Reef nutrition

Reef Hobbyist 40B

Nav

Guest
1e42d0c0692bffa45040a2a4ffc948f2.png

17fe9aad8883fa36be2a6d97dc517eee.png

Setup
  • Aqueon 40 Gallon Breeder
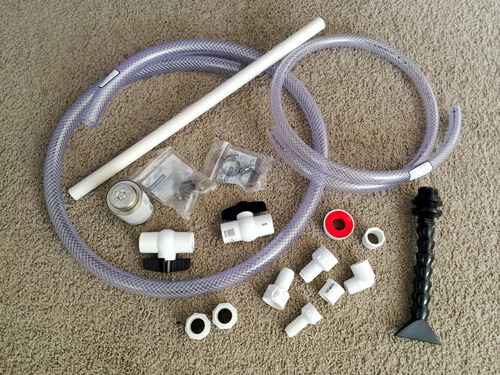
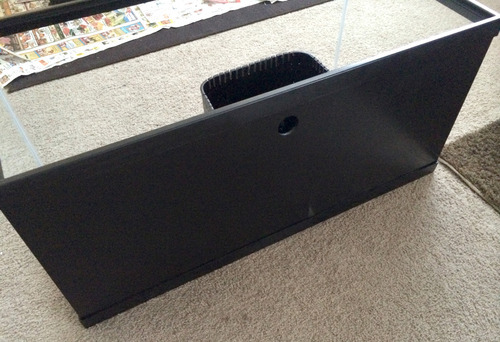
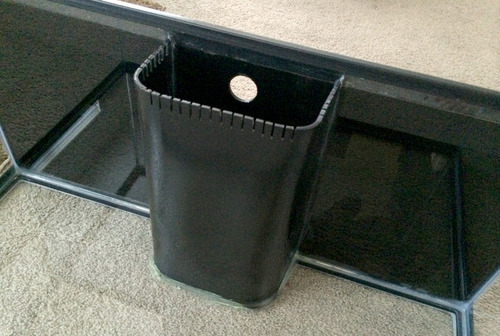
    • Herbie overflow
  • TruVu Platinum 75 Refugium Sump
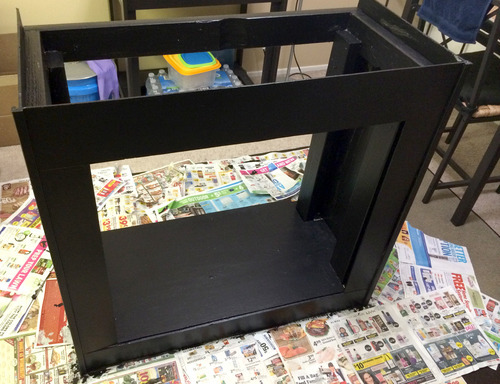
  • DIY Stand
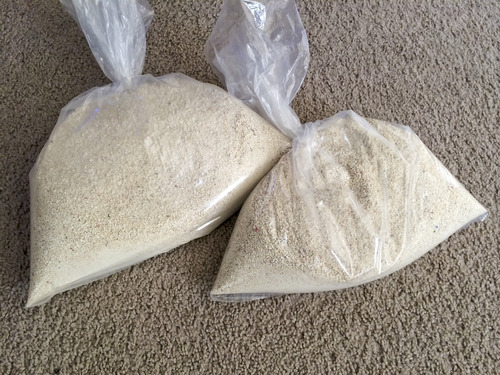
  • 42lbs Dry Marco Rock
  • 30lbs Size 3 Dry Sand
  • DIY BRS Screentop
Equipment
  • Neptune Apex Controller with lab grade pH probe
    • IO Breakout box
      • 4 switches in the sump return chamber
      • 1 switch in the ATO reservoir
  • 2 x AI Hydra 26 LED Lights
  • Powerheads
    • 2 x Jebao RW-4
  • Bubble Magnus NAC 3.5 Skimmer
  • Rio Plus 1700 Aqua Return Pump
  • BRS 4 Stage Plus 75gpd RO/DI
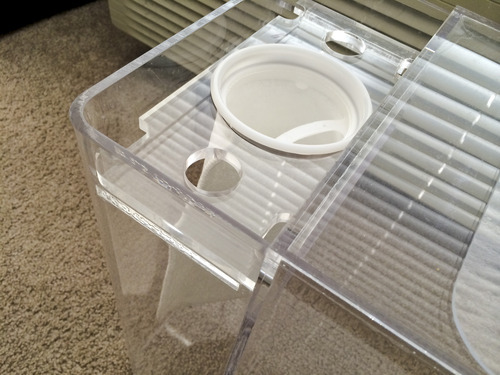
  • JBJ Auto Topoff
    • TOM Aqua Lifter Pump
    • 6gal Container
  • DIY Algae Scrubber
    • 54w Hydroponics LED (14 red + 4 blue)
    • Gravity fed
  • Phosban Reactor 150
    • 180gph Pump
    • BRS High Capacity GFO
    • BRS GAC
  • Heaters
    • Eheim Jager 150w
    • Titanium heater 50w (backup)
  • Jebao DP-8 Doser
  • Eheim Autofeeder
  • 6gal ATO Reservoir


----- Start Log (May 12, 2014) -----​

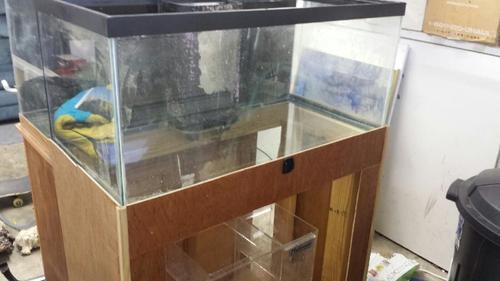
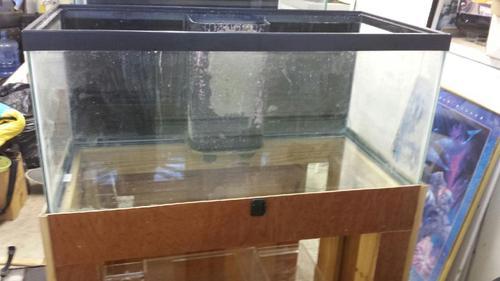
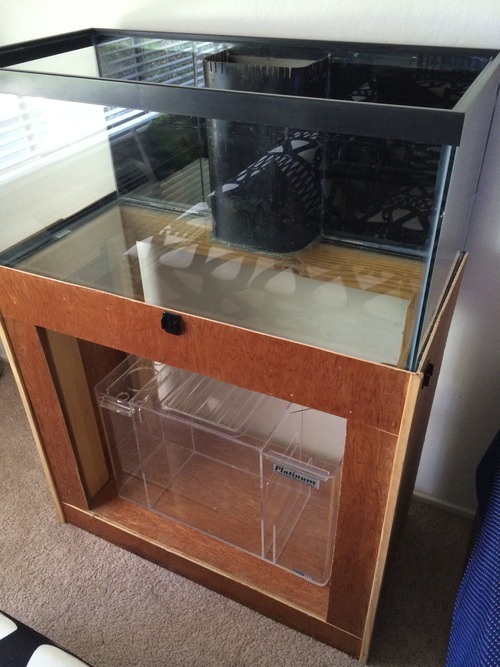
This time I decided to get a used setup. I found a hobbyist selling his year old 40B for real cheap and I decided to pick it up.

I had to drive all the way from Santa Clara to Antioch to pick it up…
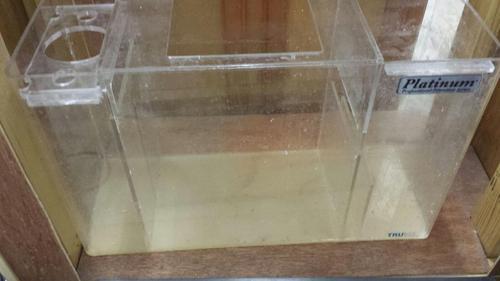
Here’s what I got:
  1. Aqueon 40B + custom overflow (drilled)
  2. DIY stand
  3. Truvu Platinum Series Refugium 75
  4. Rio Plus 1700 Aqua Pump (return)
  5. Hydor Koralia Evolution 550/600
tumblr_inline_n5h086FH8W1sc62k6.jpg


tumblr_inline_n5h08dU8iY1sc62k6.jpg


tumblr_inline_n5h08pxJGl1sc62k6.jpg
 
Last edited:
Water washed the tank & sump first… then soaked in vinegar for a few hours and scrubbed very well to bring the tank back to almost new…

Forgot the mention the guy who gave me the tank, coated the overflow box (notice the previous pics had a white peeled-off area on the overflow).

tumblr_inline_n5h0ggZoF61sc62k6.jpg
 
The background had a few see-through spots and the overflow area was also not painted which was kinda odd to me. So I used Krylon Fusion for Plastic (satin) and re-coated the entire back.

This was how it was:

tumblr_inline_n5h0p2bof71sc62k6.jpg


… and here’s after I painted it:

tumblr_inline_n5h0rgpxQS1sc62k6.jpg


Also re-coated the overflow box cos it was not very well finished.

tumblr_inline_n5h0t18nVg1sc62k6.jpg
 
Picked up a grey primer and satin black paint from Lowes. Went through two coats of primer & first coat of the black (dried 6hrs between coats).

Today will be doing the final coat. Fyi, I live in an apartment without a patio, hence the mess in my dining area :)

tumblr_inline_n5h11zRc2W1sc62k6.jpg
 
These are updates from the last 3 days… The tank came with the return bulkhead so I had to order two 1” bulkheads for the bottom of the tank (drilled) to the sump. Yea, it has 3 drills, 1 on top and two in the bottom.

Here’s what I’m planning on next:
  • Second black coat to the stand
  • Wash the tank once more (cos I painted the overflow box)
  • Get everything for the plumbing
  • Purchase dry rock & sand
 
looks fantastic. great look and setup.

can i suggest, that before you put the sump in, to paint the inside with water resistant paint? there are many brands out there, some are marine epoxy-based ($$$) which I've seen a few people use, but many simply go with the home depot glossy paint.

i didn't paint anything, but i did create a "tub" at the bottom using bath liner and stapled the sides up. I also caulked all corners. this has saved me a few times, holding ~3 gallons of water in accidents when i wasn't home.
 
can i suggest, that before you put the sump in, to paint the inside with water resistant paint?
Yea forgot to mention, I also purchased a waterproof coating for the inner walls around the sump.

i did create a "tub" at the bottom using bath liner and stapled the sides up
I'm going to look into this option, hope I get something that fits this custom stand...
 
Everything looks pretty good so far. I personally like to use vinyl for the background because it takes way less time and you can always peel it off if you change your mind about it.
 
Picked up basic plumbing from LFS & Lowes:
  • Loc-line
  • PVC pipe
  • Ball valves
  • Vinyl tubes
  • Clamps
  • Hose barbs
  • Some adapters, tape & glue
tumblr_inline_n5ji2y55x61sc62k6.jpg
 
Checked out a few varieties of dry sand at ReefRaft Norcal and fell in love with their Size 3 sand.

They actually don’t have it for sale (cos thats what they use in their display tanks) but convinced the owner and got half of an open 44lb bag. It came up to $25 for 22lbs.

tumblr_inline_n5jicepGdo1sc62k6.jpg
 
Received the 4”x12” 200 micron filter sock from Amazon today.

Waiting for two more bulk heads to be delivered and I’ll be all set to start plumbing.

tumblr_inline_n5jig4rQGW1sc62k6.jpg
 
Are you plumbing to the lower plate and bypassing the filter sock?
Until I get the first plate ready, I'm going to have the vinyl pipes go straight into the sock (few inches inside)

Pipes are very very sturdy and I doubt if it's going to maneuver for now.
 
Checked out a few varieties of dry sand at ReefRaft Norcal and fell in love

Heyyyy you! I was just there around 4pm! Making good progress! It's a bummer about that plate, but you should order a couple more of the bulkhead fittings, and get that little plate made and you'll be in business.

When are you planning to get the tank wet?


:beer:
 
  • Like
Reactions: Nav
IMO I think it would be a better idea to take care of that upper plate before getting that tank wet. Especially since you already have a tank going and are not in a real rush. Better to have confidence in your system before livestock is added. Just my 2 cents..,
 
Back
Top