
This is the start of a new journey for me, redoing my tank with a variety of changes. I know I'm breaking BAR tradition by starting a tank thread when there IS water in the tank, so please forgive me for this. 
As some of you may know, my previous 180 tank had been in a steady state of decline for around 9 months until I finally pulled the plug on it. My thought was to clear everything out and start from a complete clean slate. By doing so besides ridding whatever problem I had before I had some improvements and new ideas in mind for the 2nd round of this tank so to speak. I viewed this as a fresh start, a chance to get re-enthused about my tank again, try some different ideas and make some improvements. So here's the start of my new tank thread,
This is the list so far and where I'm at:
[*]Less cluttered look
- Generally this meant less rock than I had before, more open space and a more open sandbed. I liked pillars, overhangs, caves & tunnels so that's what I had in mind with my Aquascaping plans. I did all the preliminary pillars and rockwork in my garage, piecing different pieces together to make the pillars and structures I wanted. Playing architect/ artist I enjoy so I had no problem taking a few weeks making a lot of changes & revisions until it looked like I wanted. With using all base rock this was easy and there was no time crunch. I got from Marco rocks the E-Marco-400 cement and that stuff really rocks! (sorry for bad pun) I'm a strong believer in having an aquascape you really like because it's what you'll always be looking at and because I really hate the rock wall look I put time into making it what I like with pillars, caves, tunnels & overhangs. it's not 100% done but pretty close so far.
[*]Different rock types
- I made pillars and the rockwork out of various types of rock. I really like the fisheads dry rock I found @ Neptunes. It's pricey but the color, shapes and unique crevices throughout the rock I found to be worth it. I also used some Macro rocks and props to Jim (Gimmito) for also giving me a good amount of nice pieces- including a whale bone vertebrae- thanks Jim!!
[*]More depth front to back
- This is perhaps the biggest change since I thought the way to do this was to convert the back wall to a rock wall with the idea that if the back wall is made a main part of the display, you are getting the maximum front to back visual distance. I saw a few threads on Reefcentral about foam rockwalls and got inspired to do the same for the back wall. I made the right and middle sections comprised of a sloping back wall of fake rock. I had a large rock already planned for the left side of the tank. With some trial & error, and patience I got the result I was looking for- a varied rock wall that looks real, has a lot of variety and plenty of places for coral frags & coral growth. To top it off having a whale vertebrae in it added to the coolness. I used eggcrate, black pond foam, various rocks to put on the wall, 2 part epoxy and 2 different kinds of sand to make it look like a rock wall. check next post for the 'rock lab' pics.
Improved plumbing
- I changed the plumbing in the sump & refugium which before had a pump to get water from the sump to the refugium. Not very eficient, plus it was just 1 more pump to maintain and another cord adding to the other cords of 'spaghetti' I changed the plumbing so 1 of the drains went righ tinto the refugium. Problem solved and it's now plumbed like most other tanks.
Better Refugium
- The previous refugium was bowing and had limited access from the top. I had Gen from Kritter tanks make me a new one to the perfect dimensions. It came out real nice- braced & with lids. Gen does excellent work and is great to work with so I'll give a shout out to Kritter tanks!
[*]Sand that won't blow around
- I've got Neptune's coarse sand (#3). I like it so far & it's easy to add since it doesn't cause any clouding of the water. The previous sugar sized aragonite sand blew around too much for my liking.
[*]Less noise from powerheads
- I'm going to replace my old 2 MP40s with 2 Tunzes. I'll take the larger size (Tunze) in the tank for less noise outside the tank- the MP40s were too noisy for me. I try to keep my system as quiet as possible and those were the loudest sounds I had.
Less power consumption
- I'm going to be replacing 3 250W metal halides with yet to be determined LED fixture(s). The PG&E bill was high before; $80-90/ month and when I use all LEDs it'll lower the bill as well as reduce heat, meaning I'll also get rid of my chiller which I rarely used anyway. Win-win all the way around.
Better 2-part reactor
- I had used the BRS dual chamber reactor, which works, but just ok at best since you can't keep the GFO & carbon tumbling very well. I DIY'ed 2 Avast reactors, hooked them up to an Eheim and am looking forward to using them- both have ball valves so it should be easy to get each reactor the proper flow. I did have a couple troubles with leaks & assembly errors, but those are fixed or in the process of being fixed.
With those things incorporated into this, it's off to the races. I had freshwater in the tank for ~1 week to rinse or let leech any rock wall epoxy/foam residue, and as of now saltwater has been inside the tank for about 3 weeks. I used no live rock and am going with Robert's recommendation (@ Neptune) of using all base rock and adding daily bacteria (Brightwell's Microbacter7) for the cycling. I've also added hermits, snails & food to get the nutrients going. I really like this approach because it minimizes pests and it allows me to use all base rocks which makes aquascaping that much easlier. With live rocks I wouldn't have got the same aquascape.
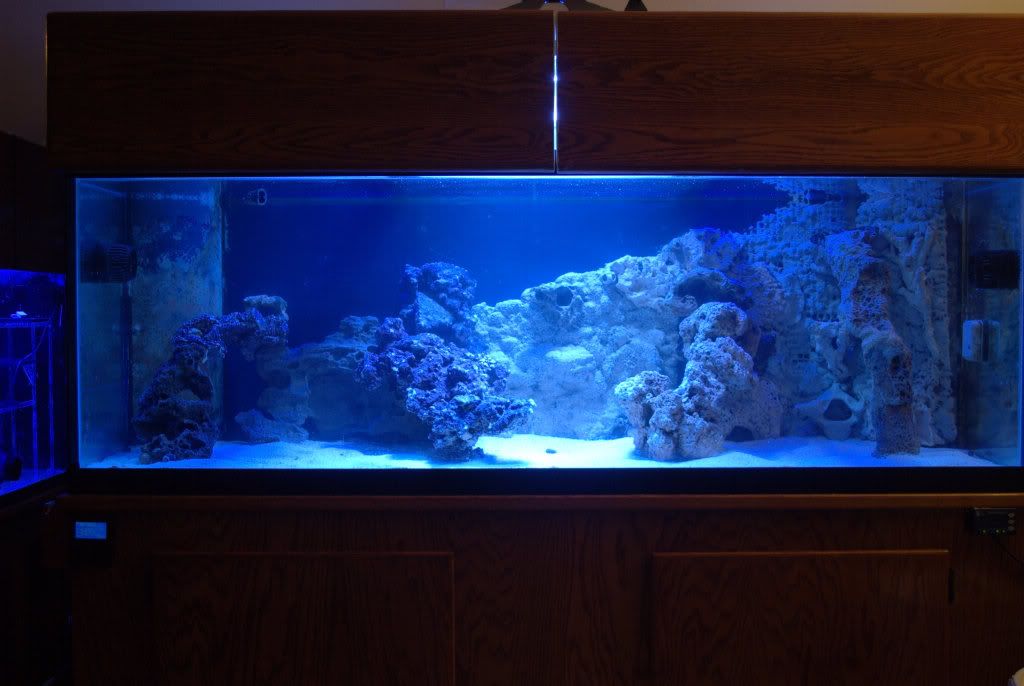
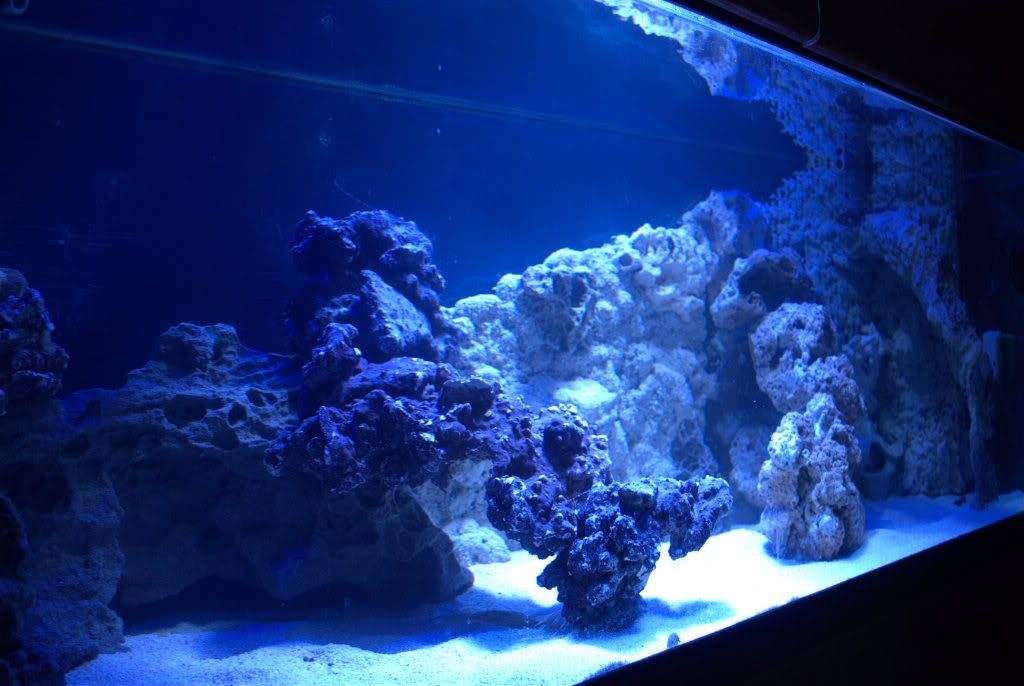
Without further ado, here are the pictures so far. Just 1 MH in the middle + a blue reefbrite strip.
Full tank shot:
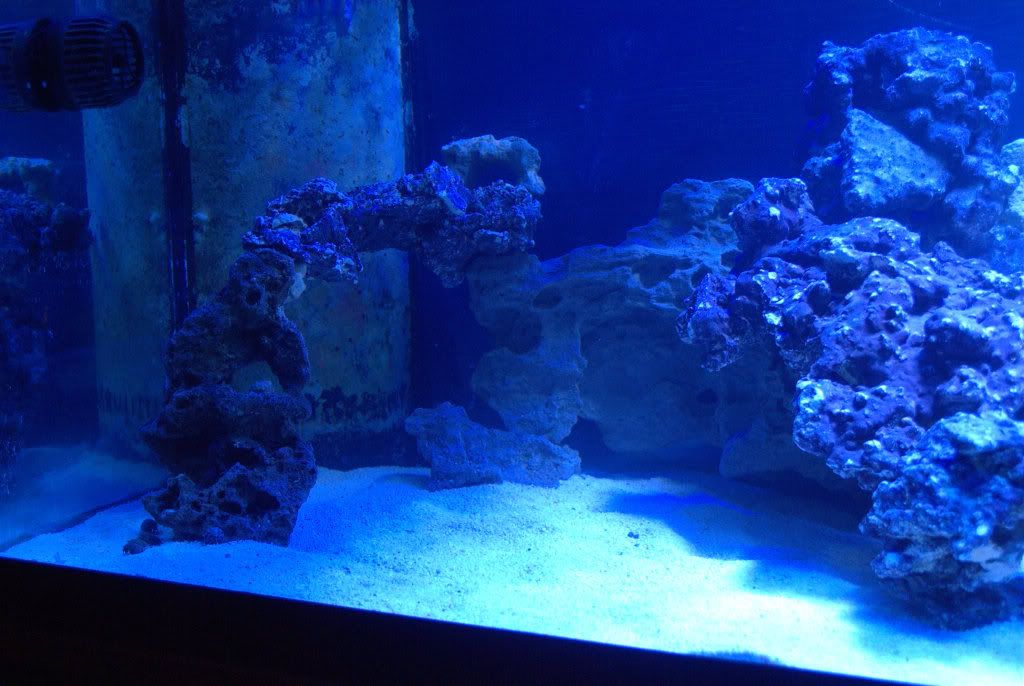
Left:
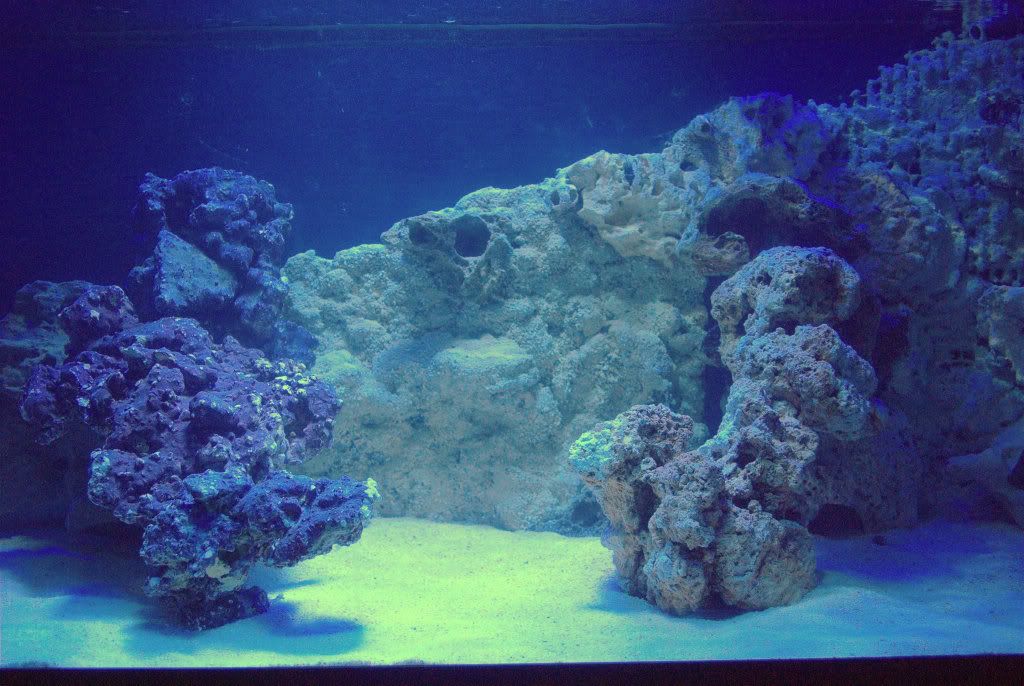
Middle:
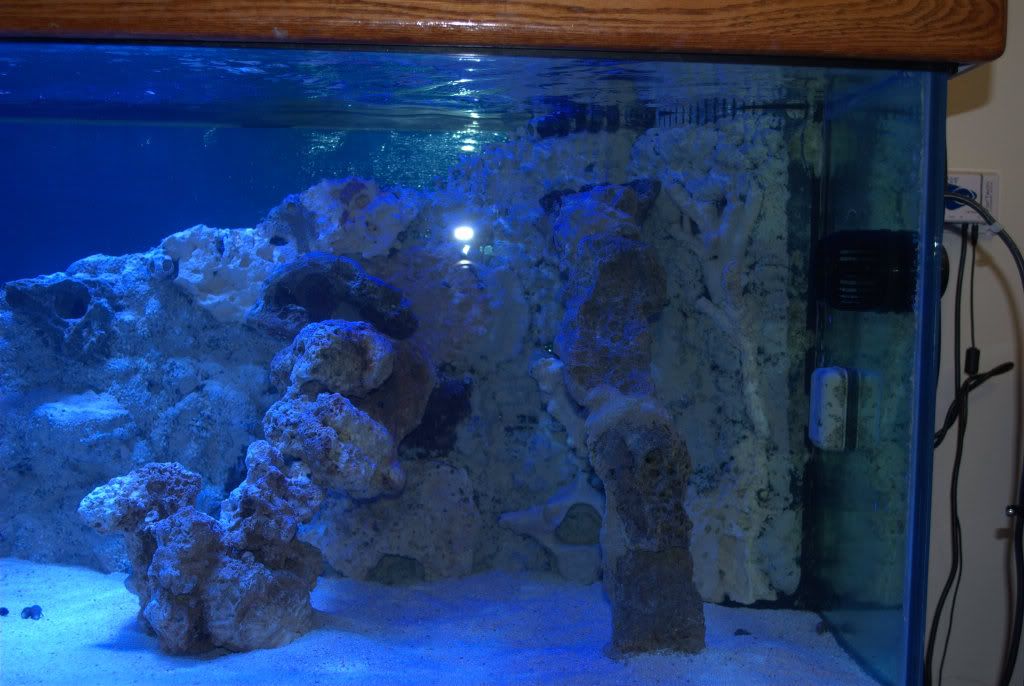
Right Side:
Distorted angle shot:
As some of you may know, my previous 180 tank had been in a steady state of decline for around 9 months until I finally pulled the plug on it. My thought was to clear everything out and start from a complete clean slate. By doing so besides ridding whatever problem I had before I had some improvements and new ideas in mind for the 2nd round of this tank so to speak. I viewed this as a fresh start, a chance to get re-enthused about my tank again, try some different ideas and make some improvements. So here's the start of my new tank thread,
This is the list so far and where I'm at:
[*]Less cluttered look
- Generally this meant less rock than I had before, more open space and a more open sandbed. I liked pillars, overhangs, caves & tunnels so that's what I had in mind with my Aquascaping plans. I did all the preliminary pillars and rockwork in my garage, piecing different pieces together to make the pillars and structures I wanted. Playing architect/ artist I enjoy so I had no problem taking a few weeks making a lot of changes & revisions until it looked like I wanted. With using all base rock this was easy and there was no time crunch. I got from Marco rocks the E-Marco-400 cement and that stuff really rocks! (sorry for bad pun) I'm a strong believer in having an aquascape you really like because it's what you'll always be looking at and because I really hate the rock wall look I put time into making it what I like with pillars, caves, tunnels & overhangs. it's not 100% done but pretty close so far.
[*]Different rock types
- I made pillars and the rockwork out of various types of rock. I really like the fisheads dry rock I found @ Neptunes. It's pricey but the color, shapes and unique crevices throughout the rock I found to be worth it. I also used some Macro rocks and props to Jim (Gimmito) for also giving me a good amount of nice pieces- including a whale bone vertebrae- thanks Jim!!
[*]More depth front to back
- This is perhaps the biggest change since I thought the way to do this was to convert the back wall to a rock wall with the idea that if the back wall is made a main part of the display, you are getting the maximum front to back visual distance. I saw a few threads on Reefcentral about foam rockwalls and got inspired to do the same for the back wall. I made the right and middle sections comprised of a sloping back wall of fake rock. I had a large rock already planned for the left side of the tank. With some trial & error, and patience I got the result I was looking for- a varied rock wall that looks real, has a lot of variety and plenty of places for coral frags & coral growth. To top it off having a whale vertebrae in it added to the coolness. I used eggcrate, black pond foam, various rocks to put on the wall, 2 part epoxy and 2 different kinds of sand to make it look like a rock wall. check next post for the 'rock lab' pics.
Improved plumbing
- I changed the plumbing in the sump & refugium which before had a pump to get water from the sump to the refugium. Not very eficient, plus it was just 1 more pump to maintain and another cord adding to the other cords of 'spaghetti' I changed the plumbing so 1 of the drains went righ tinto the refugium. Problem solved and it's now plumbed like most other tanks.
Better Refugium
- The previous refugium was bowing and had limited access from the top. I had Gen from Kritter tanks make me a new one to the perfect dimensions. It came out real nice- braced & with lids. Gen does excellent work and is great to work with so I'll give a shout out to Kritter tanks!
[*]Sand that won't blow around
- I've got Neptune's coarse sand (#3). I like it so far & it's easy to add since it doesn't cause any clouding of the water. The previous sugar sized aragonite sand blew around too much for my liking.
[*]Less noise from powerheads
- I'm going to replace my old 2 MP40s with 2 Tunzes. I'll take the larger size (Tunze) in the tank for less noise outside the tank- the MP40s were too noisy for me. I try to keep my system as quiet as possible and those were the loudest sounds I had.
Less power consumption
- I'm going to be replacing 3 250W metal halides with yet to be determined LED fixture(s). The PG&E bill was high before; $80-90/ month and when I use all LEDs it'll lower the bill as well as reduce heat, meaning I'll also get rid of my chiller which I rarely used anyway. Win-win all the way around.
Better 2-part reactor
- I had used the BRS dual chamber reactor, which works, but just ok at best since you can't keep the GFO & carbon tumbling very well. I DIY'ed 2 Avast reactors, hooked them up to an Eheim and am looking forward to using them- both have ball valves so it should be easy to get each reactor the proper flow. I did have a couple troubles with leaks & assembly errors, but those are fixed or in the process of being fixed.
With those things incorporated into this, it's off to the races. I had freshwater in the tank for ~1 week to rinse or let leech any rock wall epoxy/foam residue, and as of now saltwater has been inside the tank for about 3 weeks. I used no live rock and am going with Robert's recommendation (@ Neptune) of using all base rock and adding daily bacteria (Brightwell's Microbacter7) for the cycling. I've also added hermits, snails & food to get the nutrients going. I really like this approach because it minimizes pests and it allows me to use all base rocks which makes aquascaping that much easlier. With live rocks I wouldn't have got the same aquascape.
Without further ado, here are the pictures so far. Just 1 MH in the middle + a blue reefbrite strip.
Full tank shot:

Left:

Middle:

Right Side:

Distorted angle shot:


