magnetar68
Guest
[I was originally going to post this in the same thread as my tank, but I would like to keep the feedback together, so I am posting a new thread instead.]
I need an SPS capable light for my 48"x24"x24 tank. I am thinking DIY, although it seems like new off-the-shelf units are coming out every month and they are getting closer and closer to what I want to build myself.
While I know there is a lot of ideas floating around in terms of different color LEDs and even multi-chip LEDs, I am thinking about a typical CREE XP-E/XP-G Royal Blue/Cool White fixture. Here are my current specs:
100 LEDs
3:2 Ratio of RB:CW
60 CREE XP-E 500 Royal Blue
40 CREE XP-G Q5 Cool White
60 Degree Optics
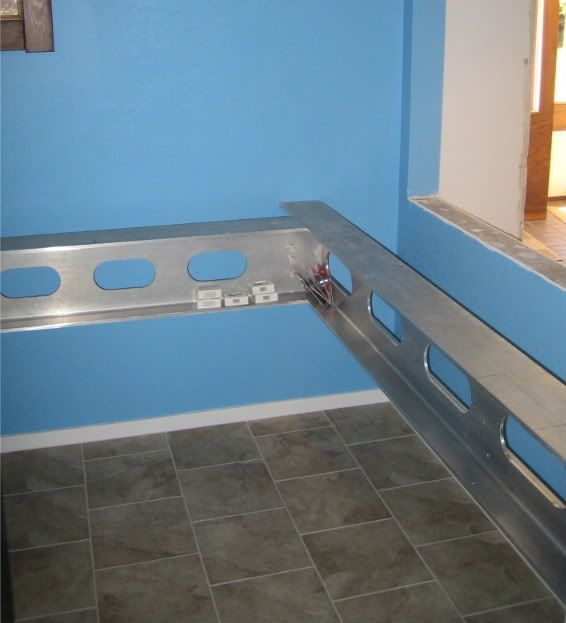
10" wide HeatSinkUSA HeatSink
Wired in Series with Thomson Research Product Drivers
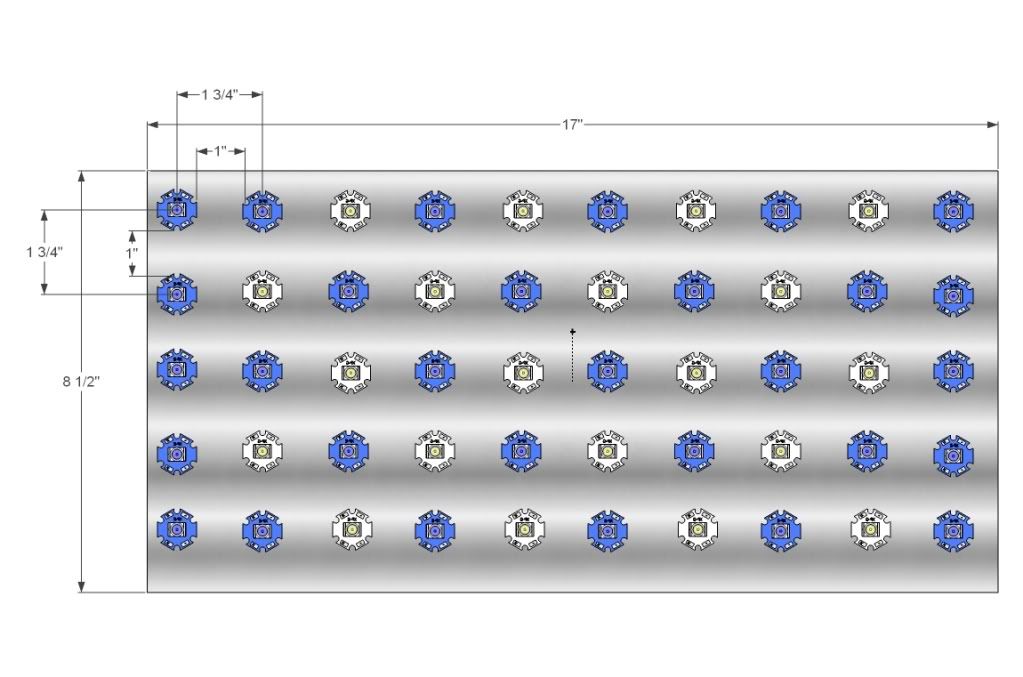
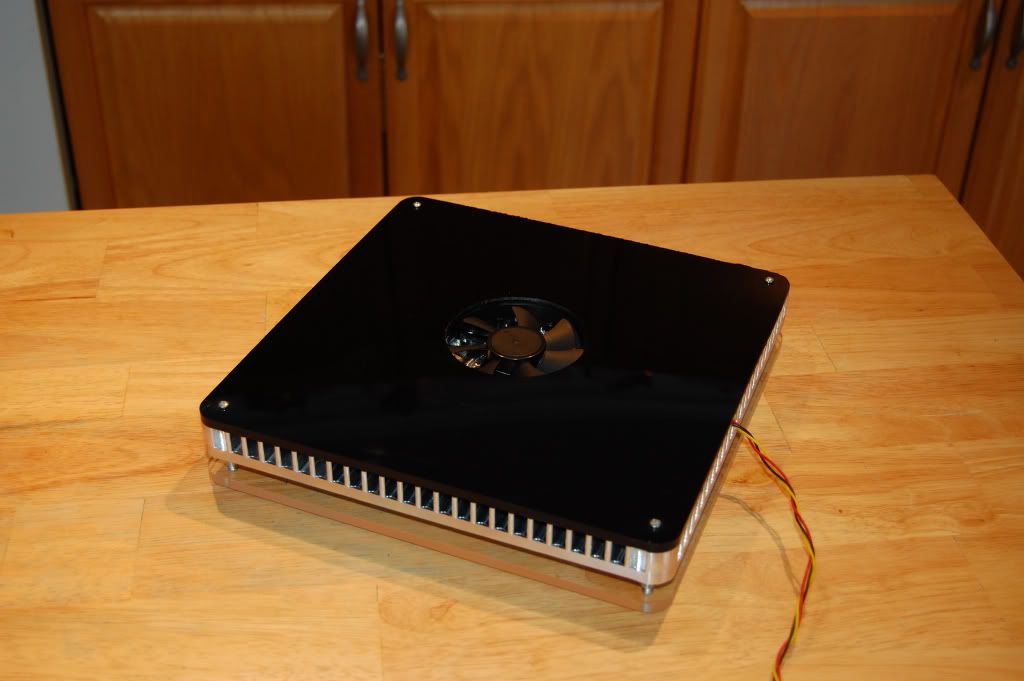
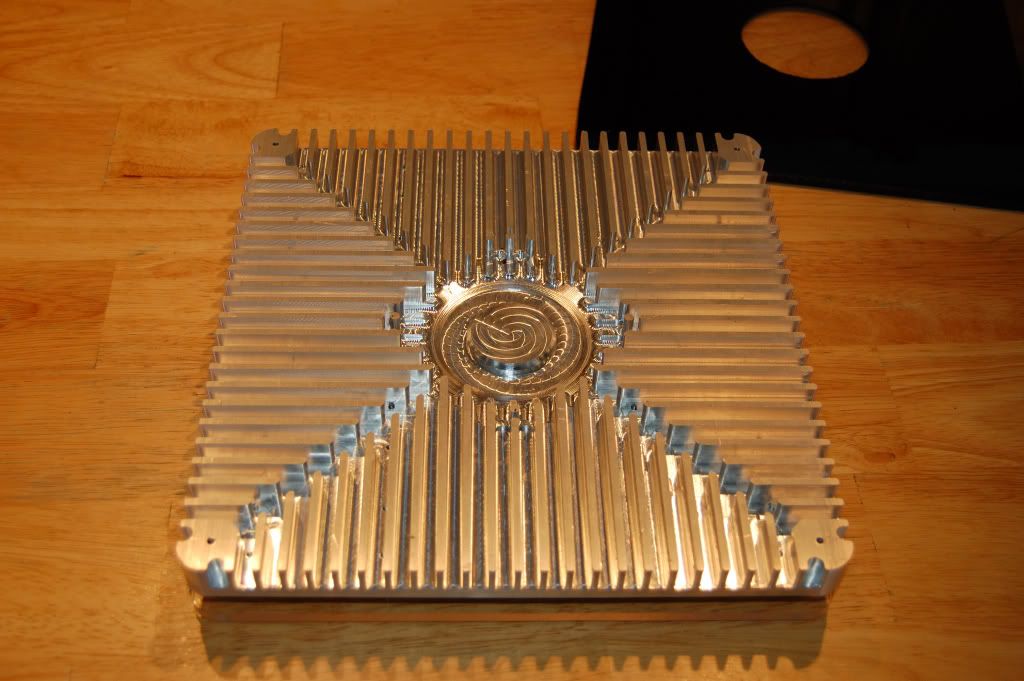
Originally, I was thinking one long heatsink laid out something like this (ignore the LED layout, this is not what I was planning):
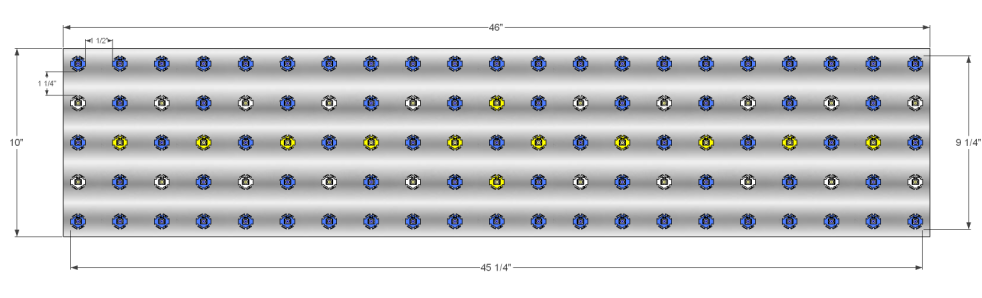
Then I got some feedback on nano-reef.com and people said that two smaller units might give me more flexibility, so I designed this:
In this layout, I can use one TRC-120S105DT (1050mA) and TRC-120S140DT (1400mA) to drive the 30 RB and 20 CW LEDs, respectively. With these drivers, my plan would be to always have these dimmed somewhat. Technically, the 1050mA is 50mA too high for the XP-E 500 RB. Here is roughly how it works out:
XP-E 500 RBs at 1000mA run at 3.479V, so 30x = 104.37V. The TRC-120S105DT has a voltage range of 68-114V, so I should be OK there.
XP-G Q5 CW at 1400mA run at 3.528V, so 20x = 70.56V. The TRC-120S140DT has a voltage range of 52-86V, so I should be OK there too.
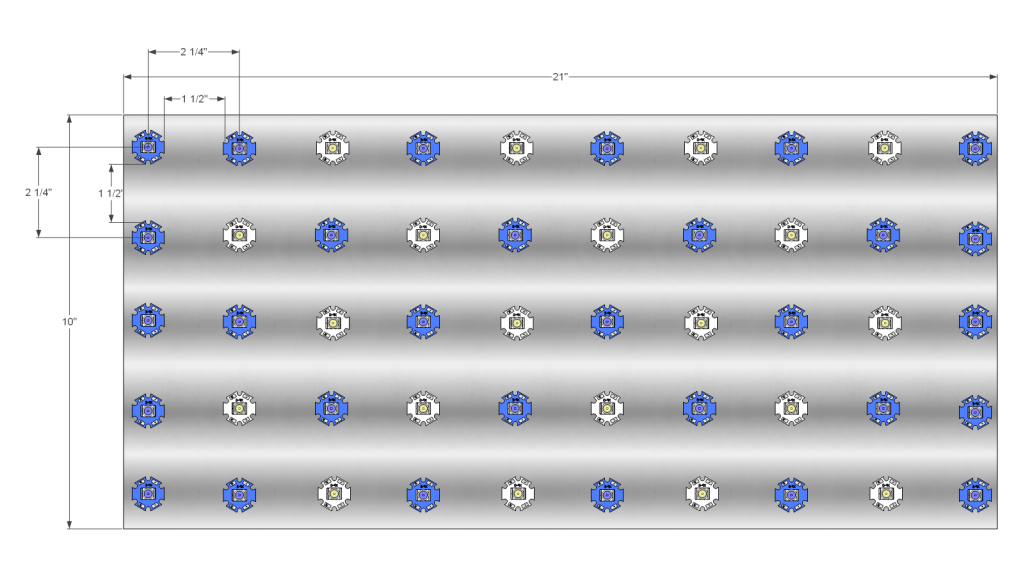
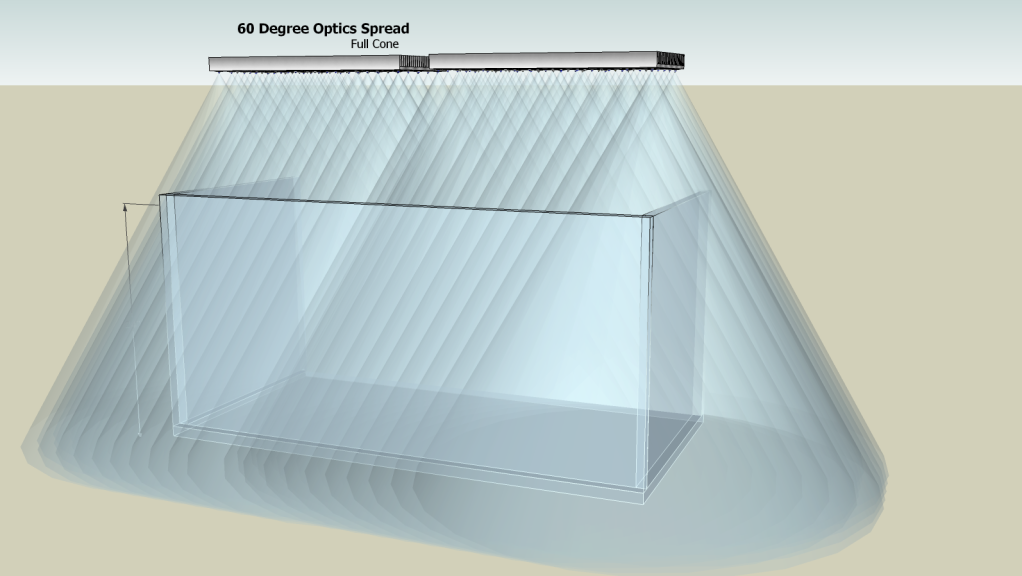
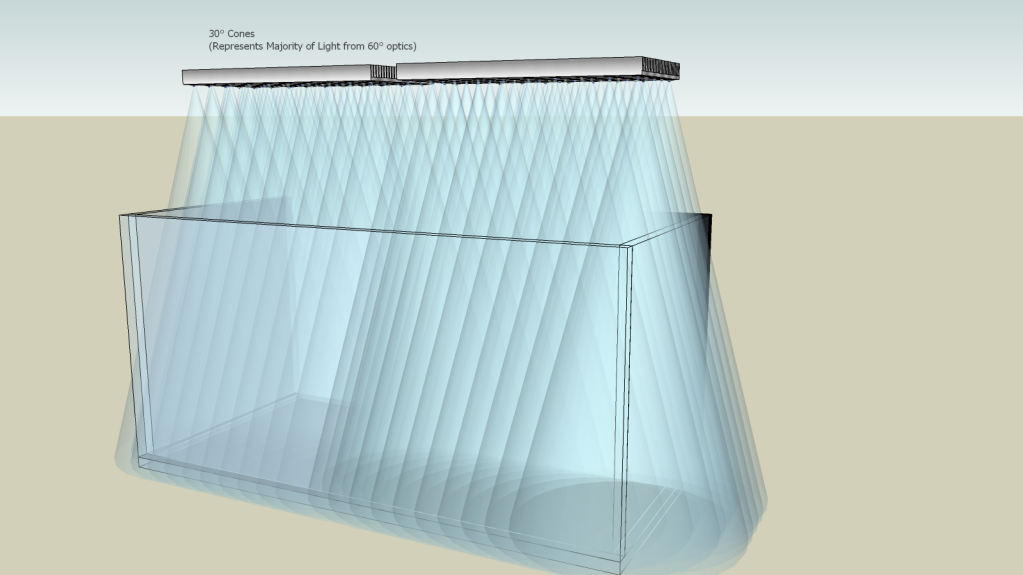
With the 60 degree optics, I looked at getting these spreads with the light 12" above the tank. These diagrams show the 60 degree overall spread and 30 degree spread that contains most of the light from the LEDs:
Most recently, however, I saw that nanocustoms is going to offer the following heat sink Kit and a DUO700 driver box, so I could build four of these and run them at 700mA instead of 1000mA and 1400mA.
If I wanted to use the Duo700 driver box, it would limit the build to 700mA -- not sure I want to do that -- but the math works out like this:
This gets me back to my original 100 LEDs but running at 700mA. Of course, I don't need the Duo700 box, so I can drive them in series with different drivers and drive them higher.
I need an SPS capable light for my 48"x24"x24 tank. I am thinking DIY, although it seems like new off-the-shelf units are coming out every month and they are getting closer and closer to what I want to build myself.
While I know there is a lot of ideas floating around in terms of different color LEDs and even multi-chip LEDs, I am thinking about a typical CREE XP-E/XP-G Royal Blue/Cool White fixture. Here are my current specs:
100 LEDs
3:2 Ratio of RB:CW
60 CREE XP-E 500 Royal Blue
40 CREE XP-G Q5 Cool White
60 Degree Optics
10" wide HeatSinkUSA HeatSink
Wired in Series with Thomson Research Product Drivers
Originally, I was thinking one long heatsink laid out something like this (ignore the LED layout, this is not what I was planning):
Then I got some feedback on nano-reef.com and people said that two smaller units might give me more flexibility, so I designed this:
In this layout, I can use one TRC-120S105DT (1050mA) and TRC-120S140DT (1400mA) to drive the 30 RB and 20 CW LEDs, respectively. With these drivers, my plan would be to always have these dimmed somewhat. Technically, the 1050mA is 50mA too high for the XP-E 500 RB. Here is roughly how it works out:
XP-E 500 RBs at 1000mA run at 3.479V, so 30x = 104.37V. The TRC-120S105DT has a voltage range of 68-114V, so I should be OK there.
XP-G Q5 CW at 1400mA run at 3.528V, so 20x = 70.56V. The TRC-120S140DT has a voltage range of 52-86V, so I should be OK there too.
With the 60 degree optics, I looked at getting these spreads with the light 12" above the tank. These diagrams show the 60 degree overall spread and 30 degree spread that contains most of the light from the LEDs:
Most recently, however, I saw that nanocustoms is going to offer the following heat sink Kit and a DUO700 driver box, so I could build four of these and run them at 700mA instead of 1000mA and 1400mA.
If I wanted to use the Duo700 driver box, it would limit the build to 700mA -- not sure I want to do that -- but the math works out like this:
PHP:
	XP-E RB 500
	LEDs     Amp     V Each     Total Volts     Total Watts
	15        0.7       3.4          51.0            35.7

	XP-G CW R5
	LEDs    Amp    V Each    Total Volts    Total Watts
	10       0.7   3.242     32.42        22.694
This gets me back to my original 100 LEDs but running at 700mA. Of course, I don't need the Duo700 box, so I can drive them in series with different drivers and drive them higher.
")