High Tide Aquatics

Jeff's 120

Well if you can believe it that 18" eel got out of his bucket again last night. Was probably on the floor for 5 minutes before I found him. He is over twice as big around as the holes in this eggcrate but he was able to squeze out just the same. Took him into Max this morning. Max was great; wanted to give me a $15 credit for him. I asked him to hold off though due to the fact that the guy spent 5 minutes out of the tank last night. I'll go back in about a week and if he's doing well I'll take the credit on a frag of something. Thanks Max! Here's a pic of what he got through last night.
3140301620_c79d7a8bd2_b.jpg
 
Today ended up being "all stand"... Still did not get finished with it but I'm happy with what I've got done and the quality of the build. What was once a steel stand I had made a couple years back and a oak skirt that went around it is now a solid single structure. I re-did the footing of the steel stand and turned it into a solid 6" thick piece of Treated wood. This gets the tank a little higher off the ground where I like to see them. I then secured the skirt to the steel stand and am now lining the entire interior with that water/mildew proof 1/4" wall siding stuff and putting a back on it. Also installed the flooring for the tank itself.

I probably still have 2-3 hours of work on the interior of the stand tomorrow before I am done with it but I've made it pretty far today. After finishing the stand tomorrow I will work on my refugium through the day while putting a couple of nice gloss coats on the stand to give it a nice shiny look.

For the refugium I have scraped the 55g and am instead going with a 40 Gallon breeder. With the 55 I could no longer get it out of the stand the way I used to do it. With a 40g breeder I can take it in and out through the removable 24" x 48" back panel I will be puting on this stand. The removable panel will have a vent and fan system as well as have the holes that will allow plumbing to go to the chiller, ATO and 40G breeder Frag tank.

3143812248_2f846945ff_b.jpg

3143812690_7544fbcec3_b.jpg

3143813822_d1e6648464_b.jpg

3142984369_d6659dd2a4_b.jpg
 
I finished the interior of the stand today. It's a 100% waterproof and mildew resistent now. The removable back piece is also done but still drying...

3145326325_5cc384ae62_b.jpg

3145326895_578708fc14_b.jpg

3145329939_85045658d4_b.jpg
 
Now the refugium... some pics of how the progress went...

Started with this
3145327545_ee00264050_b.jpg


After taking it out for a water test and then cleaning up I then had this
3146161210_6934331038_b.jpg


Got my supplies together
3146161866_75658f9907_b.jpg


Here we go...
3146163060_43a64ae5b9_b.jpg

3146163740_26dd7046f7_b.jpg

3146164424_890d1970e3_b.jpg

3146165080_b6bd285c60_b.jpg
 
So the refugium is done... I can put water in it at 3pm on Tuesday. Tomorrow I will go back in and clean up some of the silicon with a razorblade and give it a thourough cleaning. The right hand side is a 20G Refugium. You can see the drain area where a filtersock can be placed (right/center back). I will do a t off the incoming drain that will flow into the refugium at a slow rate (via ball valve). Both the drain area and refugium overflow will flow into the front left chamber which is a 12" by 18" chamber for my ADM G3 Protein Skimmer. The back left corner is a bubletrap just preceding the return chamber that will house my Mag 18 return pump. The wave like back shield on the back and right side is both to give it a cool look IMO 8) as well as to help shield splash, creep etc where I believe it is most likely to occur in this tank.

3145340347_e106c40d3f_b.jpg

3145340917_51646ab7fa_b.jpg

3145341463_f97eb091e0_b.jpg
 
After a few tweaks in leveling the tank I'm going to start on the plumbing this evening. Expect to have it all plumbed out by EOD tomorrow. Also my holding tanks will each need a water change tomorrow. Tuesday it will be aquascaping day and filling the system up with SW! I'm actually really looking forward to that part.
 
I started on the plumbing this evening... Here's my Dursa. Using a "Little Fishies" flow valve in the top of the cap to control air into the dursa. Dursa is a 1 1/4" with a reducer to 1" at the base just before the bulkhead.

3146222845_d9a73b6b3d_b.jpg

3146223089_0efcd6f3d5_b.jpg

3146223685_03d670c504_b.jpg
 
I'm missing a couple of things to finish up my plumbing but I was able to get pretty far this evening without a trip to HD. Will be heading to HD first thing in the morning to finish up the plumbing. After doing water changes on my 29g nano, 20g frag tank and 40g holding tank I'll have to look at what time i've got left. If i'm feeling ambitious I may go ahead and start drilling my Live rock tomorrow and take an initial stab at aquascaping.

3146224473_522055a918_b.jpg

3146224699_179ca0da70_b.jpg

3147056486_8d918ab120_b.jpg
 
Wow, that's amazerific. Can you tell me what the two ball valves on the left are for? Also, is there any specific reason you decided to use flexible tubing on the bottom portion of the drain pipe? Lastly, what are those three devices on the left?

Sorry about all the questions, just looks like a very interesting setup.
 
Your plumbing looks great, very clean. One thing though, you may want to switch out the ball valve on the overflow return to a gate valve, those ball valves can be a royal PITA when it comes to fine tuning, otherwise it looks real good!
 
I have 1 question, how come you put the ball vavle on the drain after the T leeding to the fuge? I would have thought it would come 1st to allow you to stop all flow to the sump/fuge
 
[quote author=itsacrispy link=topic=4762.msg71848#msg71848 date=1230565735]
Wow, that's amazerific. Can you tell me what the two ball valves on the left are for? Also, is there any specific reason you decided to use flexible tubing on the bottom portion of the drain pipe? Lastly, what are those three devices on the left?

Sorry about all the questions, just looks like a very interesting setup.
[/quote]

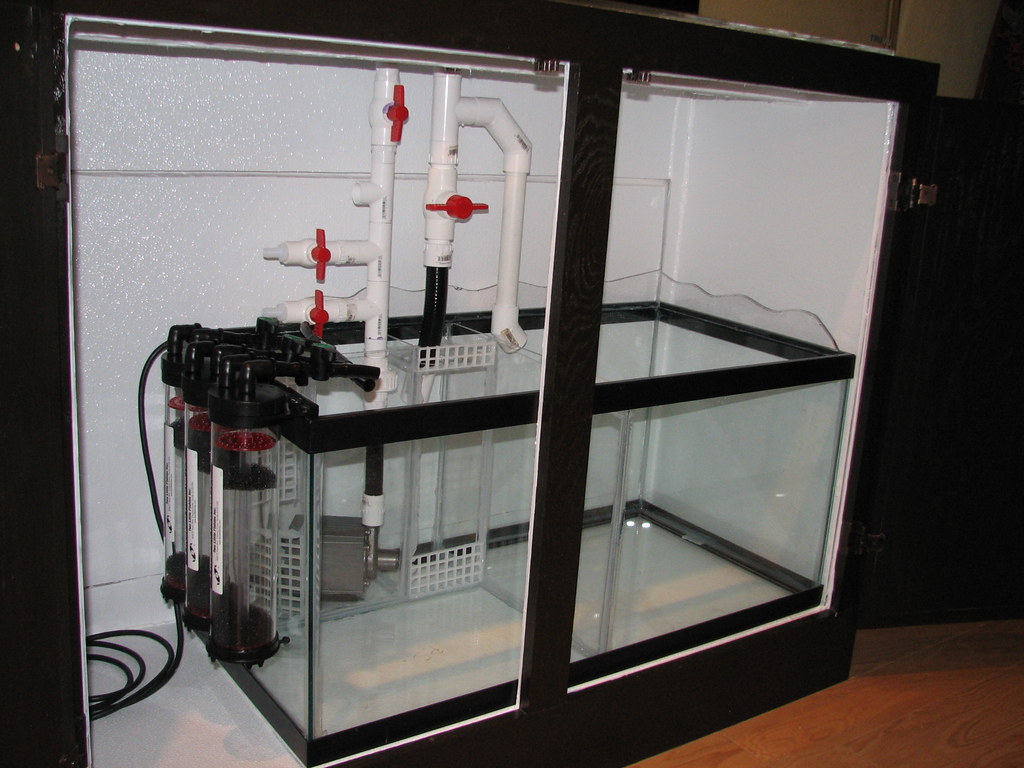
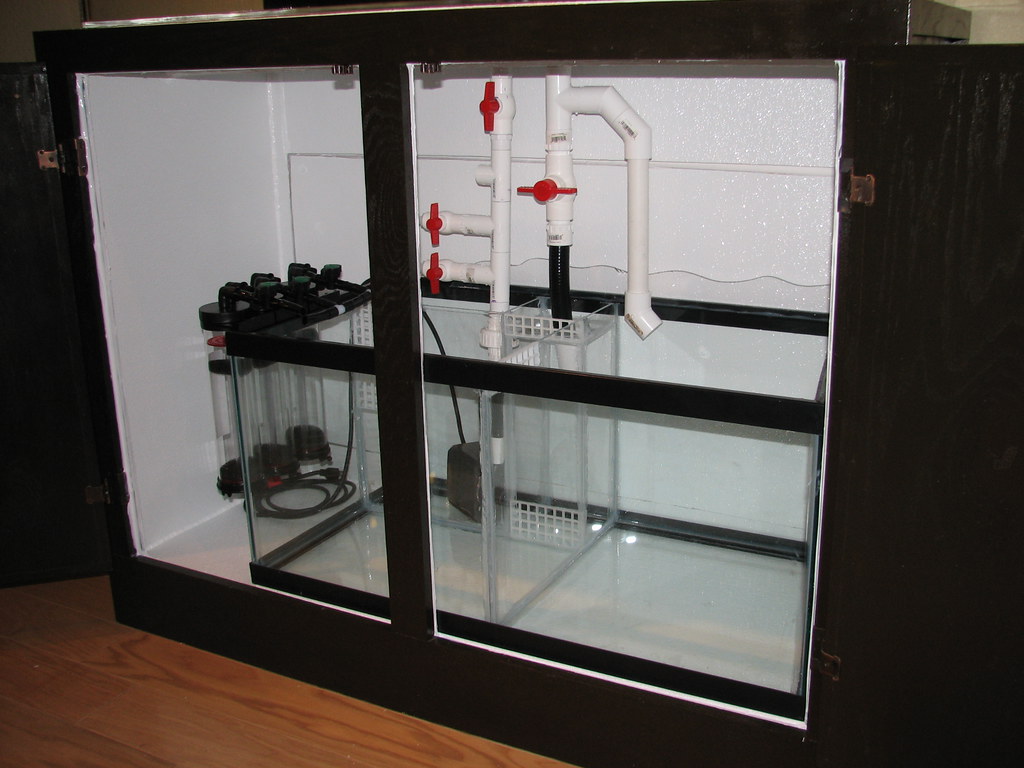
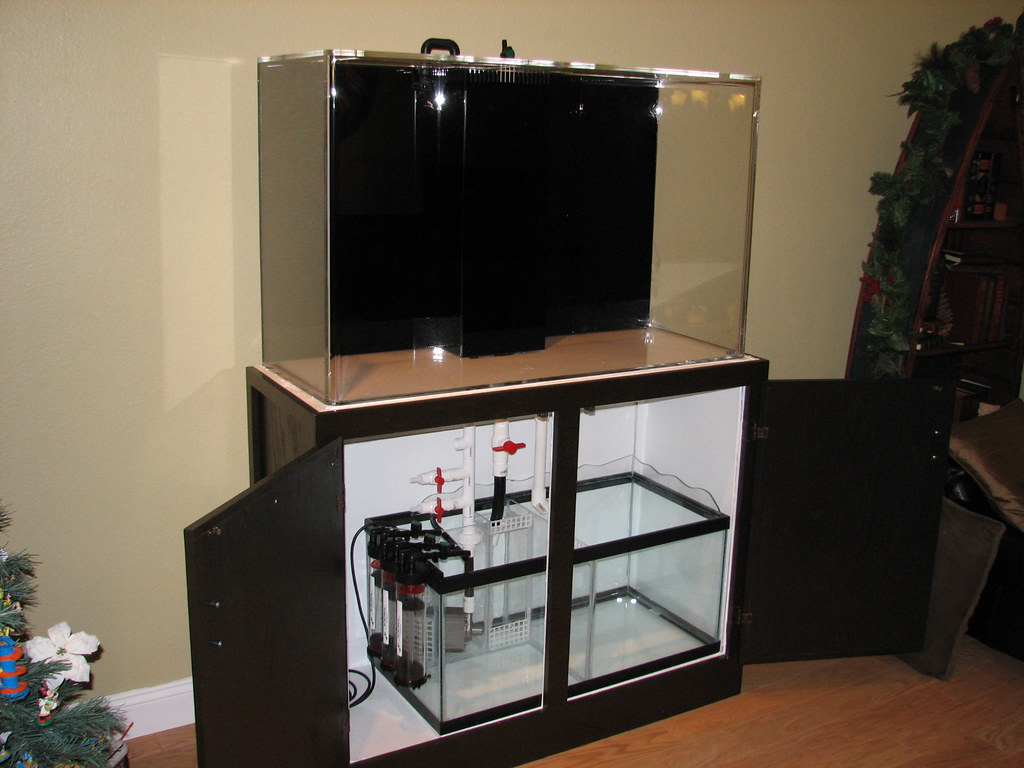
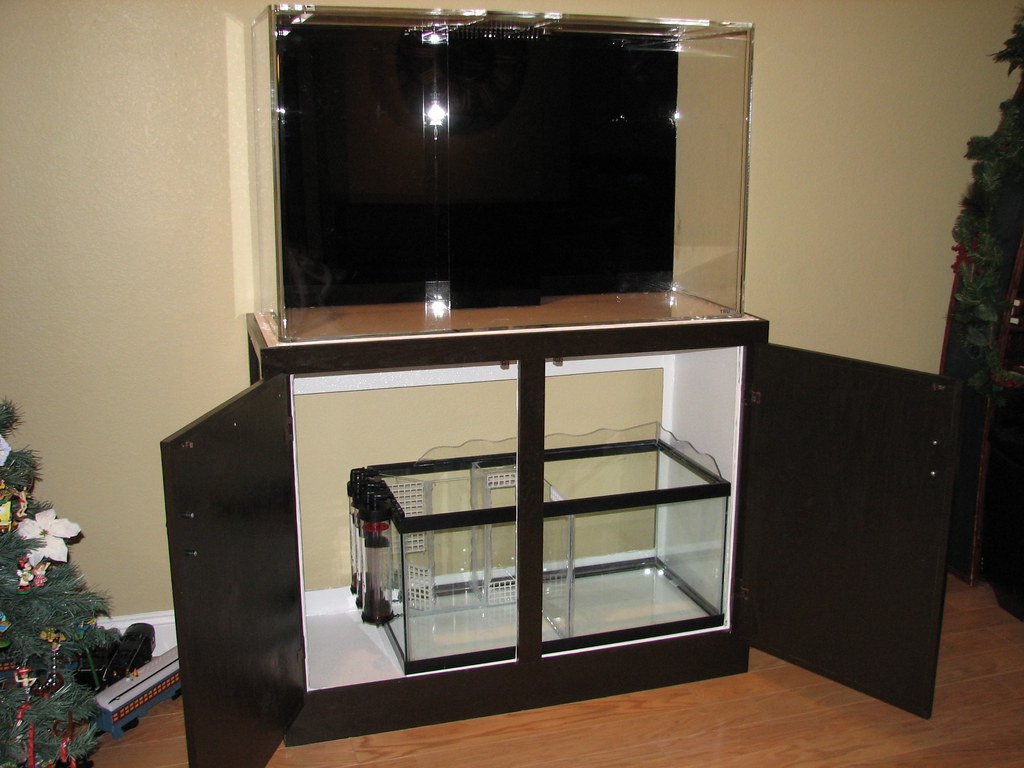
The two ball valves on the left are 1/2" ball valves. One goes to the three media reactors and one is just a miscellaneous one... water changes, maintenance and potentially to feed my chiller if the GPH are strong enough. I want a slow circulation of the system so with a MAG18 pump I believe that it will work.

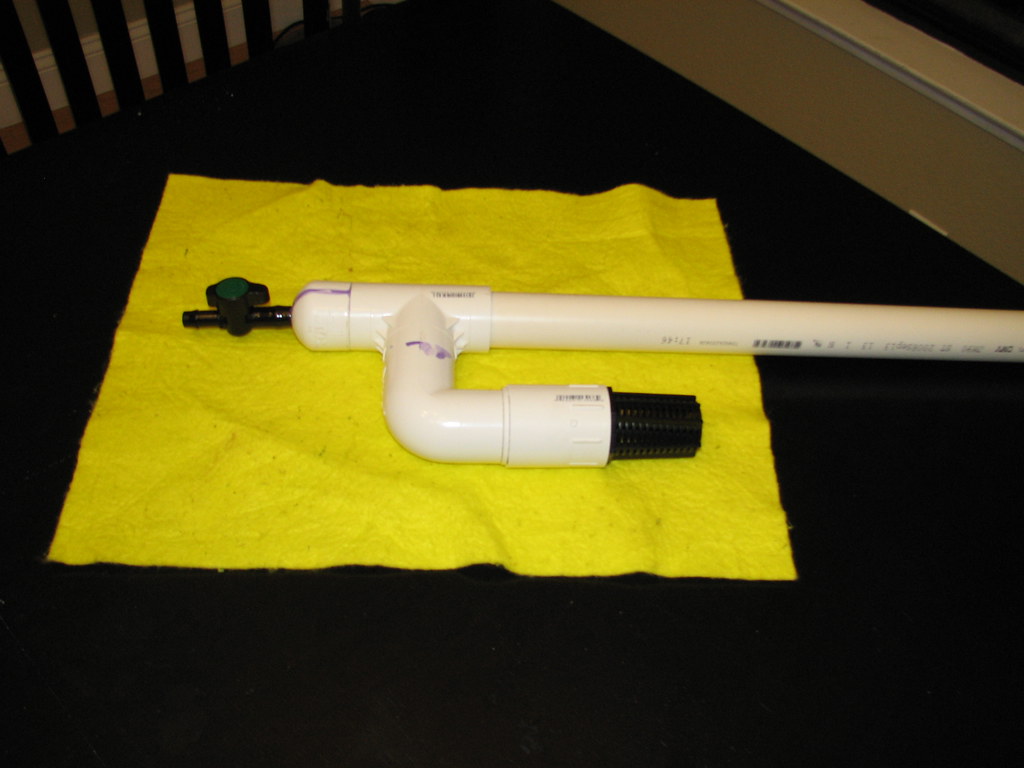
I like the flexible tubing on the bottom portion of the drain pipe because it is easy to remove but strong enough to stay because of the consistency of the flexible pipe. This is where my filter sock will be going so I need to me able to take this on and off.

The devices on the left are Phosban Reactors by "Little Fishies". I will be using one for Phosbane, One for HydroCarbon and a miscellaneous one that I can run Denitrate or something other in. My Korallin Calcium Reactor will also go to the left of this tank.

I think that's it... thanks for the cudos. ;D
 
[quote author=Roc link=topic=4762.msg71865#msg71865 date=1230576412]
I have 1 question, how come you put the ball vavle on the drain after the T leeding to the fuge? I would have thought it would come 1st to allow you to stop all flow to the sump/fuge
[/quote]

Well I'm not completely done with this set-up. Heading to HD here in a few minutes to get the final parts and then will be back to finish. Will post pics of the final shortly thereafter. The ball valve to the drain allows me to restrict the flow in a way that regulates the amount of flow that goes to the refugium via the T. I can turn it all the way off to change out my filter sock and the flow all goes to my refugium. I will also be putting a 3/4" ball valve on the T that goes to the refugium (currently dry plumbed) in order to completely shut down flow to this tank. This will allow me to change out my DSB down the road if I ever have to without it effecting my larger system.
 
[quote author=tuberider link=topic=4762.msg71857#msg71857 date=1230573140]
Your plumbing looks great, very clean. One thing though, you may want to switch out the ball valve on the overflow return to a gate valve, those ball valves can be a royal PITA when it comes to fine tuning, otherwise it looks real good!
[/quote]

I hear the PITA part of these ball valves... what can I say. I needed something to give me a challenge. ;)
 
[quote author=70Cuda link=topic=4762.msg71868#msg71868 date=1230576605]
very nice. dont see the Valve for the refugeium did you change your mind on that?
[/quote]

My ball valve for the refugium will be mostly for completely turning it off if I have to. Will be installing today. Other than that it will stay wide open. I will restrict the flow going into my sock in order to send flow along the T into the refugium.
 
[quote author=zambavi link=topic=4762.msg71871#msg71871 date=1230576949]
[quote author=tuberider link=topic=4762.msg71857#msg71857 date=1230573140]
Your plumbing looks great, very clean. One thing though, you may want to switch out the ball valve on the overflow return to a gate valve, those ball valves can be a royal PITA when it comes to fine tuning, otherwise it looks real good!
[/quote]

I hear the PITA part of these ball valves... what can I say. I needed something to give me a challenge. ;)
[/quote]

Also... I may switch them out at some point but for now I'm going to see how it goes. Every Ball valve in this set up is threaded on both ends so it gives me the flexibility to switch them out if I need to.
 
Back
Top