Neptune Aquatics

Mike's Machination

If I could get a buffer that I can tune down, then sure, but you really don't want to go too fast at all. I don't have said tool and I don't feel like buying one just for this.
 
Really should start sanding early in the morning then I could get 2 passes before work, however I found writing things on a chalkboard later at work is not very fun as a result :D

So just finished sanding the interior with 800 grit... all 26 or so square feet of sanding *bleh* and afterwards it looks kind of like this. Not too horrible, still a bit hazy but I have more grits to go through.
Sanding-800wet_zps1bca19aa.jpg


Unfortunately that's when it's wet, when it dries out it's a bit more obvious where the sanding was done.
Sanding-800dry_zpsa4019567.jpg


As the saying goes, it needs to get worse before it can get better :D
The upside is the inside WILL be wet, which is why those sanding down to 2000 grit or so is usually sufficient. However I'm going for clear when it's dry, then I know it'll absolutely look good when it's wet.
 
Yup Arnold, I am doing it again from the "Hey I can do it fast with power tools" mentality. Funny thing is I tested the ideas on a small area, and it seemed to work flawlessly, I'm not quite sure why that didn't translate to the entire pane of acrylic.

BTW, what happened to that 240? Still waiting until you buy a house to put it in? :D
 
Here's after the 1200 grit from yesterday (after it dried)... not exactly too clear, but you can see something in the tank!
sanding-1200dry_zps7604dbf5.jpg


Then this morning I hit it with a 1500 grit, and probably could have been done there, however I was sitting inside the tank, I had the sandpaper near me, so what the hell, I did 2000 and finally 2500 grit. Difference is I didn't wait for it to dry between, I figured this was just to make the buffing job a bit easier so why wait. Still quite hazy when dry, but at least you can now read the brand name of the wet/dry vac that's in the tank :D
sanding-2500dry_zpse934b367.jpg


Either way I was out of grits... well ok I had a piece of 6000 grit micromesh but I didn't think it'll make that much difference to spend the time sanding with it, so next up.. Novus 2, the Mother power ball buffer, and an electric drill (FINALLY, power tools are in play!!).
Sanding-Done-Buffed_zps2b07e5cf.jpg


BAM! What acrylic!? (ok you can see acrylic due to the flash :D) but yeah it's pretty damn crystal clear. Still going to hop in the tank tomorrow (I'm done for the day) and hit the acrylic at an angle with some brights lights, sometimes that's the only way to see any tiny scratches. I did see a couple already not sure if they're going into the "Screw it, it's good enough" category yet though, some are near the edges which is fine because the edge of the tank will be covered. Either way it'll be spot sanding at worst, so I can get that done easily.

So what's next?
-Well still need to do the outside of the acrylic, however in my experience it's good to save that until last because who knows what kind of scratching I'll do from little crap like "whoops shouldn't have worn that sweater with the zipper" or my favorite "all this feels so great and smooth *while wearing my wedding ring* ... awww summabitch!"

-This weekend will be a combo between aquascaping and building the canopy/ceiling top. The ceiling top I figure will be fairly unobtrusive, and since the access panels will be 100% removable that can wait until everything is done. I did some doodling in my lab class last night when my students were all strangely quiet and working, just running through some ideas of how I was the rocks to lay. Got a rough idea, but we'll see how it works out in the tank, because I might not have the right rocks to do what I want, and I might not have enough rocks :D There's a lot of real estate in there, and (un)fortunately I most of it is away from the acrylic walls so it makes a lot more usable space. However there were some guidelines I'm going to try to follow
a. All the holes that I covered with acrylic, should have a rock or structure that "masks" them, while they're all somewhat close to the acrylic, putting a little something ontop just so you don't see a plug in the bottom is key
b. I want lots of open space, but I also want to minimize how much "see through" I can get, I would rather not see the other side of the tank if possible, and when not possible I want it to look like 3 separate tanks based upon which of the 3 viewing panels I'm looking through
c. I need caves and hidey places (much of which will be between the two overflow boxes) however I still need to be able to access everything in case I need to siphon detritus, the euro bracing on the tank is pretty damn wide, so it might limit how I put things.
Now how well will this all work out? As the old saying goes "No battle plan survives contact with the enemy" so I'll just be flexible enough to adjust as I need to.

Until the next update/installment :D
 
Put cardboard on the sides when you mess with rock placement.
I SO wish I had done that. And I did not spend the ton of time you did getting scratches out.
 
Put cardboard on the sides when you mess with rock placement.
Yeah that was definitely in my "to-do" plan, hell probably going to do that on the outside too, although I kind of want to see what the rocks look like from the outside, going to be "fun" climbing into the tank to place rocks, never thought I'd do that.

Feel free to call me if you have any heavy lifting.
Bah all the heavy lifting has been done already man! :D
 
Have any final pictures of the acrylic? Would love to see how it turned out. I haven't really looked but I hope that Novus stuff doesn't have any fillers which could make it appear as if the acrylic is scratch-free. I know that there are certain polishes for buffing cars that have oils in them to extend the polishing time.

FWIW, all the power sanding I did was on a random orbital so I wouldn't have to worry so much about the chatter or the unevenness of sanding (unless you decide to keep the machine in one spot). It definitely made things a lot more manageable and I wouldn't have dared doing it by hand... I've already done my fair share of hand sanding, haha.
 
That last one is a "final picture". As far as I know Novus is an abrasive not a filler, Novus 3 is very obviously an abrasive and is meant for heavier scratches although since I went down to 2500 grit I figure I've already surpassed the "heavy scratch" phase, and Novus 2 is for fine scratches.
 
Alright, so plans didn't go as I envisioned, rocks are still not in the tank all aquascapy like. But like everything else figured out other stuff I could do before which would make my job quite a bit easier.

One of those things was to build the framing structure above the tank, I have to say being able to stand in the tank and do all of this made it a lot easier, also putting down a plastic drop tarp over it so I can seal it all up with an oil based paint... again awesome that there was no rocks/water in the tank at the same time :) The point of this is that this is what's going to hold all the access panels above the tank sides (still working some ideas for pulling that off), it also doubles as a raceway to run any wiring to lights and what not so I don't have to worry about accidental drops into tanks, lastly it's to hold the lights up too.
Tank-Scaffold_zps7c1772a6.jpg


Now I feel like I need to rant a couple times for a minute. Feel free to skip the next two paragraphs should you just not want to hear it.

I used smaller 1x2 to do everything because I knew each piece would be locked into one another and overall would be very strong. Normally what I would do is simply buy some 2x4s (in reality 1.5x3.5s) and simply rip 3 pieces out of each one on a table saw, and the pieces would be a little bigger than I need but whatever it's cheap and easy. So to my surprise 1x2 strips were about 1/3 the cost... well damn, that sounds like a plan and the difference in cost was well worth not having to rip the pieces on a table saw. However to my horror I saw the labeled 1x2s (on the price tag) then with a separate label that said 11/16 x 1 3/8th?! WTF!? Not even 1 1/2"? that I could at least understand because they basically did the ripping for me (you could see every few had rounded corners just like the edges of 2x4s)... nearly lost my mind. But whatever I swallowed my pride at the out of control lumber industry and went on with it.

Then at the cash register, I nearly flipped my shit when I saw CA Lumber Tax, WTF² !!!! It turned out to be a penny per piece so I didn't quite drop everything and run screaming out of the store... but when I got home and researched what the hell the CA lumber tax was, I screamed up a storm. Wondered where it came from because I sure as hell never saw a tax ballot for "Lumber Tax" turns out they got a 2/3rds super majority on the vote so didn't need to put it on the ballot. Overall it says it's good for timber companies because they don't have to pay CA regulatory fees anymore, but it's not like any companies eat costs like that, they'll get passed onto the consumer, all the while lumber has gotten more expensive. Sure why not, 9 percent sales tax lets tack on another 1% because why the fuck not California's already are paying so a little more won't kill them. I kind of rank this up there with that "bag fee" scam that got slipped through for "environmental" purposes, all the while you can get bags you just have to pay for them, stores are not legally allowed to give you a bag for free *sigh*... and don't get me started on this CRV nonsense which is still in our state even though just about every major city has a full on major recycling program.

End rant.

Also got a new toy for helping out with water storage, something that's a little more classier than a Brute garbage can... and I'm kind of moving into that territory that having 30 gallons of water on hand for top offs AND making salt water. So thanks to Mark for throwing together a little "group buy" (shipping was cheapest when ordering 4, that's all it was), and the other Mike (well one of the other Mike's) for being nice enough to throw mine and his two into his van and bring them by. I now have a fancy 100 gallon water storage container!
Water-Storage_zps42372ff9.jpg


Tossed this into my greenhouse, and let me tell you, 30" wide going through a 28" wide opening was not easy to pull off. I put it in my greenhouse though for a couple of reasons 1) out of the way inside, no way to really "hide" it without sacrificing a closet, 2) it'll act as a heat sink for my greenhouse storing heat when it's warm then slowly radiating it back out when it gets cooler, and 3) If I make a mess with water, this is definitely the place to be.

My only concerns might be algae growth inside of it. I know the water is sterile going in, but algae and bacteria will find a way. Not sure if I'm going to run a pump to recirculate the water, I'm definitely going to have a pump to move the water to mix salt and what not, or if I should just go simple and toss in a few air stones (although that might be problematic due to the height of the thing I'd need more powerful airpumps to push air down over 40"). Also thought about running ozone through it constantly, but probably won't go that route because a) I don't know what ozone will do to the material, and b) even though the greenhouse is air tight I really don't want to risk having ozone build up inside of it. At the very least I'll wrap it in black paper to block as much sunlight as possible, or build a box to go around.

Sorry not much exciting updates this time, although unless I figure something else out that needs to be done... I think aquascapiness is happening this weekend :D
 
Ok so I got tired of waiting for a tank that was empty all the while holding my breath around it to make sure I don't rescratch any of the inside panes (still have to tackle the outside ones). I had rock "cooking" in the refugium area, however I wanted to get started on aquascaping which meant taking some rocks from my holding tanks as well (which pissed off a couple of my inhabitants big time, now they have a mostly empty tank to swim in). Mind set is get the aquascaping while it's dry and then add water from the sump area, which won't be enough but enough to keep the whole cycling process going.


And done! It looks so natural doesn't it?? :)
Rocks-Done2_zps03946abc.jpg


Rocks-Done1_zps62e28033.jpg


But in all seriousness, looking down at this I feel like I don't have enough rock for what I want to do. And afterward, I felt like I was right, however I did not want to just pack every inch of the tank with rock, I wanted various zones and areas separate from one another and always have to remember if it doesn't feel right, don't do it just because you can.
So I went to work. Started at the back of the tank and moved forward, I do have to say standing inside the tank and looking down is a whole different ballgame when aquascaping, I didn't want to keep climbing in and out of the tank so I just went with my gut what it would look like... and a few times my gut was wrong.

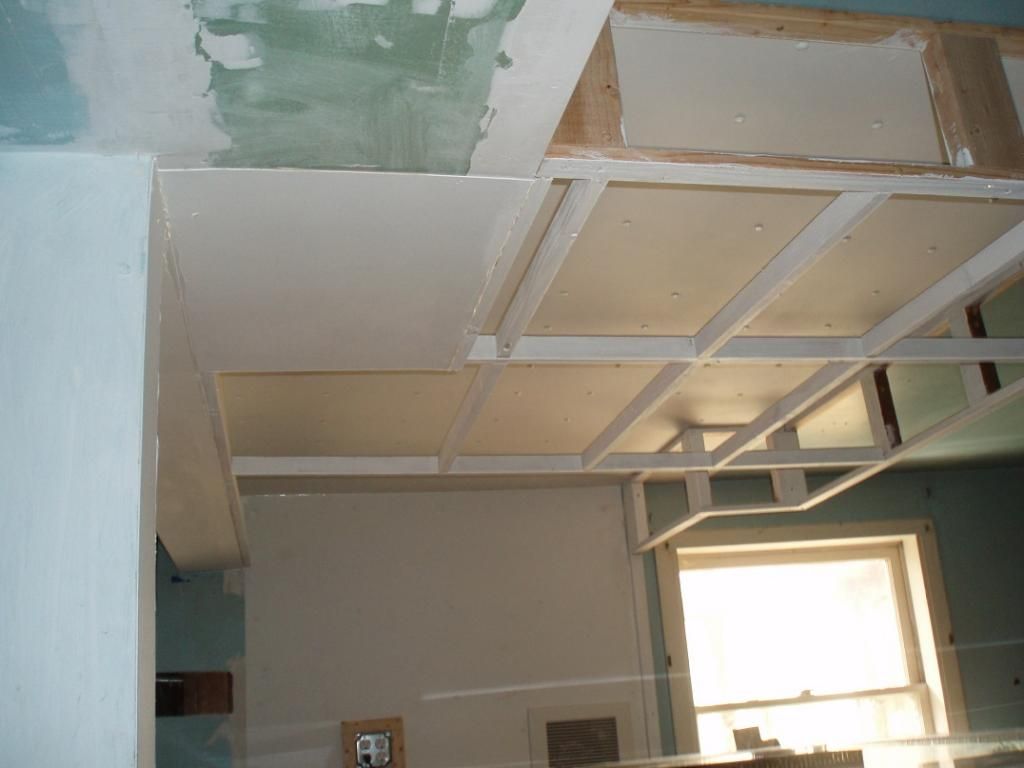
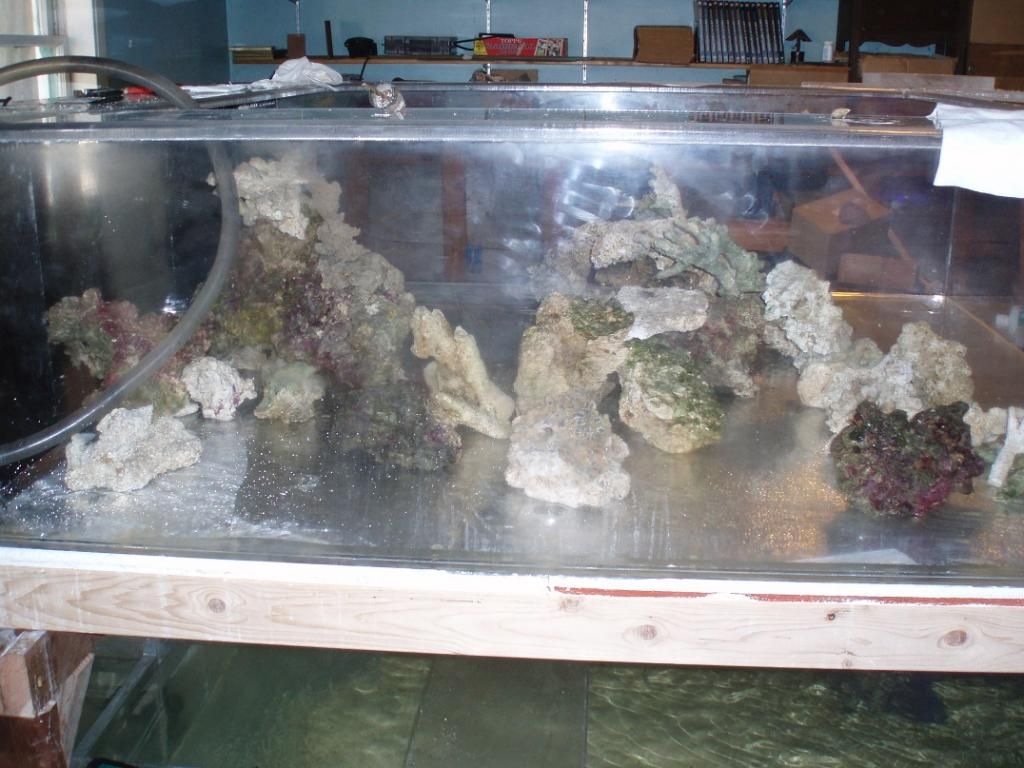
So here's version 1.0. Now one of the "rules" I had was that flow had to be "unobstructed" at least 2/3rds of the tank distance. So that meant a low area from the back to the front. Now an issue that I've always had my mind on is that pumps are only going along the back wall between the overflow boxes, the tank is viewable from 3 sides, and I didn't want "ugly pumps" viewable in the tank, so check this out, black background, black pumps.. except for the impellers they do a pretty damn good job of blending in.
Rocks-Aquascape2_zpsf26067f2.jpg


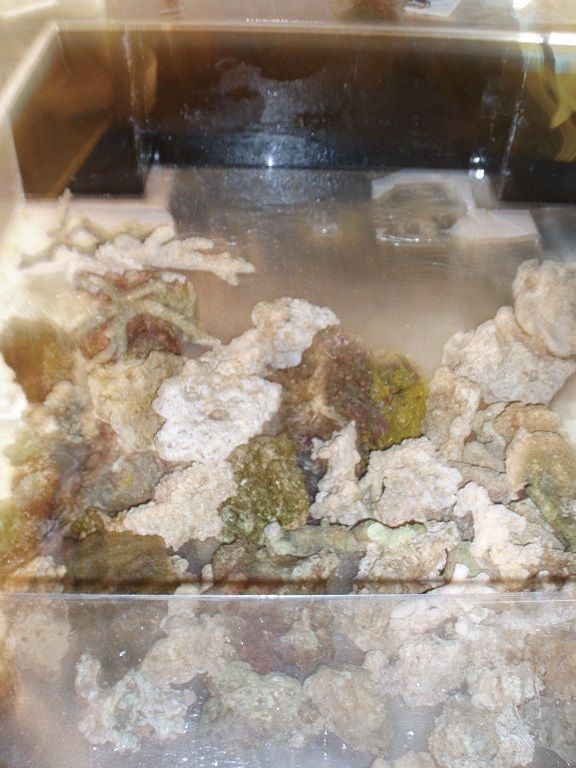
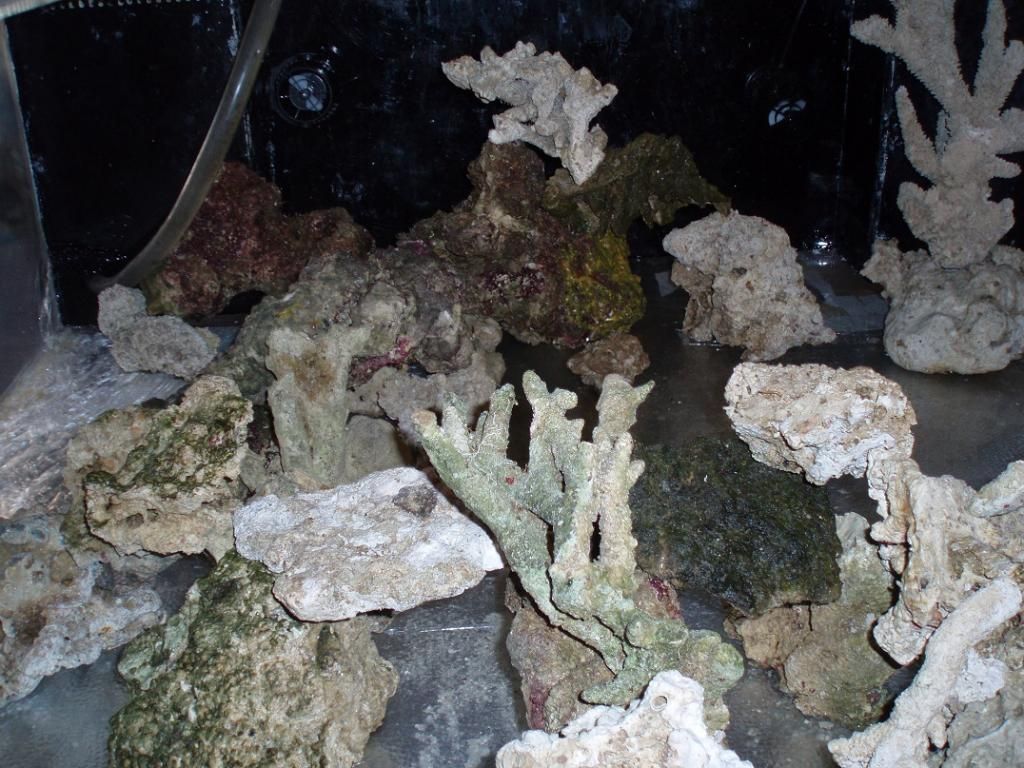
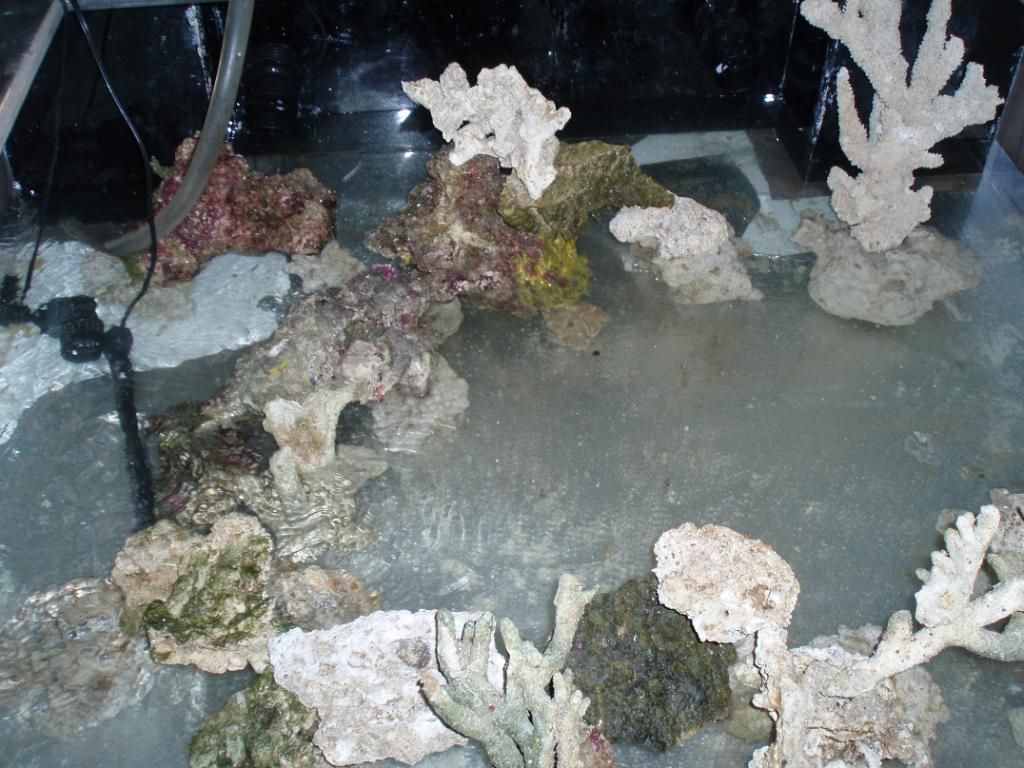
Here's a closeup of the back corner as I'm filling it with water. First thing that pops out is I need to get me a bristletoothed tang, they're made for scraping that type of algae of rocks. Second is that very white flat rock in the lower left quadrant.. I really like the idea of "flat rock" so that I can just cover it with frags, but something just looks unnatural about it, I think I'll live with it for a while, and regardless of the way it looks now have to remember corals will be growing vertically so don't worry about low areas or areas that are "too flat"... at least not now.
Rocks-Aquascape3_zps98174e1e.jpg


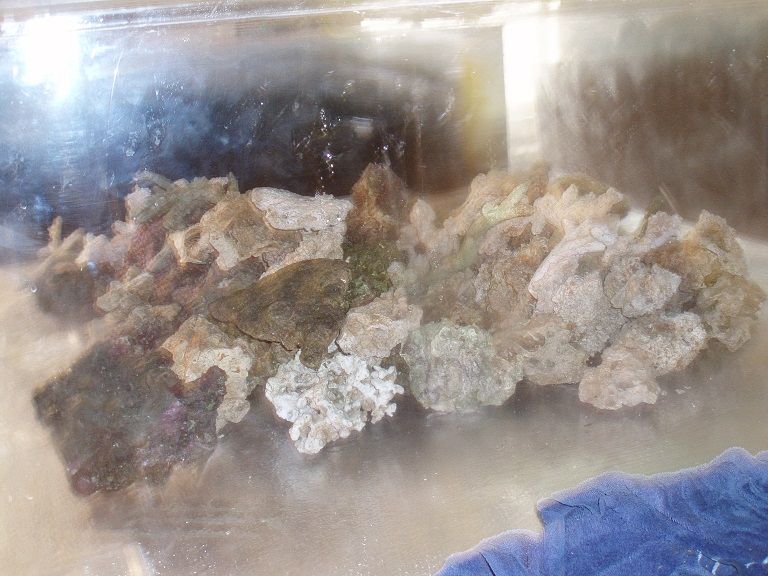
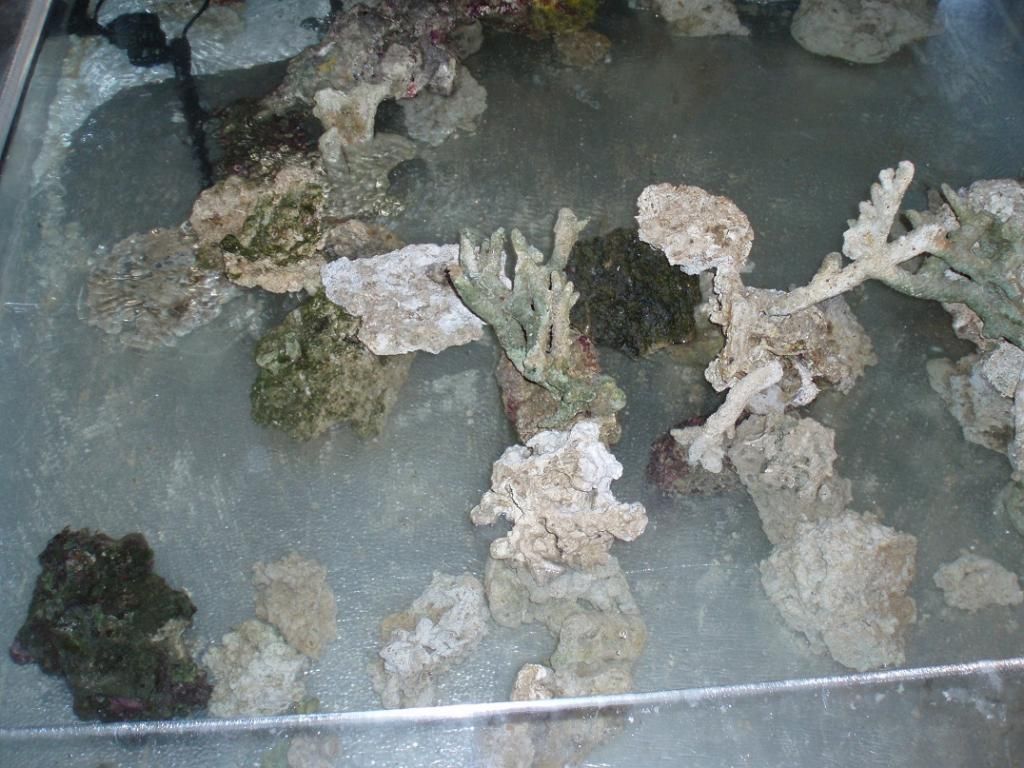
Here's the other corner, a bit more water. Another thing I'm not quite sold on is the branched "rock" I have in there. The one of the back corner I'm not too worried about, it's isolated, I'll toss on some zoas or palys on it, and I'm sure they'll cover it in no time. However in the foreground I'm not yet sold
Rocks-Aquascape5_zpsc2dfbe62.jpg


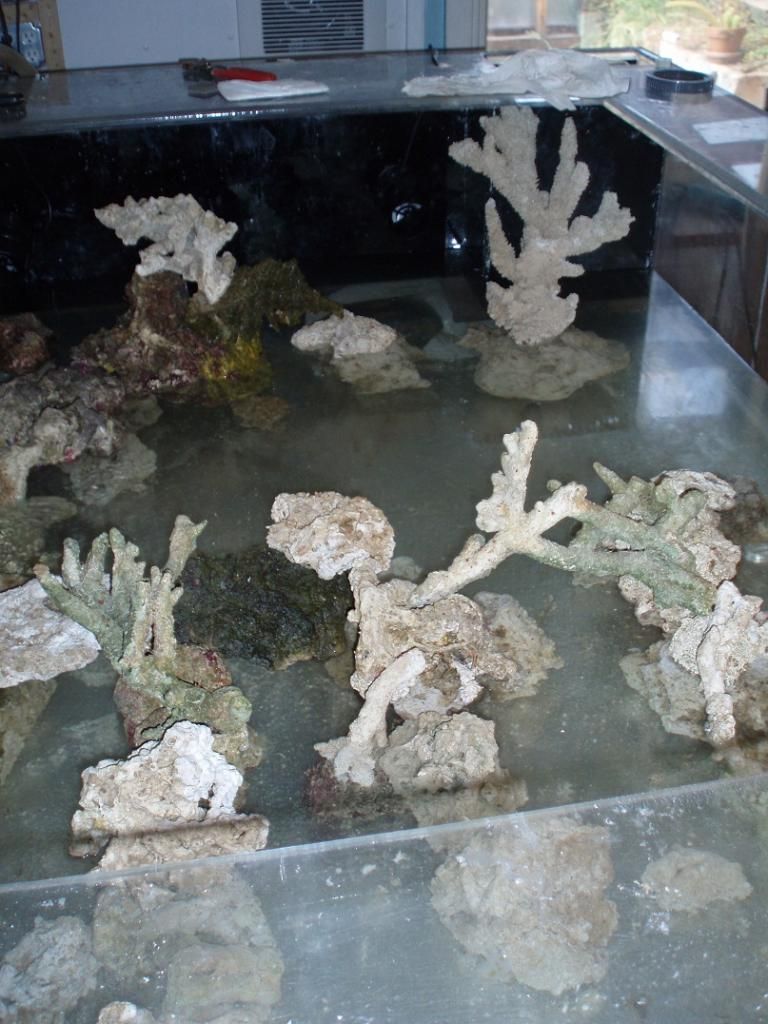
Here's the front part of the tank, ignore the bottom corners, the left corner is the rocks I wasn't sure where to fit so rather than just go "ooh lets stack rocks" I left them here in case I needed them later, the green rock is one of those "lets see if there's any more aiptasia on it" rock. I purposeful left the front corners devoid of stuff because I still have some rocks with corals/clams in the other tank that I'm not ready to move yet. However this picture helps illustrate something I was planning out when I was in the tank with the "lagoon view" and that's that I wanted different areas that were isolated from one another, there's that big one at the top (and in picture above) there's a smaller one in the bottom corner, another one in the upper left corner, there's one behind the rocks in the first picture with the pumps, and lastly one in the front right corner (can't see too much here). My plan is to have very few big fish, I already have a yellow and purple tang, and a foxface.. . I will get a bristle tooth tang too but that's a smaller fish, and I'm really thinking of a copperband or long nose butterfly to deal with those pesky hydroids that I know will make their. Mostly though I want smaller fish, not nano-mini fish but anthais/clownfish sized, and I figure different areas will give different fish various territories. Although I think I may have over done it with the number of "caves" I have (hard to tell with this view).
Rocks-Aquascape6_zps6bdbbfc2.jpg


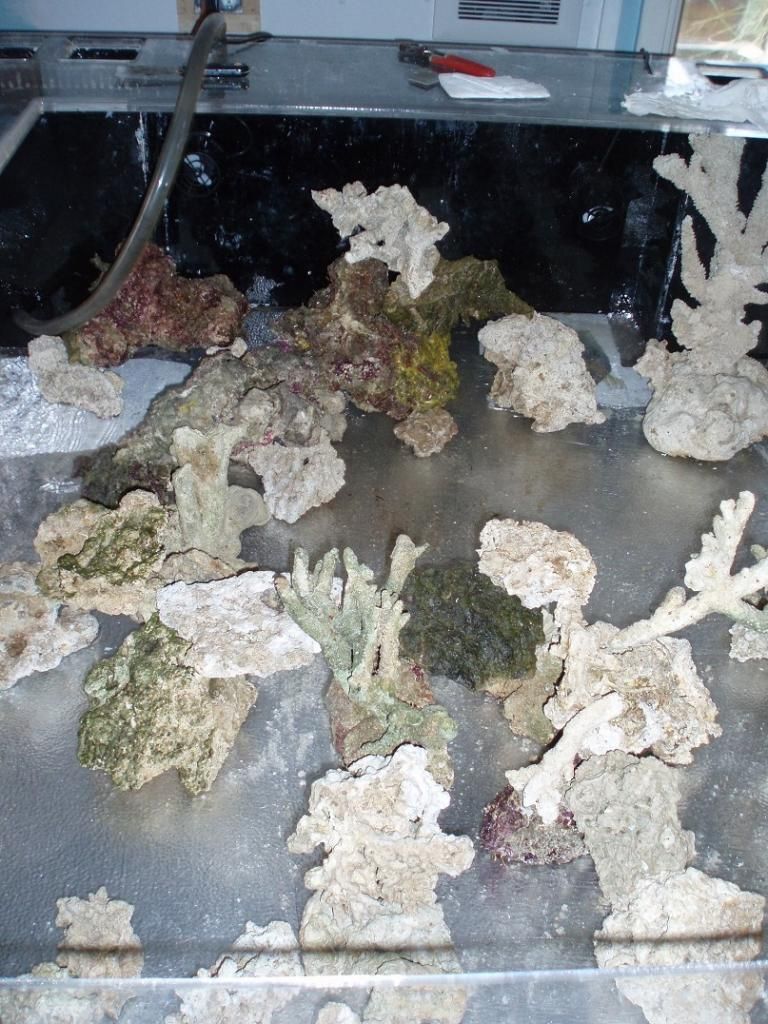
Here's a long shot towards the back, again those branches I'm sold on, keep telling myself, corals will grow on them, branches will disappear.
Rocks-Aquascape1_zpsce019ee0.jpg


Here's a side shot, I didn't want to take any more of these because I still need to clean up the outside acrylic, and with a flash off it just looks bleh. However another thing I wanted from this tank is that each side would be a unique view. If you have a longer skinny tank as a pennisula, you basically see the same thing from both sides, you're looking at the backside of the rocks you see from the other side. Now while I couldn't completely remove the otherside, I'm hoping that when some corals grow in they'll really change the landscape considerably.
Rocks-Aquascape4_zps933d598b.jpg


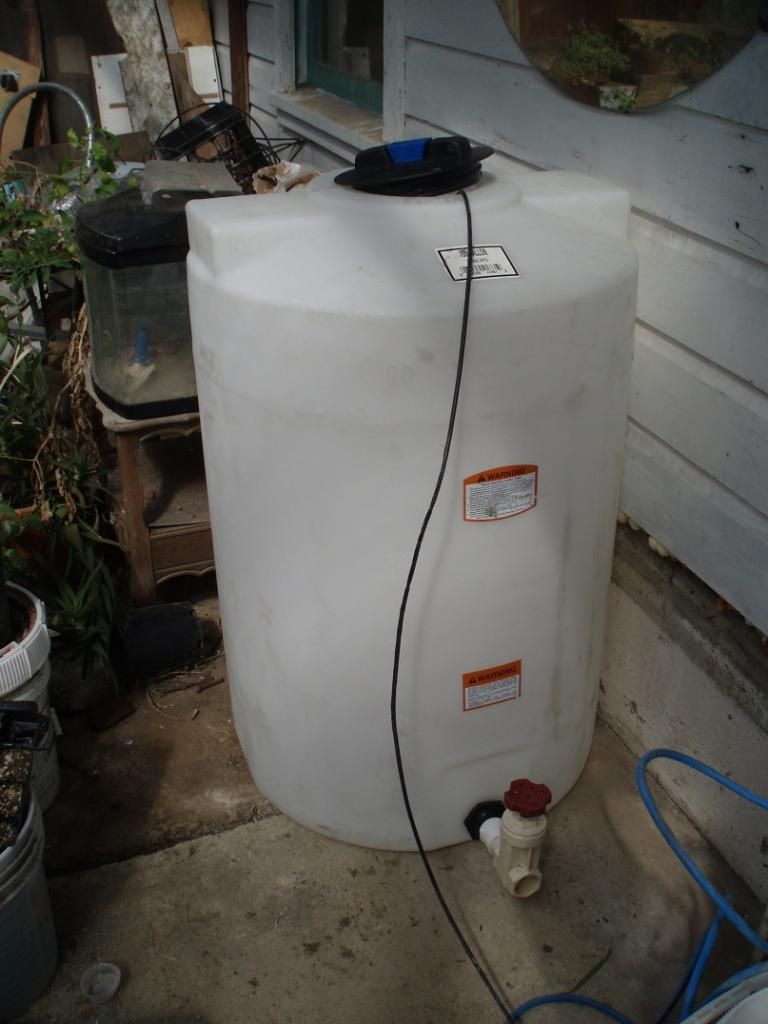
Also did a leak test on my 100g storage container, and the container it self and bulkhead is fine, unfortunately my gate valve leaks a bit from around the knob, I'm sure it could be fixed with a new washer or something... however I'm not sure I can actually get in there and service that. So I'll probably buy a new valve, go with a cheaper ball valve.

Either way, back to making water in the brutes. Bonus I found out while filling water, and using the waste water to leak test the storage container, is that my RO/DI system only wastes 1.4 gallons of water for every 1 gallon it makes.
 
Back
Top