Kessil

Mike's Machination

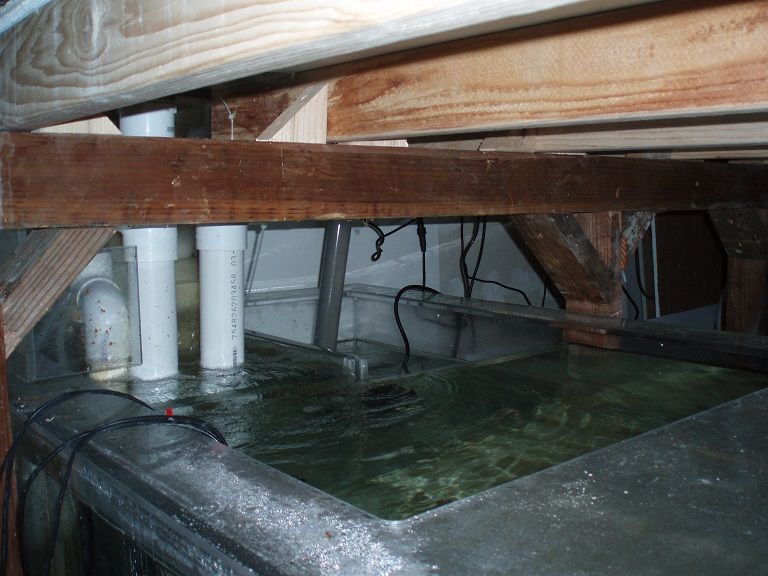
And overflow plumbing is done!
plumbing_zps2369d67b.jpg


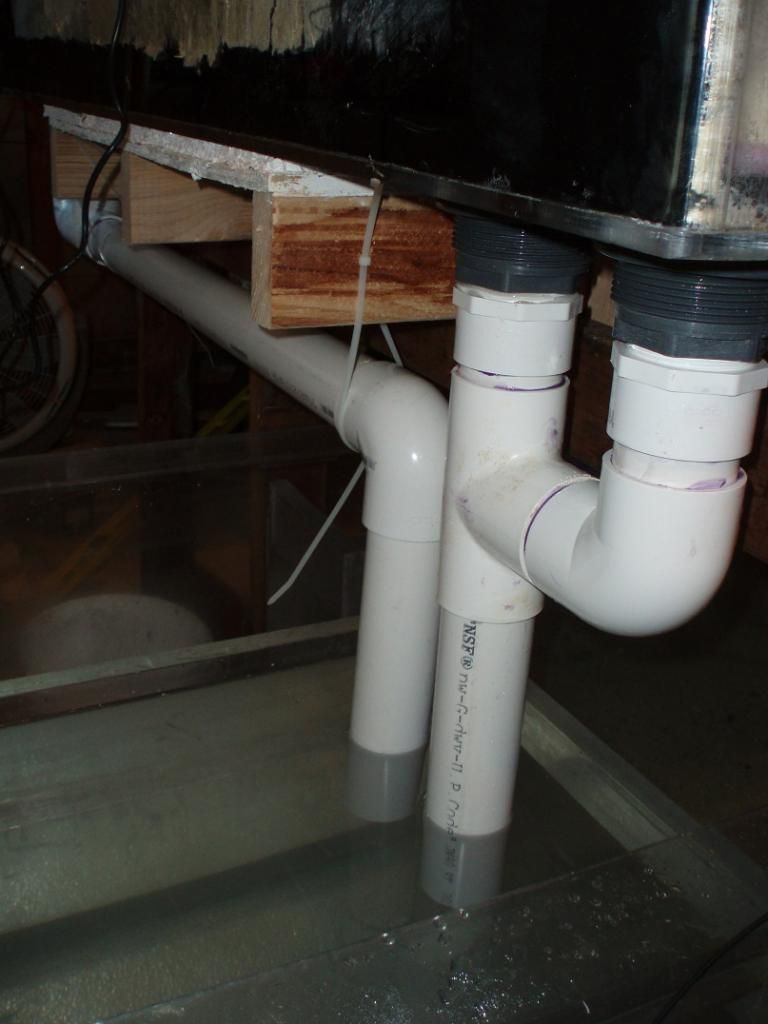
Put it through the ringer, and leak free.. .whew... I was worried about those screw connectors, due to the way I ran the piping and essentially connected both together there would be no further tightening going on. I did contemplate doing 4 separate pipes, however my mindset is that they're 2" pipes, the volume is there, and since there's 2 sets, the chances of one getting clogged is very small, doubly so considering the only thing that could get into the overflow would be small enough to easily get swept through the pipes. We'll see if that idea backfires, worst case is I'm out maybe $20 in PVC parts (2" fittings ain't cheap! Each elbow was $2 a piece!)

Unfortunately the side of the pipes does not allow me to really get too creative with herbie overflows, or a bean animal, etc.. I'll see how it works out with sound before I try to get creative in shutting it up. Downside is the tank came with like 4 - true union ball valves which are not cheap, the downside is that they have PVC welded to them in funky shapes that would make using them a bit impossible.

Oh well, display is about 80% filled, Sump is about 75% filled... ammonia is reading about 0.5ppm, so I'm getting close. Unfortunately I don't have any nitrite test kits to see where that's sitting, and don't feel like buying one that I'll use maybe 5 times at most. This whole cycle bit is hard to follow as it is, originally nothing but dry stuff, get a little ammonia spike, then I add more water, and more water and more water, basically gave it a 50% water change by doubling the water, then I add a bunch of live rock from my existing tank... oh well. My fish are staring at me from their holding pen wondering when they get to go play.

Ordered a bunch of stuff for lights, probably won't get those done until next week, but I might throw the fish in before then depending where ammonia is later this week.
 
Coming along nicely.

Hey I'm used to odd taxes being from Canada. After 14% sales tax everything here seems like a bargain.

Sent from my Nexus 5 using Tapatalk
 
Coming along nicely.

Hey I'm used to odd taxes being from Canada. After 14% sales tax everything here seems like a bargain.

Man I vacationed in Portland a month ago. Went shopping and drank all the beer. Ain't nothin like no sales tax man. I hate that even common folk like us have to pay the same damn 10% tax that every rich person pays.

I loved it up there. Then when I came home, it was really hard to go shopping because in the front of my mind I knew the sales tax wouldn't say "$0.00" like it did up in Oregon. :/
 
It's not like I'm one of those who hates taxes, I mean no one likes paying more money but most people understand the need for them. It's that I don't like having them thrown in my face like that. Why can't they simply make lumber 1% more and have the computers doing the bean counting later when it comes to dolling out taxes to the state vs taxes to the timber fund. It's like eating in SF and seeing either on the menu or the check a percentage upcharge for "health care", I want workers to have health care but why don't you just raise prices to deal with that cost of doing business? No have to slap it in my face that my meal costs more money because workers get health care now. Or with a plane ticket and a "Fuel surcharge" WTF? Shouldn't that be factored into the cost of the ticket? What about a "Piloting Training So Plane Doesn't Crash" fee as well?

... ah whatever ...
Either way just finished my 2nd bucket of salinity, so that's approximately 550 gallons of salt water I've made up! One of my flower beds is probably absolutely drowning in water... maybe should have moved that waste water line elsewhere in the yard :D
 
From the looks of the last pic, I am concerned about splashing. Will there be a lid?
Splashing how? From the drain? That's a possibility since bubbles will be in the water and there will definitely be some "spritz". That chamber also is where the skimmer will be (on a pedestal), in the past I've put elbows on returns to go right under the skimmer pedestal to reduce this "splashing" effect, other times I've simply built an "acrylic wall" to keep spritzing down to a minimum. I'm not quite sure fast the velocity of water will be through those pipes though, the return pump I'm going to use is a DC pump so I can dial it back if necessary. Bottom line is there isn't a lid planned, but as water starts moving through the whole thing I'll adjust as needed.

I do plan on covering up the exposed wood with the same plastic paneling that I used for the walls though.
 
I'm having a hard time seeing how you are supporting the tank. Those cut off 2x4 don't look all that stud-ly! Is the corner close to the camera supported?
 
I'm having a hard time seeing how you are supporting the tank. Those cut off 2x4 don't look all that stud-ly! Is the corner close to the camera supported?
Doesn't need to be stud-ly, however I am beam-ing in pride at the simplicity of the design :D

Horrible puns aside, the corners are not supported... yet. However the unsupported area is the overflow box area. Every single time without question I have put up a tank I have had a bitch and a half job with the bulkheads, I just don't anticipate how much room I need. So rather than hope my measurements were correct, I simply did not have the beam extend all the way back so that I have access to them. Later on I'll probably toss in a piece at a 45° to the leg to support it, but for now it's fine.
 
And it's full, with a low return chamber height and minus the overflow volume (removed pipes). Got one of my mixing pumps (mag3) MacGyvered up, so not too much flow moving through the system, but at least now the 600 watts of heaters in the display tank can mix with the water in the sump/fuge area and start to warm that up as well as whatever water that was there mixing with the water in the main tank sand vs rocks epic struggle for who will remove the ammonia from the tank!! :D

Unfortunately, I noticed a leak... and of course it was right where I thought it might be right where the PVC screws into bulkhead, and unfortunately due to the way I linked the pipes I can not tighten it any further. So I'm left with a choice, drain out the overflow area and try to goop up the inside with PVC cement forever fusing the screw joint, try to use some silicone inside the joint to plug the hole, or cut it all off and start over again (after purchasing 2 slip/thread fittings, 1 elbow, and 1 tee). I'm torn between the first and last choice, doubt silicone would do much of anything, the first choice might be the easiest, however who knows if I'll get ample coverage inside the bulkhead at which point I'm really forced to try to make that work because there's no turning back, however cutting it out and restarting, while yeah it costs more money, who's to say the fitting won't do the same thing.

Oh well, at least the leak is right over the sump, so I can think about my choice while working on other things. How about plan D, let it crust up with salt and hope that stops the leak? :D
 
Chances are salt creep will seal it up over time. Heh.

Before redoing any plumbing see how it works for you. Ie make sure the drains balance and work as you expect. Then if need be you can cut it out and redo. I've never managed to get threaded fittings to be leak free. It what good luck with unions to make sure things can be changed in the future. Too bad they're so pricey.

Sent from my Nexus 5 using Tapatalk
 
and... the fish are in! Purple tang went first, and he sprinted all the way to the back, and he like blends in perfectly with the black background (great chamoflauge except for that yellow tail), then the two big'uns my Yellow tang and yellow foxface, they didn't zoom to the back, they were quite content to "hide" near the front pane where I was, just peeking out at me from behind the rocks. I'm awaiting to see if I'll get fireworks between the purple and yellow tangs.

Still need to get the lights up though, even though I put what few corals I had and my clams. I figure the ambient light from the window will be good for now.
 
Ok, I need to figure a solution out, the back legs have way too much rock to them in the lateral direction. Like the gussets I added in aren't doing a thing. The vertical load strength isn't a worry, however if there's a shaker I might be in trouble.

Plan A is to screw in a 2x6 part way down and basically like an I beam between the legs, Hopefully this should stiffen things up a lot. If that doesn't work, Plan B is to weld a square out of some 2" square tubing that I have and bolt that to the inside of the legs, complete with additional gussets inside. Plan C... oh boy, I don't have a plan C.
 
Yeah, while I lay awake in bed at 4:30 this morning going through options in my head, I think I'm going to swap out what plan A was, and simply slap a piece of plywood across it. Didn't want to block off the access from the front to the back, but it'll probably give me more strength in the long run.
Understand-Back_zpsb14021e4.jpg
 
Mike there's several things in that pic that disturb me.

Why is there a gap between the beam and the 2x6s? No real support there. Don't depend on just screws going thru end grain in those short, 45 degree cut pieces. Cut some spacers to fit underneath the 2x6s.

The very short knee braces don't provide any real lateral support to the post/beam combination. Putting a piece of ply across from post to post might be enough. Make sure you glue and screw it very well to the beam and both posts. It is still a very short sheer wall!

With spacers holding up the 2x6s, I'd remove the short 45 degree pieces and add another plywood on the back side.

Do you have any pics of the area before the tanks went in? Perhaps from the back and top?
 
Why is there a gap between the beam and the 2x6s?
That is due to the way the support beam lies/is fixed in. It's actually a doubled up piece and the other deck beams are resting on the back portion. I figured the doubled up was for strength, and as long as the deck beams are directly laying on the support beam I was good to go. But yeah I did notice that gap too, both beams are laying on the legs flush though, I'm not sure why there's a gap between one and not the other.

Cut some spacers to fit underneath the 2x6s.
I'll do that just to make you happy ;)


The very short knee braces don't provide any real lateral support to the post/beam combination. Putting a piece of ply across from post to post might be enough. Make sure you glue and screw it very well to the beam and both posts. It is still a very short sheer wall!

So length is needed on the knee brace to give them strength? Oh well, I don't have room in there for length. Ply it is. Perhaps even ply to both sides due to how short it is?

With spacers holding up the 2x6s, I'd remove the short 45 degree pieces and add another plywood on the back side.
By back side, you mean the edge of the deck beams?

Do you have any pics of the area before the tanks went in? Perhaps from the back and top?
Unfortunately no, that's when my camera was taking wonky pictures, and once the legs and main support beams went up the deck that supports the tank went up so fast I didn't bother taking any pictures.


I added some labels for clarity. I have no idea what to call the piece with the 45 degree cut! :D

From the pic it's hard to see if all the joists rest on the beam. If they don't, they need to be shimmed for solid contact. It'll make me :) and your stand a LOT safer.

It looks like the stand goes back to the right some distance. I'd put plywood across all the posts. If the area to the right can handle it, put the ply top to bottom. It'll have to be shorter over the sump. Lots of construction adhesive and lots of screws. I'd do the same to the posts and beam I assume is behind the camera view point.

Better hurry! I feel the next big temblor coming. :eek:
 
Back
Top