Kessil

Mike's Machination

Wow, lots of progress. Looking good.
You might want to paint that wood, or somehow cover it. I always seem to get a bit of mold
if I leave uncovered wood too close to the surface.

Cut the leaky part out and start over. You will be annoyed forever if you don't.
Use lots of silicone around the fittings when assembling.

Regarding the water tank:
Obviously I have the same issue on recirculation, since I have the same tank.
My current leaning is to just put a small powerhead on the end of a PVC pipe,
that extends down through the lid, so it is near the bottom. I need to mount
a small float switch there as well.
The other crazy idea was an air stone in a short pipe, attached to a float.
The air would both aerate, and act like a weak pump (think old under-gravel-filter).
Since it floats, it goes up and down with the level, so no need for a powerful air pump.
 
Yeah, i think I'm going to go that route too. After ditching the leaky gate valve I got a simple ball valve which is a bit harder to turn but at least there's no worry about a seal leak. In the mean time I'll just keep it shut off and use an aqualifter or something to bring ATO water in.

Mine is in my greenhouse so I still need to build a box or something around it (or find some cheap opaque plastic covering) so it doesn't turn into a big green algae water container :D

Still got a bunch of stuff I'm trying to do all at once. Lights, plumbing, reframing/strengthing, then covering/painting, finish work, nabbing any aiptasia/majanos I missed. Luckily this is finals week for me so I'm almost done with school and ready to have summer vacation... for the next few weeks before I go back to teach summer school.

Upside I tossed in my anemones into the sump and put my some LEDs to keep them all nice and happy.
 
So here they are, got RBTA? :D Some water spots on the acrylic that I didn't care about at the time. Lights are only along the front of the tank for now. Ideally I'd perhaps like to go the clownfish route again... MAYBE (although I'd hate to have to feed the refugium individually). As you can see there's an area of light near the front but not so much near the back (there's ambient room light from a window there), so my hope is that this contains them... but if it doesn't whatever they're not going anywhere but other places in the refugium. I'll put up other lights down the road further back because I'd like to plant/macro algae back there.
Anemones_zps38519bf7.jpg


Here's the lights, these are some old DIY suckers I threw together back in the day, and have repaired/replaced them over the years. From the original Rapid LED site when those hunks of aluminum with fins were the only heatsinks they sold (in different sizes) nothing like the clean black coated stuff they sell now. They're mounted between two beams pretty tightly (and screwed to the beams in case that tightness diminishes) They swivel in one direction, which was a nice idea I came up with, allows me to throw that light in any direction along that axis so that all the light isn't just coming down, it actually hits the side. Two outer ones are, 4 royal blue & 1 cool white, center one is 2 royal blue and 3 cool white (because that's what I had available now and I just tossed that together), blue and white channels are controlled independently although just off/on control, sometime down the road I might put them on a dimmable source but for now the anemones have photonic food so it's all good. I finally found some connectors I was actually pleased with that wasn't a hassle so that I could make a generic setup and simply daisy chain them together as needed. For the other parts of the refugium I would like light that can tilt in 2 direction, trying to figure out how to do that without getting overly complicated.
SumpLights_zps47e6e698.jpg
 
Yeah... fortunately there are a couple on smaller rocks if I ever want to get rid of them, strangely enough finding someone who wants to buy a rock with 20 or so is a bit difficult :D
 
Yeah, i think I'm going to go that route too. After ditching the leaky gate valve I got a simple ball valve which is a bit harder to turn but at least there's no worry about a seal leak. In the mean time I'll just keep it shut off and use an aqualifter or something to bring ATO water in.

Mine is in my greenhouse so I still need to build a box or something around it (or find some cheap opaque plastic covering) so it doesn't turn into a big green algae water container :D

Still got a bunch of stuff I'm trying to do all at once. Lights, plumbing, reframing/strengthing, then covering/painting, finish work, nabbing any aiptasia/majanos I missed. Luckily this is finals week for me so I'm almost done with school and ready to have summer vacation... for the next few weeks before I go back to teach summer school.

Upside I tossed in my anemones into the sump and put my some LEDs to keep them all nice and happy.


Mike, look at "twinwall" plastic sheets. It's basically plastic cardboard. Cheap, rigid, light and cutable with a utility knife. Makes a good anti-light covering. Only problem with it is it's impossible to glue because it's polypropylene.
 
Mike, look at "twinwall" plastic sheets. It's basically plastic cardboard. Cheap, rigid, light and cutable with a utility knife. Makes a good anti-light covering. Only problem with it is it's impossible to glue because it's polypropylene.
I'll take a peek at HD for that stuff, is it actually opaque though? I know they sell a white version of greenhouse material similar to that which isn't opaque it basically makes a uniform light instead.
 
Well, I guess it's not totally opaque. You could probably spray it with krylon to opaque it up, or it's cheap enough to just double up?


You could try foam sheet insulation as well I guess, it would help keep heat in/out?
 
Ok saw the stuff in the store, totally not transparent. I'll figure something out though, foam sounds like a good idea though then I can easily cut out where holes where the pipes go in/out.

Onto the tank now.
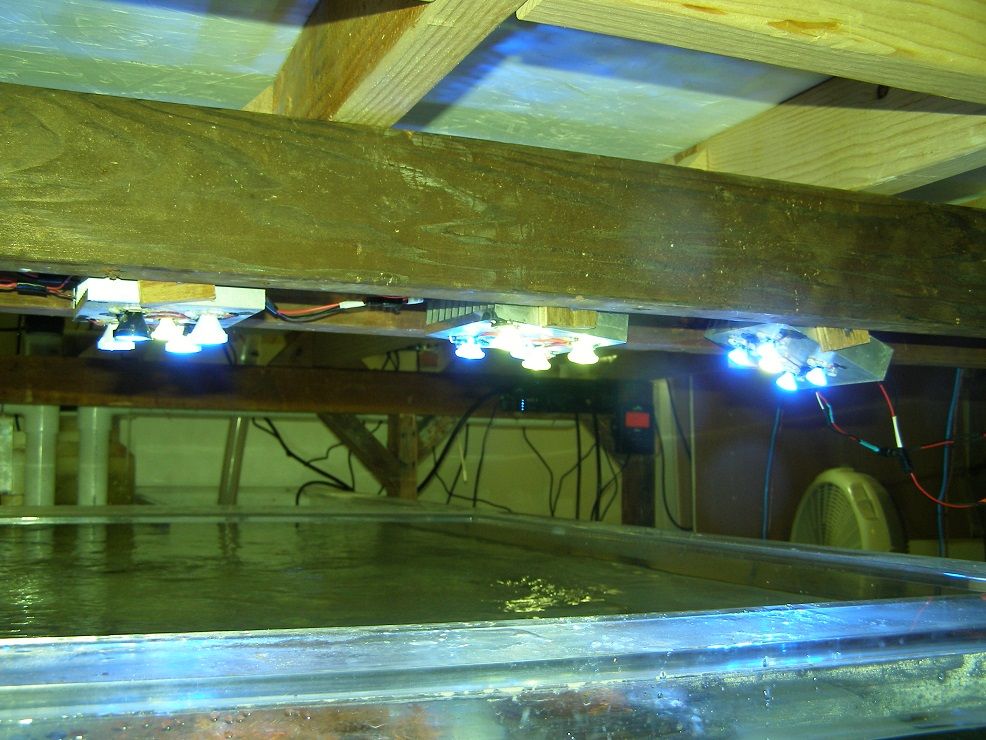
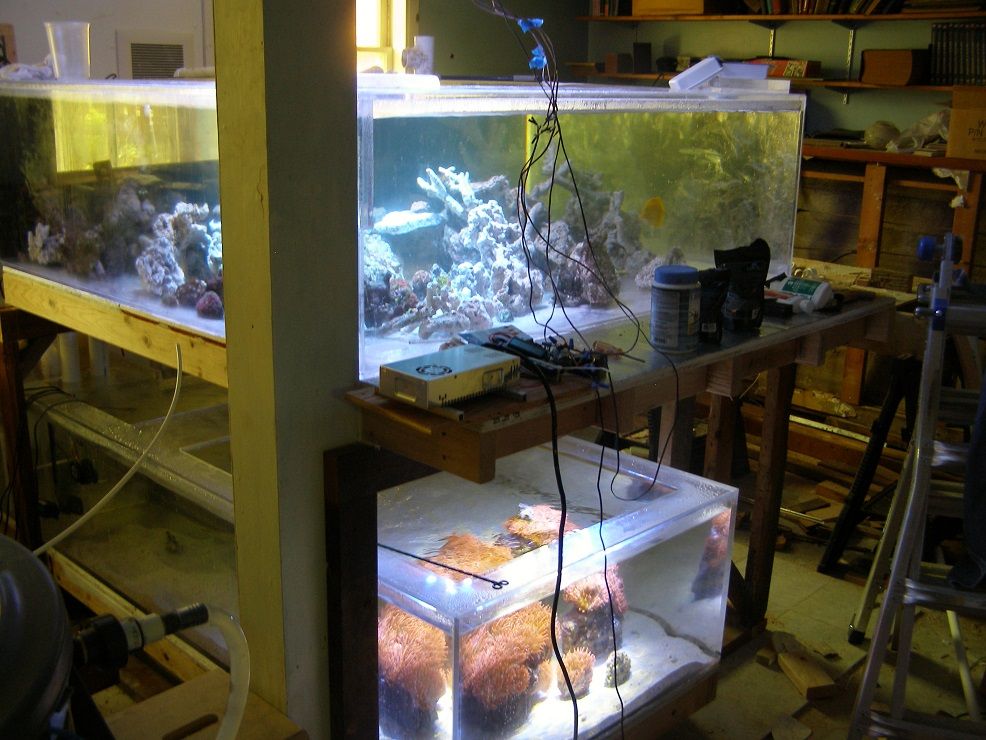
Noticed something over the past few days that kind of bugs me. When I shine lights into the tank the tank water looks a bit cloudy. I don't think it's particulate matter in the water column though because the sump doesn't look particularly cloudy, although I tossed on some filter socks just for kicks and giggles to see if that clears things up. What I think that's happening is because of the insulation foam I put under. I had the silver side up because the other side basically said R-TECH and looked kind of tacky to be looking at through a barebottom tank, but the silver stuff is almost dimpled like old school MH reflectors, I'm thinking the light from the LEDs is going down, then reflecting right back up but because it's not a perfect mirror finish the light is getting scattered. Probably will be absolutely awesome for corals to get light from multiple angles... I'll have to see though as far as how annoying that gets... maybe a few monti caps to have some big shaded areas... frag swap is coming soon isn't it?? :D

Ok, since there's some stuff in the tank, I guess it's only fair to throw up some eye candy. I don't have a fancy camera, it's an older point and shoot but I like it because it has a built in white balance that I can change on the fly to compensate if the lights are too blue. I also noticed my little top-down under the water picture tube is getting some bright haloing around some of the corals. I'm not sure if it's from the aforementioned reflection, or if the clear nature of my camera tube is allowing light to funnel into the lens at odd angles. Either way, a little photoshop magic and I can wipe away a lot of the haze.

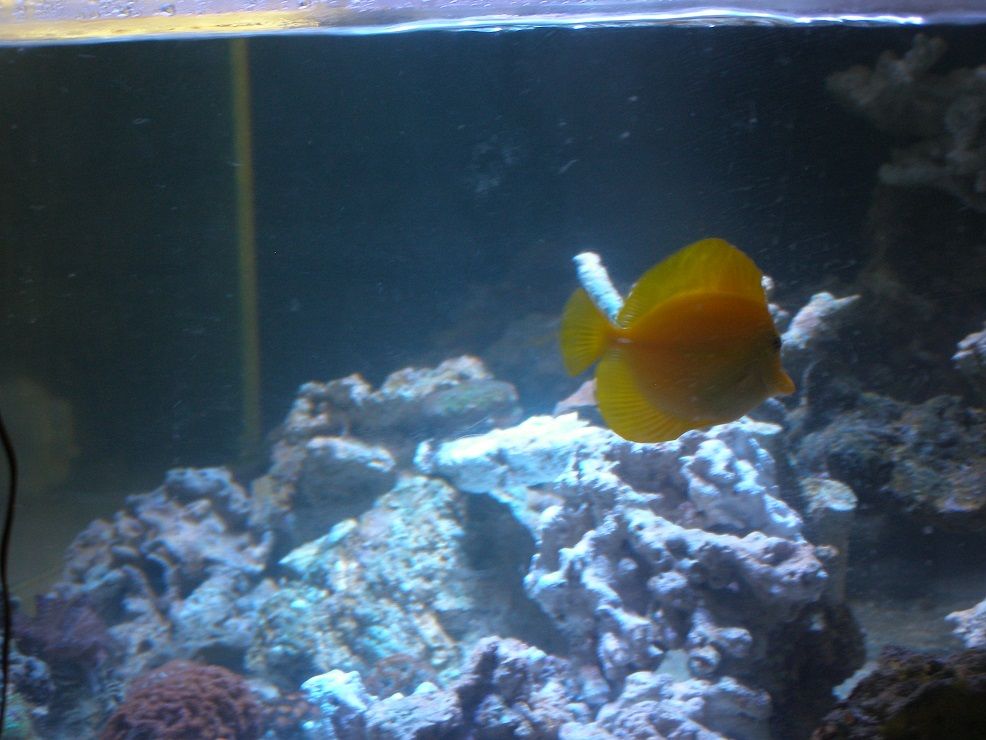
First up, 1 of 3 fish. Only fish picture I've gotten so far. They're getting more comfortable with the tank, definitely can tell they like the space to swim around. Was a bit worried about the yellow tang picking on the purple due to the size difference, I saw a little bit of flashing/chasing but later that night they were both "sleeping" in the same cave area. Also notice the purple does come to hang out near the other 2 when I'm not around (I catch him just as I peek into the room). Oh well, as they get more comfortable I'll see about trying to get more fish pictures.
YellowTang_zps88edeb03.jpg


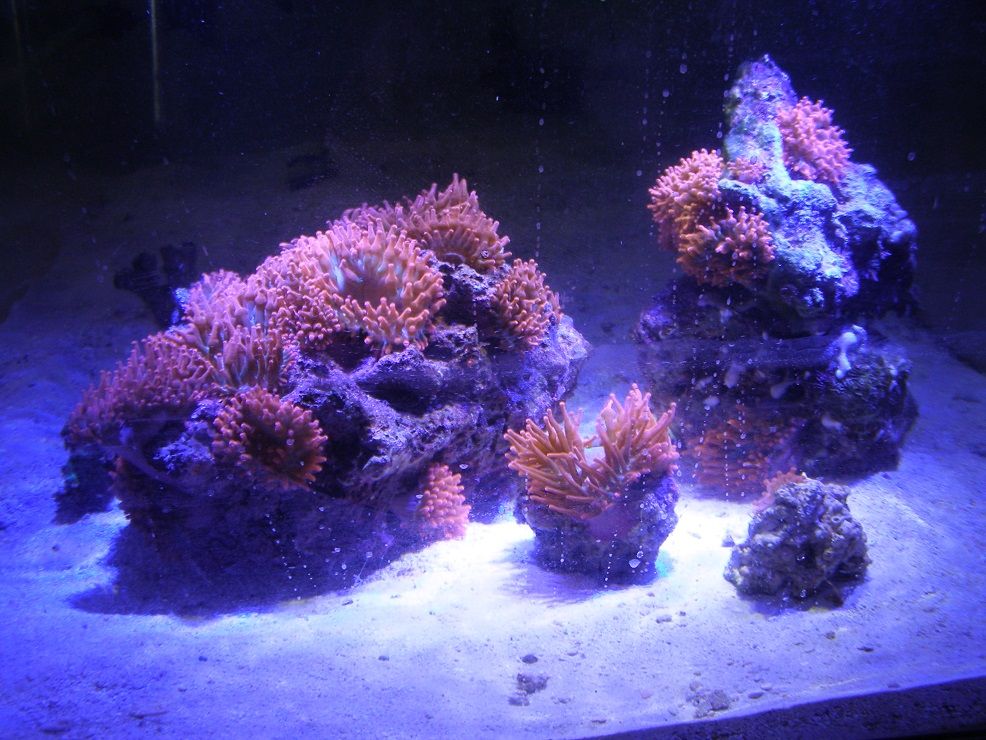
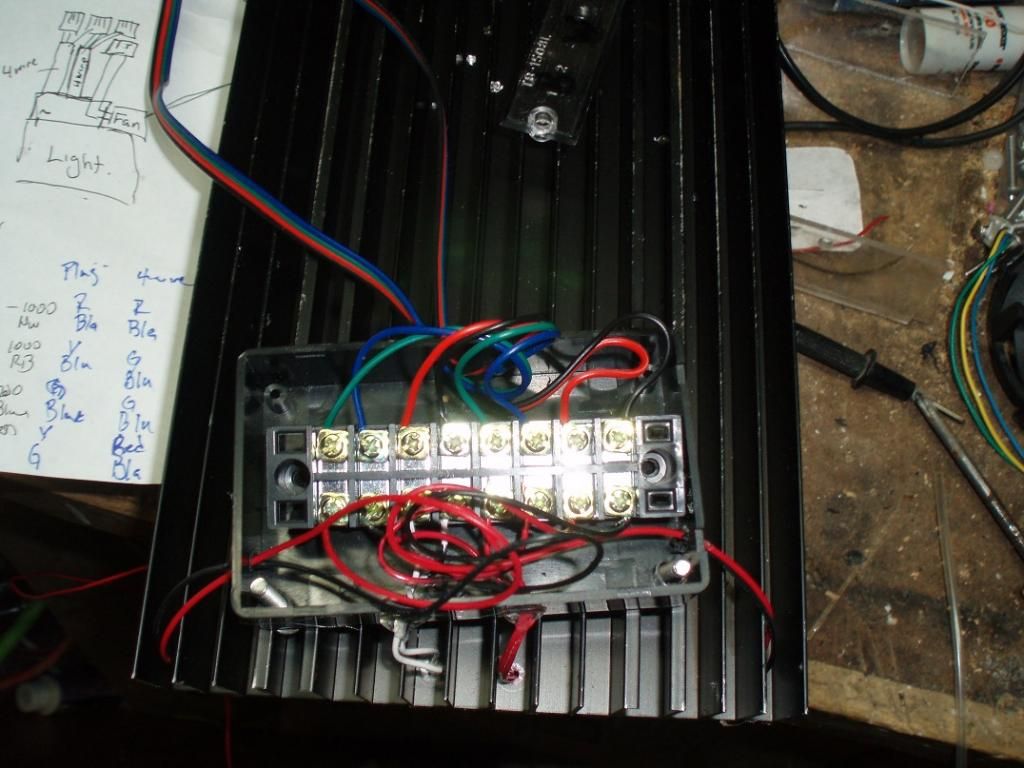
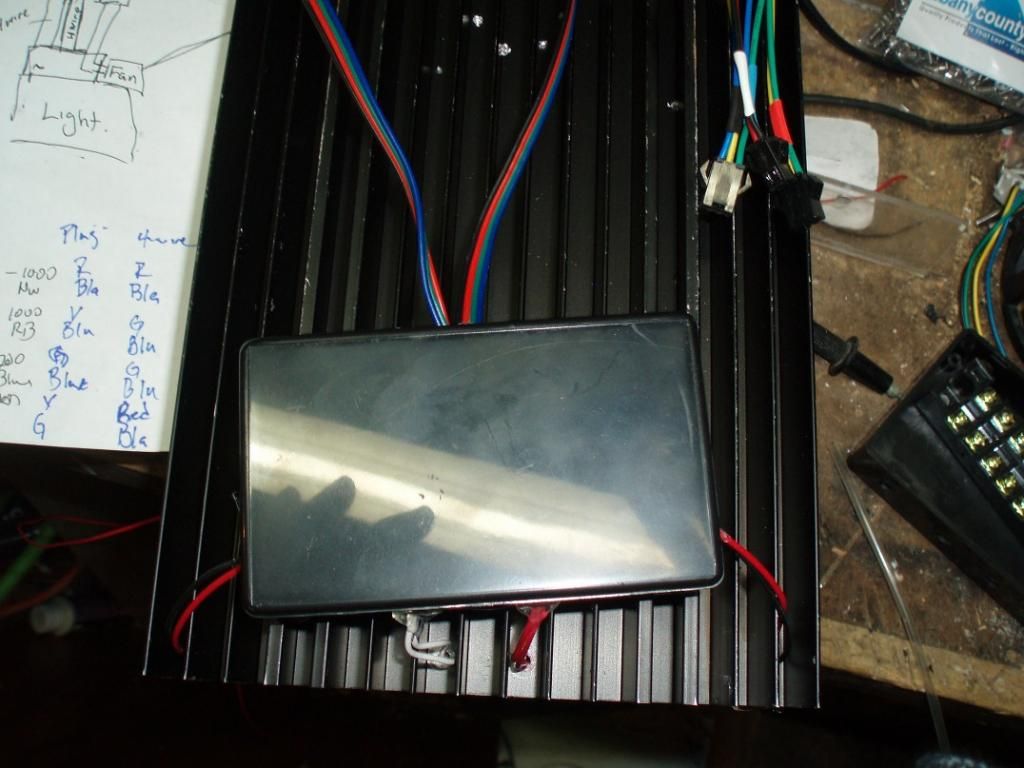
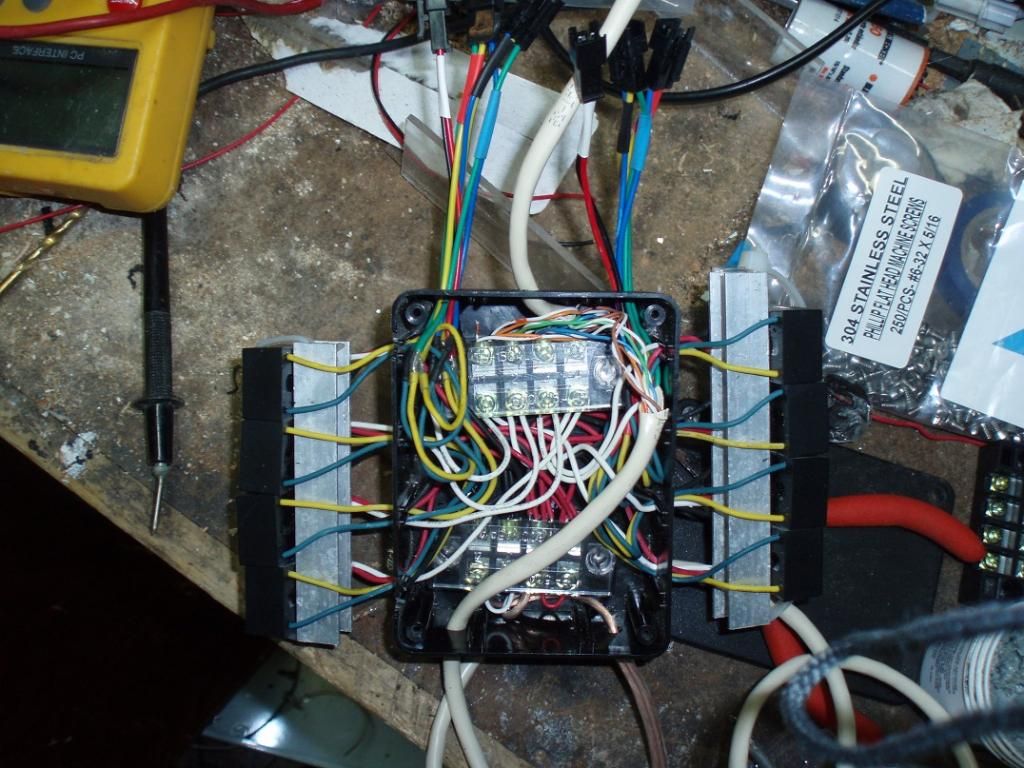
Since I only have 1 LED array up, all the corals got "bunched" into one corner. I kind of half-assed the wiring just so I could get some light over the system and so the corals didn't brown out. I almost got all the pieces I need to throw together my lighting (except enough lenses for the LEDs... but I'll run without lenses for a bit, since I won't have corals all over the place yet). Either way here's the corals through the acrylic (kind of horrible shot)
Corals_zpsed9ff577.jpg


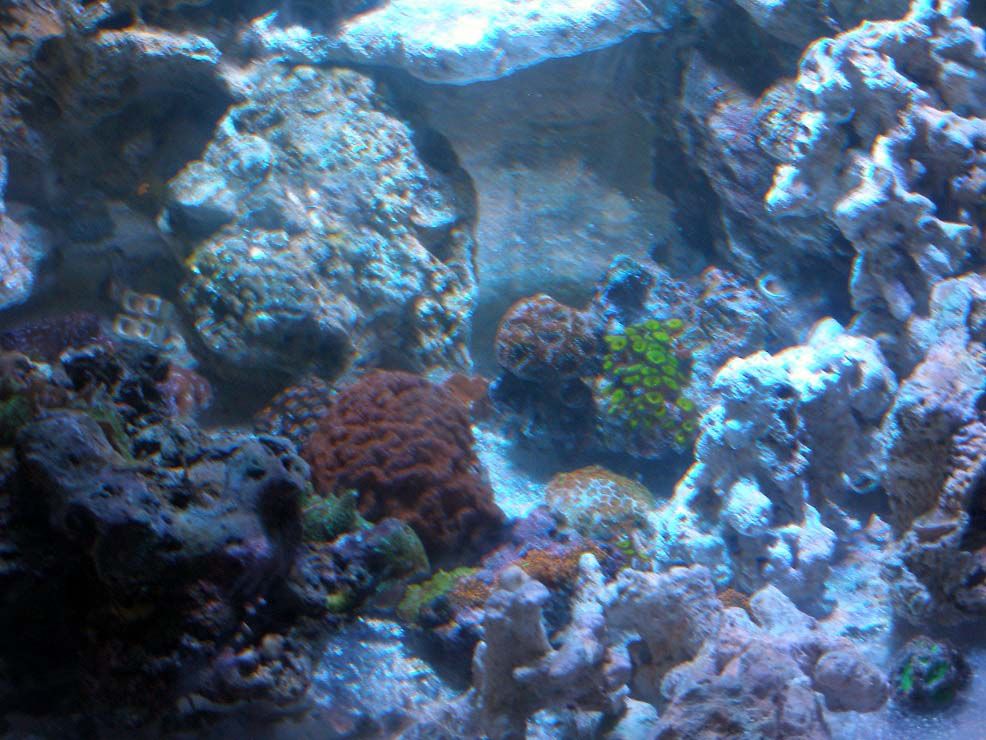
Now for the money shots, the top-down under water shots.
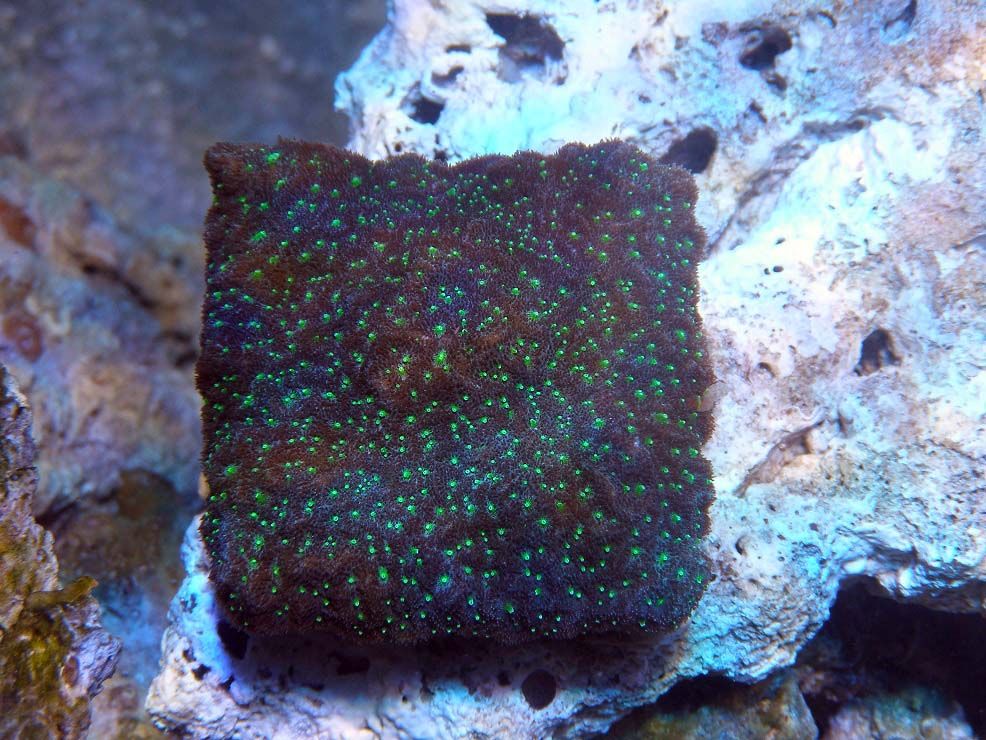
First the drab... but this sps actually survived! Not sure what the hell it is, maybe some encrusting monti? My wife likes this one for some reason because of the green dots, I see brown coral though :|
Monti-Something_zps4f5ebaae.jpg


Next the other SPS that survived! The pink sand dollar monti. It lost quite a bit of it's purple base color, but hopefully it'll color back up, or at least the new growth gets purple. This is coral doesn't fluoresce at all, so blue light or white light doesn't matter.
PinkSanddollar_zps7e88a8d5.jpg


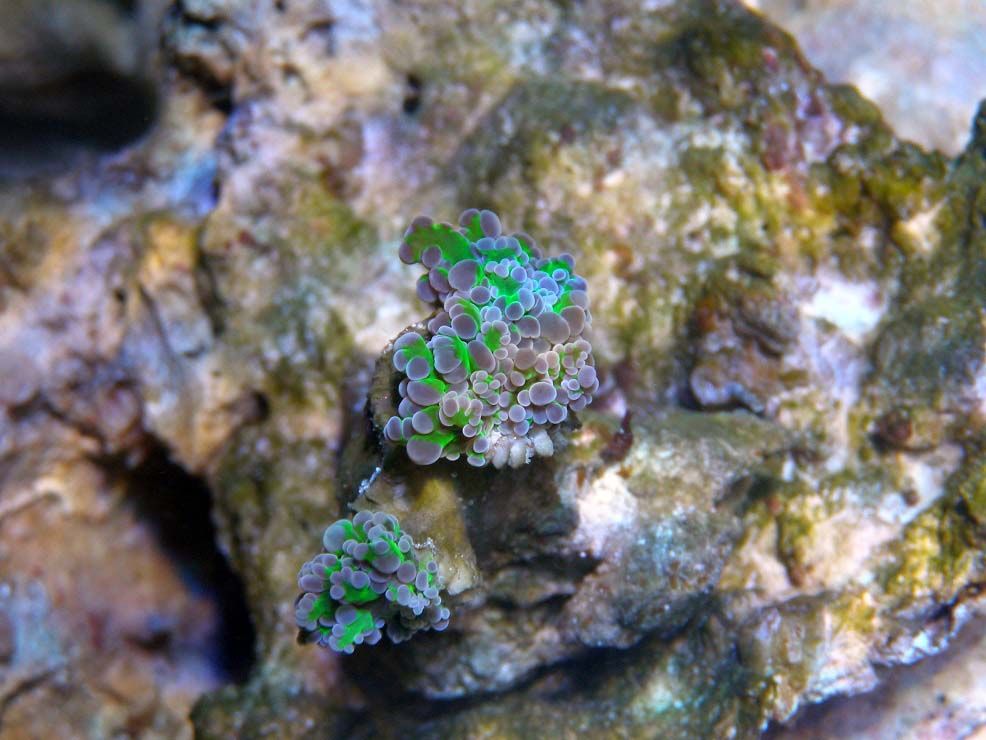
Next up is a frogspawn that ain't too happy. For whatever reason, the fact it's tall branch with a thin base, it kept falling over, it zapped quite a few of my other LPS too when it fell right on them *frown*. But even though it isn't terribly impressive for some reason I absolutely love this picture, there's just something about the way it looked from this angle.
Frogspawn_zps19bc831d.jpg


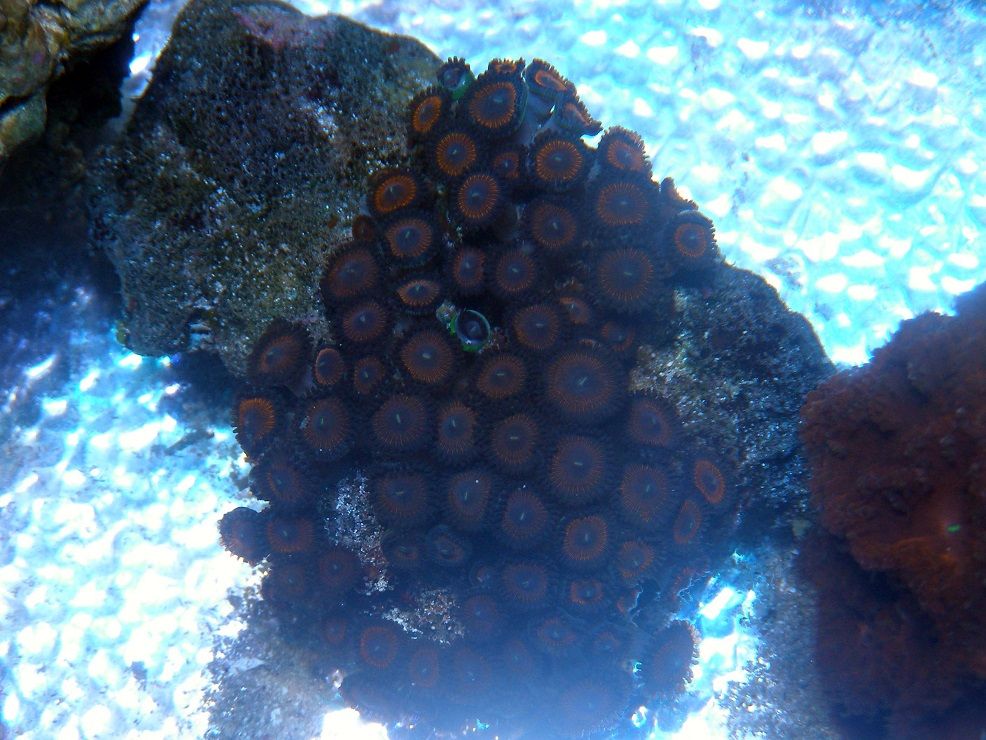
One of my zoa/paly colonies... yanno I really don't know how to tell the difference between zoas and palys... whatever they're all the same. One thing about taking macro shots from the top down is you can always find those little things that your eye tends to miss, whether it's aiptasia, or redbugs, or in this case red flatworms... so looking through all the pictures I found all the rocks that had them, removed them, treated them with flatworm exit, and hopefully none of them jumped off in the tank.
RedZoas_zps23b43e03.jpg


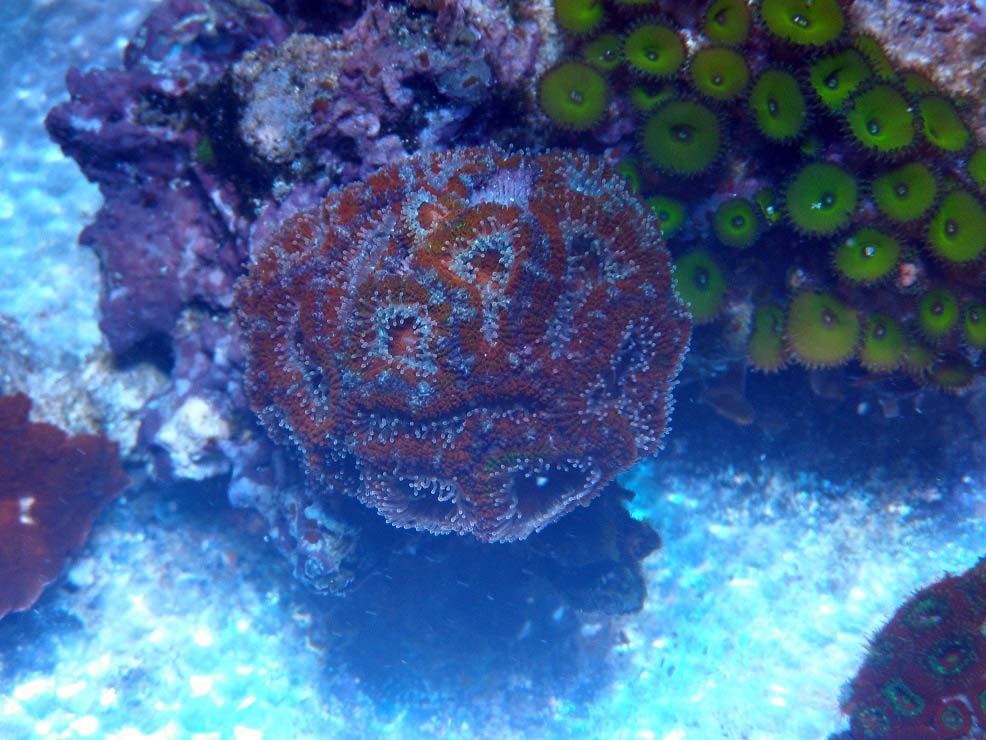
Here's an acan that seemed to have done ok considering all the issues of the old tank, there's one piece of skeleton where a polyp died, but overall it's done ok. Plus some of those green death? nuclear green? the hell if I know they're green palys.
Acan-NuclearGreen_zps3a6dd8ce.jpg


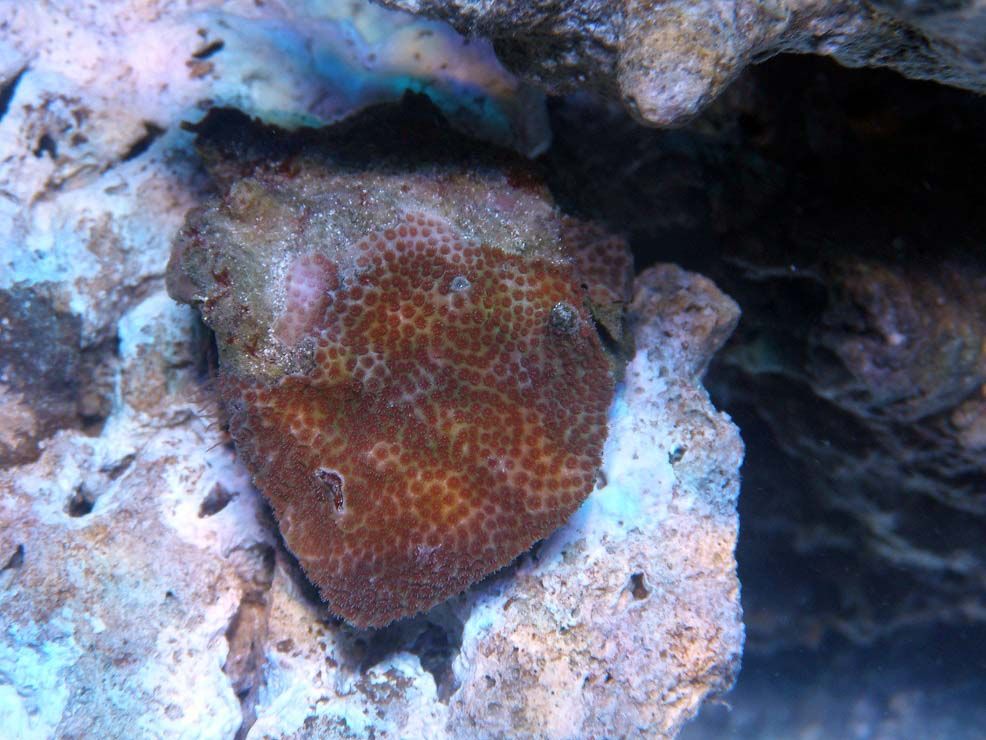
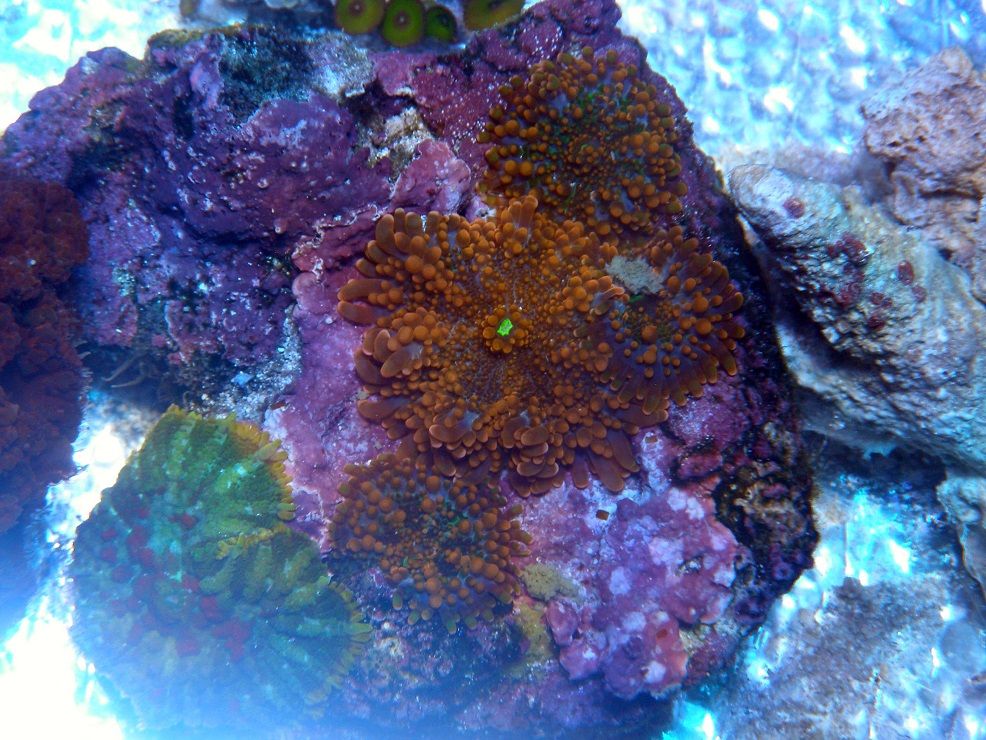
Now some orange yumas, and a super cool green rodactis with a bad case of reef herpies! Actually it's a cool little coral, unfortunately it has never split/reproduce. Will keep an eye on the boundary though hopefully the yumas don't attack it. Got this from way back when Jim had the store in Berkeley.
Yuma-Rodactis_zpsa3cb4cef.jpg


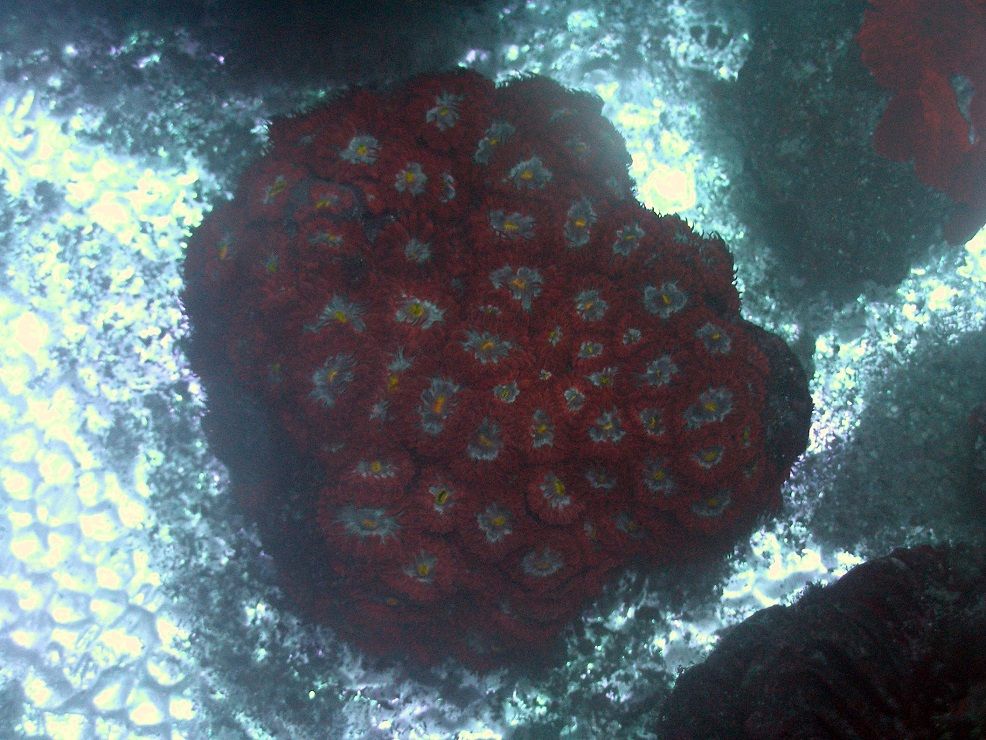
Now I've always been a blastomussa man, unfortunately there's not a huge selection you normally see in the stores. I don't buy online, yet, and I don't travel to those reef shows. So usually what you see is red with greenish/teal center blastomusa welsii. I know there are other color morphs, but I just never see them, and the couple times I did they acted as if those were one of a kind. Well here's one of my first blastos, this a Merletti, originally was red with blue center (Superman Blasto!) but I just noticed the blue is two tone, and there's actually a little yellow mouth! Definitely going to charge $200 per polyp for this guy! :D Here you can see that reflective crap on the foam, welp way too late to change anything about it :D
Blasto_Merletti_zps5999445b.jpg


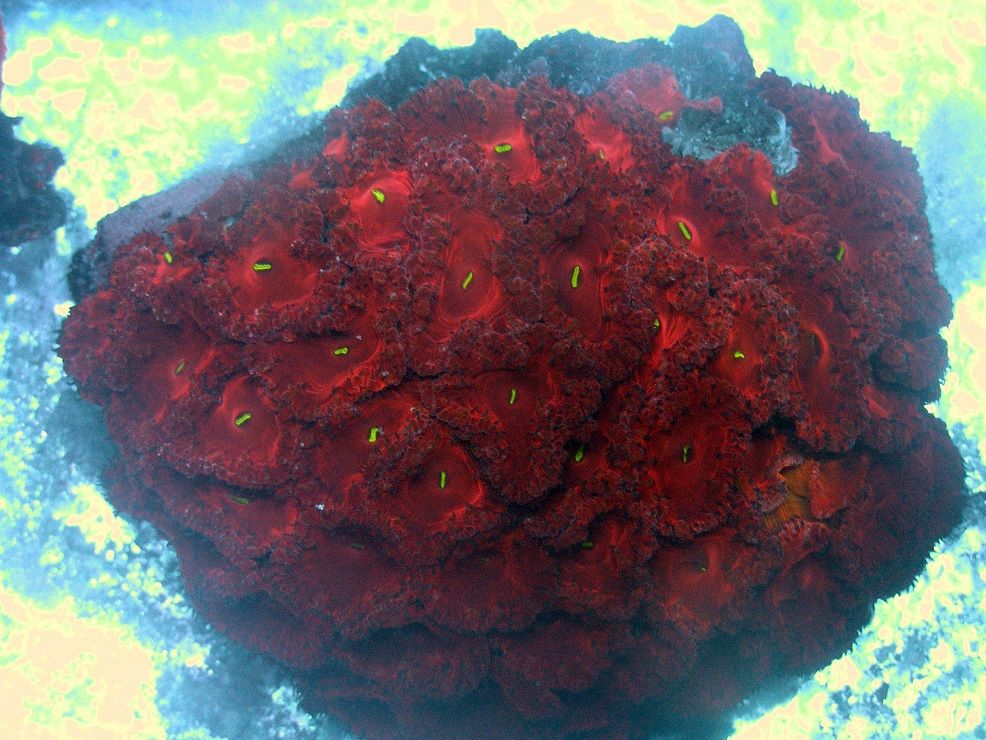
Now here's my Rachmaninov, this was one of the first DBTC I did way way back in the day, probably can't even find it anymore since every one who I gave it to killed it. Oh well I've been keeping it alive and happy. The reality is this coral doesn't look like this to me, this is a photograph thing, I can't see the level of detail that the macro shot gets. I see a red coral with a green mouth, a little bit of ruffle around the edge but that's it. But hey it does photograph pretty! All I need is some black sand to take it against and we're talking $300 a polyp! :D
Blasto_Wellsi_zps2dda83be.jpg


Oh well that's all the eye candy for now. Bob, almost time to get my babies home! :)
 
Ok the story for today is "What is my time worth"

Sidebar: the haziness with the tank seems to have cleared up, I wonder if I didn't still have a bunch of residue from sanding the acrylic in the tank and the filter socks manages to yank it all... or perhaps just the tail end of the cycle haze... whatever it's nice and clear now

Back to my story.

So before this tank became a reality I definitely wanted to go LEDs, however I was going to be picky. I've had my fair share of soldering LEDs, and didn't want to go that route again. There were going to be some standards that I wanted, first and foremost there must be independently controlled channels, I wanted to be able to mix colors as I saw fit, and I wanted that "actinic" time too when the tank is dark but all the fluorescence makes it seem alive. Second it has to be more than just off/on I want my LEDs to ramp up and ramp down in intensity, I've done the above with metal halides and T5s, I'm going with LEDs so I can slow into blue not BLAM blue, the BLAM no blue. Lastly, it had to fit what I liked, and this is one of the reasons why I didn't go with a name brand fixture.

Of name brand fixtures all of them had flaws, on the cheaper side of things was the Maxspect Razor fixture, this is a decent fixture that is actually pretty damn cheap compared to other non-chinesebay fixtures. I was really digging the fixture because it had a built in timer that would ramp up/down lights, however it only had 2 channels of control, so "white" channel (with blues mixed in) and a "blue" channel with some violets ("actinic") thrown in. Also I was waiting for the perfect time to get one, nice (insert holiday here) sale, even 10% off a $500 fixture is $50 off... only to find out they enforce MAP pricing and the fixtures were excluded from any sale out there... sorry manufacturers, I know your argument for MAP, however I don't agree with it and I won't support it. Other fixtures out there like AquaIllumination and Ecotech (also MAP people *grrrr*) had more options, but they were a bit more pricier and they all had another flaw... they think that Red, Green and Amber LEDs are "good" ... to me they are a waste of an LED spot that could be occupied by a royal blue or other useful LED.

So I came up with an idea for a fixture, it was going to be somewhat non-linear, this means clusters of LEDs instead of straight lines. It would have 4 channels, a white channel : Neutral White to be specific since it has a bit of red in there and it isn't as straight mausoleum sterile that cool white can look, a royal blue channel, these would be clustered with the whites to get the benefit of neutral white and the flavor of royal blue, then a general "blue" channel and a violet channel, these last two are linear in nature as these are more my "T5s". So after adding up the costs, I figured I could get 2 home built fixtures for every 1 Razor fixture, and my fixtures is significantly brighter and with more options ;) There's a build thread here I believe, I couldn't find it though, because stupid forum search engine doesn't like searching for 3 letter words like LED.

So Version 1.0 of Mike's Fixture went over the temporary tank, and I loved it, so no need for a Version 2.0. As a side note there were some Black Friday sales at the DIY LED places, and I got everything for about 25% off... suck on that MAP adopters!

Aaaaaaanyways, here's some pictures, here's v1.0. Ugly brown wires coming from it, lots of wire nuts holding everything together... ok the reality is I just tossed this up over the tank to get some lighting on corals in it. But seriously I had an octopus of wires half-assed stapled to the wall .. not pretty at all.
TankFrontcorner_zps802e2bdc.jpg


I wanted a bit more pretty, so by scouring ebay ordering from quite a few Chinese places and waiting, I finally got it done!
v1.1 are changes that are all aesthetic and functional, the LEDs themselves did not change at all. So it's broken up into 3 sections, the first section is the actual fixture itself. Only thing here is a project box with all the wires , and those wires connected to a longer wire with easy disconnect plugs. No wire nuts!
LightFixture_zpsf0f387fa.jpg


And when covered... voila!
LightFixture2_zps388c23db.jpg


The second section is the actual control area. This goes up in the "rafters" above the tank, the DC power from the power supply comes in to here, and the LDD drivers have all their wires connected to the power via screw terminals, then the output of the drivers get attached to other plugs which attach to the corresponding male connection of the lighting fixture. Also used some Cat5 which will carry the PWM signal from the controller. Total distance maybe 2 feet of wire length. Quite a bit of the time was to figure out how I was going to wire everything, with plugs, keeping track of which color corresponds to which channel, yeah I wrote down a cheatsheet :D

Talk about shoving 10 pounds of crap into a 5 pound sack! But seriously, imagine all those wire nuts there, now all of that replaced with a magical black box with some plugs sticking out.
PowerCenter_zps1e378a03.jpg


The third area is where the power is. I've found out the hardware that my power supplies do not like humid air, as they have fans that drive them. So instead I need to keep them outside of the tank enclosure (when that eventually gets created), along with the controller for the lights Ardino based system "Typhon". No pictures of this, because I was too tired to do any more work.

Next up... wiring 2 more of these damn fixtures!
 
Ah ok, that makes sense. I thought the texture along it was a bit too off for it to be a montipora, but not knowing what to call it....

Rockstar Supernova eh? Sweet I'll be able to put that on a frag containers and fool everyone into taking "brown coral" :D
 
Wow, tons of wires. Always exciting.
Your scribbled schematics look pretty much the same as mine.
What I really hate is losing them later, and then trying to figure out which color wire did what....

I think you need to learn to love soldering. All those screw terminals.....
(Key is to have a good quality soldering iron)

I think going with Neutral White was a smart choice. I mixed that and cool white, but
wished I had done all neutral, and ditched the red leds I added.

My old build thread is here if that is what you were referring to:
http://www.bareefers.org/forum/index.php?threads/improved-color-led-thread.10227/

Did you end up using lenses?

Typhon system looks like fun.
But a minor note: Be careful of how many fixtures each PWM controls.
The Atmel chip cannot output that much current, and R/C can add up.
All depends on the driver you connect it to though.
 
Yeah tell me about it (re: schematic) I was trying to read what the hell the top of one column was... "WTF did I write... I wrote it yesterday and I can't remember", figured it was labeling color of wires to channels. I'm actually thinking of making it look pretty, laminating it and shoving a tiny copy of that into every box :D

As to the soldering, I don't mind it, all those plugs you see are soldered to wires. The reason why I went with screw terminals is for multiple wire setups, for instance there are 8 drivers, so 8 Vin+ attaching to 1 DC+ wire, as I could have maybe done a screw nut, but 9 wires in one nut is bound to have something slip.. .could I have soldered the whole mess together? Again sure... but eh, add a little heat whoops one popped off, add a little heat crap another popped off, figured the screw terminals would just make things overall easier. The other terminal is for the PWM signal, 2 drivers per channel a little easier and yeah a wire nut probably would have been easier in this case but... whatever I feel more accomplished cramming all that crap into one box... which I did need to double check because first I figured 2 channels were tied together (dumbass me soldered the plugs on backwards... after soldering all day colors started to blend together) and then I realized that I wired them all in reverse order but that was an easier fix... I simply rewrote my schematic color drawing :D

The thread I was referring to was actually one where I showed off my LED fixture I built. It was easier to find the one I did on RC
http://www.reefcentral.com/forums/showthread.php?t=2266879
Basically just shows the process of building the thread.

As to the lenses, I did on the first fixture, and while rewiring it up noticed just about all of them were off center, but still is super bright, so I'll more likely than not need to reattach all of them. I'm holding off on the other fixtures for now until they're all done so I can see the effect on the tank. It's fairly obvious with the lenses I put the fixture much higher, hell when I had the BAR PAR meter I took data that showed me that easily. I know the eye is a very poor gauge of brightness differences, maybe after it's all done I'll borrow the club's PAR meter again and take some actual data. The lenses I went with though were cheaper ones than what the DIY places sell theirs for (about $1 each) where as the ones I got 50 for $10, I took data with them and they actually worked about the same as far as PAR values.

As to the Typhon driver, do you know the max? I'll have 4 drivers off any one channel of the signal at most, for now :D, if it's not sufficient I'll go to another driver. Not to knock some of the "name brand" controllers off there but their LED control seems equally limited and consider the module cost the same if not more than this Ardino based LED controllers it's a bit sad. Who knows that Storm controller out there looks kind of neat too, with more PWM control :D
 
I know the Atmel chip can provide up to 40 mA of current per PWM pin, and 150 mA total.
But I do not know how/if the Typhon buffers that.
It must for the 10V output. But for the 5V, probably not.

So depends on your driver, the peak input current, and the voltage.
 
Back
Top