Part of the reason for me to be in this hobby is that there are so many interesting toys that I can play with, and part of the fun with these toys are to make them myself. I have made a few things now. Even though they work fine, it is hard to make them NOT to look like DIY. Recently, I started 5 LED projects for all of my lights (big mistake as they take so much time, energy, and $$$). 3 of them are in canopies (for the two main display tanks) or in the stand (fuge light), one is an actinic light for an Sunpod, and the last one a complete LED light fixture for my 12G nanocube. Since this last one is a complete fixture displaying on top of the tank, I want to try to make it look as the real thing as possible. So no corner was cut and effort was saved. I finally have the unit done last weekend, and wanted to test it on my nano tank for a week to make sure it works reliably before posting it here. It almost fit perfectly and worked, but I made the mounting feet a little too tight squeezing the tank (I did not want it to fall off if someone pushed on it). This was I found myself in a pod of water on the floor and the tank glass cracked. I almost decide to just take down the tank, but looking at the custom made light, I decide to give it one more try. Thanks to Steve, after a whole day of running around, I have another nanocube up and running the same as before, except the new one has cloudy water due to new sand and is empty  .
.
Too much talk, I will let the pictures show itself.
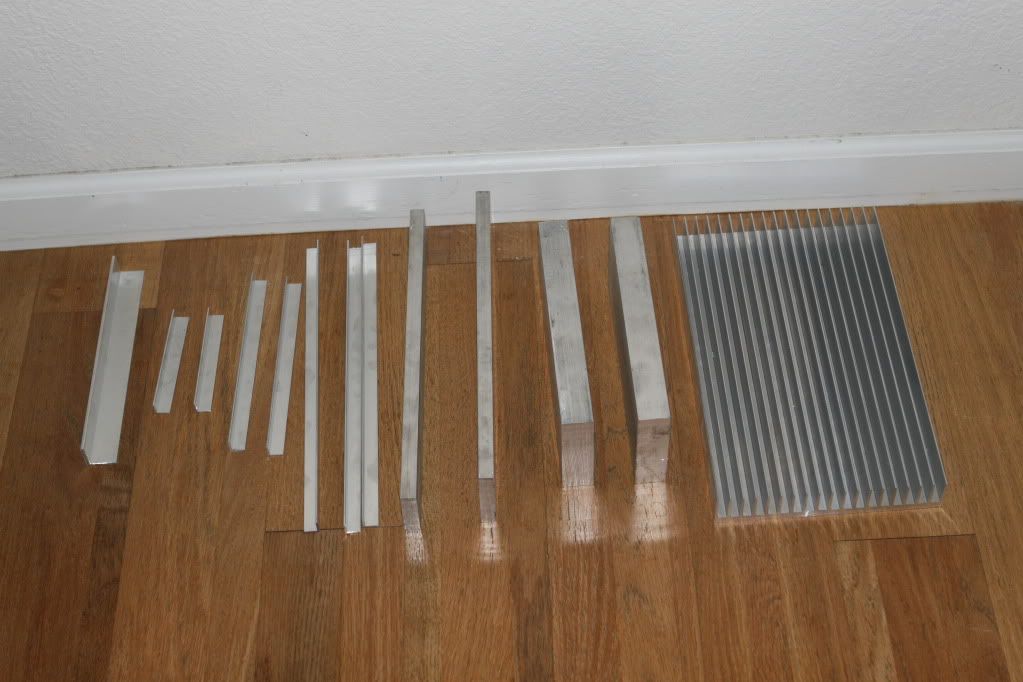
Initial parts cut to the right size (I never did so much aluminum cutting in my whole life). I want to build something with simple clean lines and solid, therefore some of these solid aluminum bars.
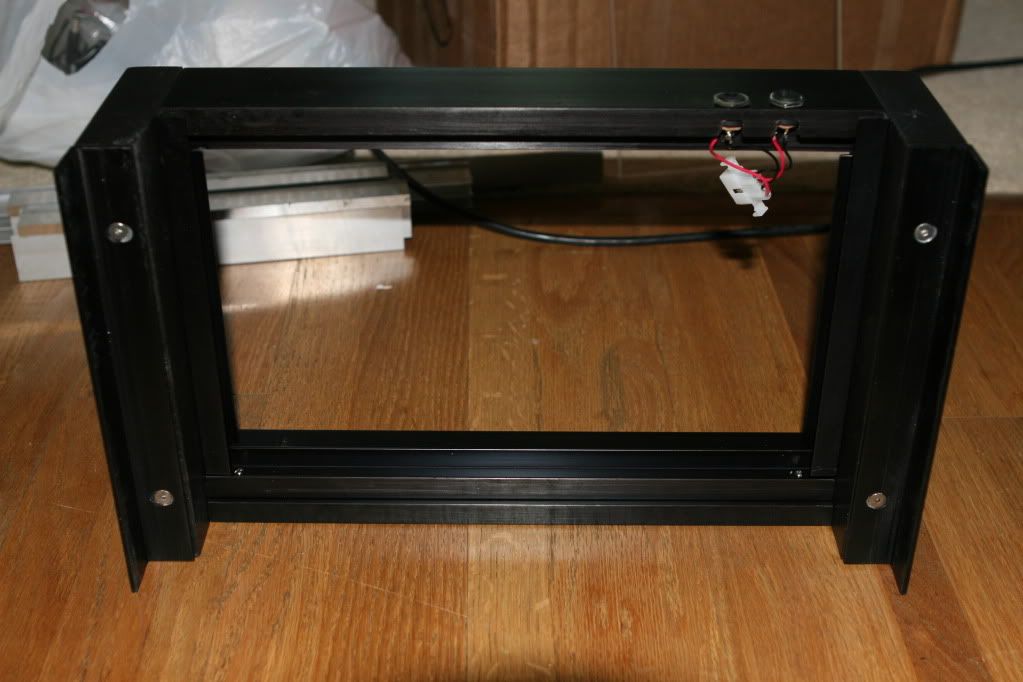
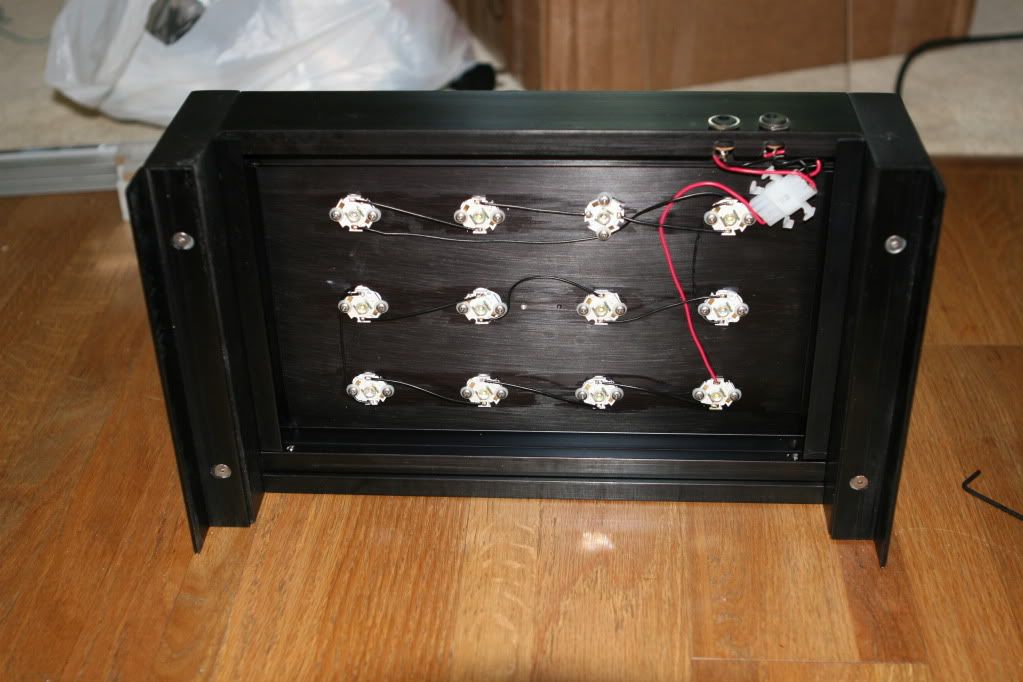
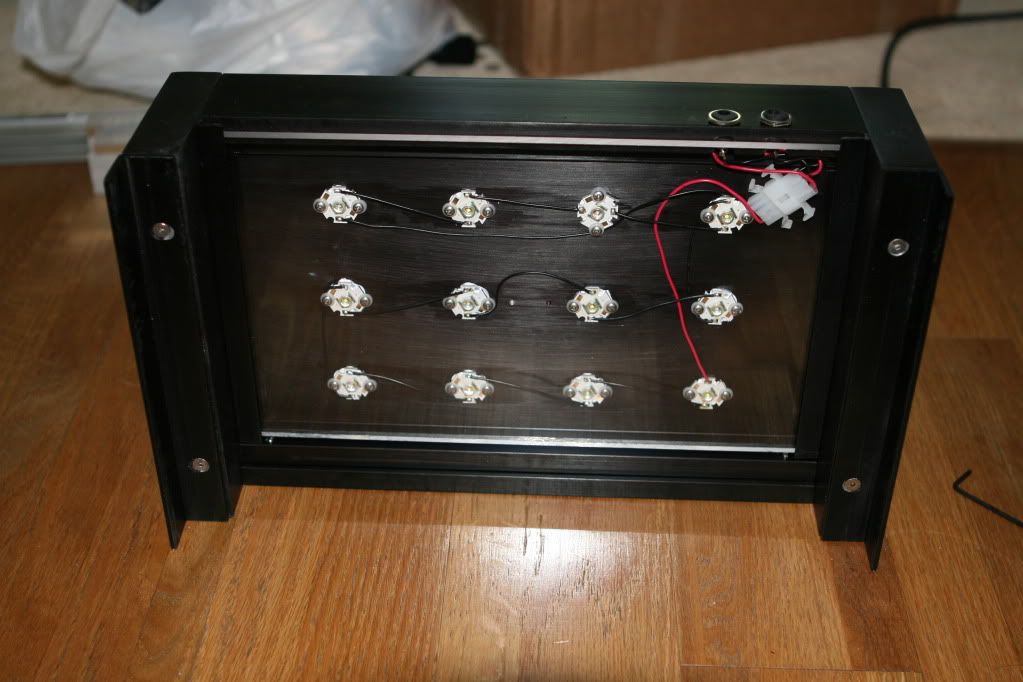
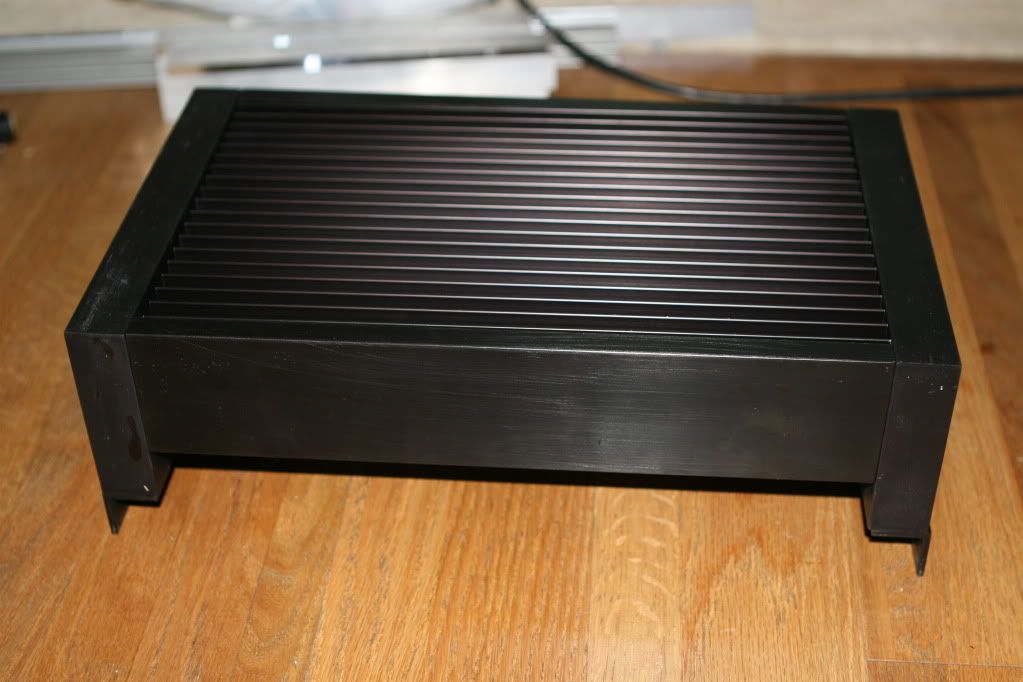
Everything black anodized and assembled.
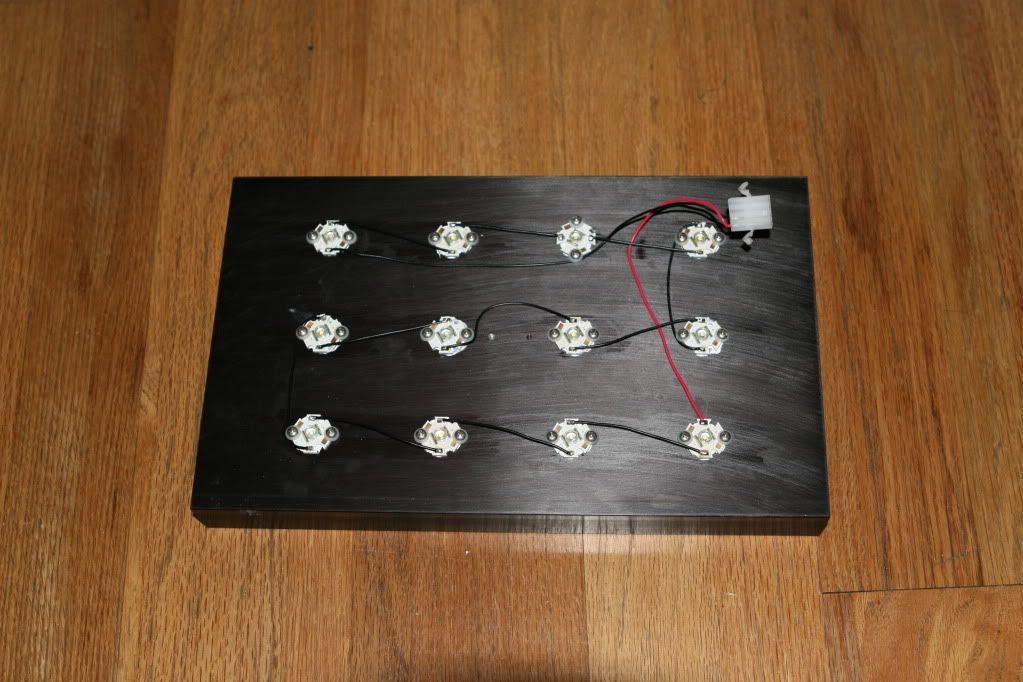
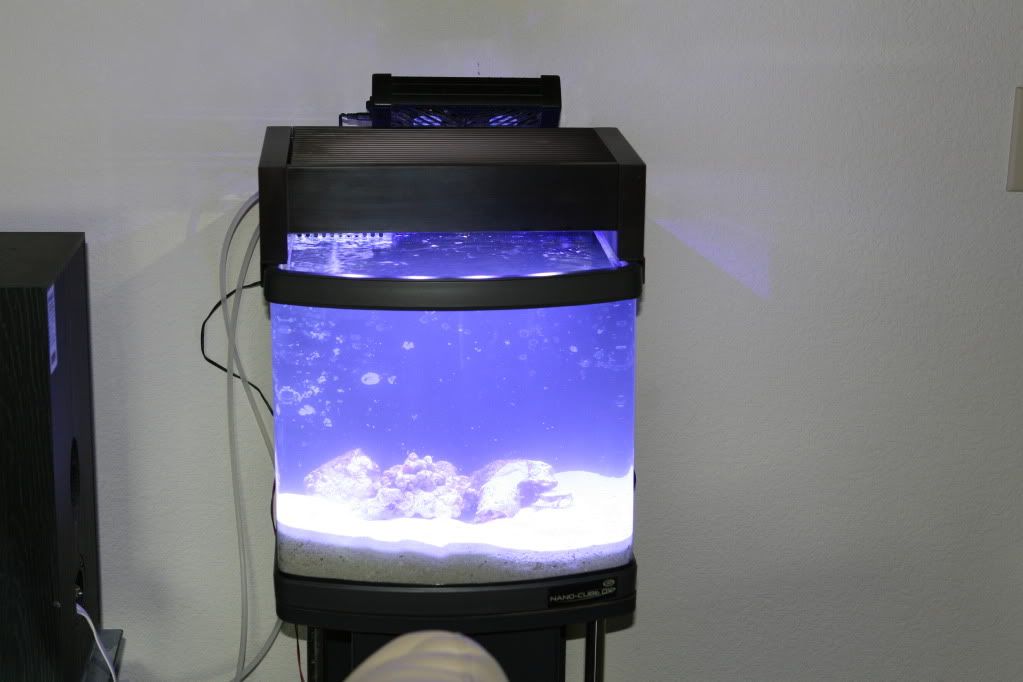
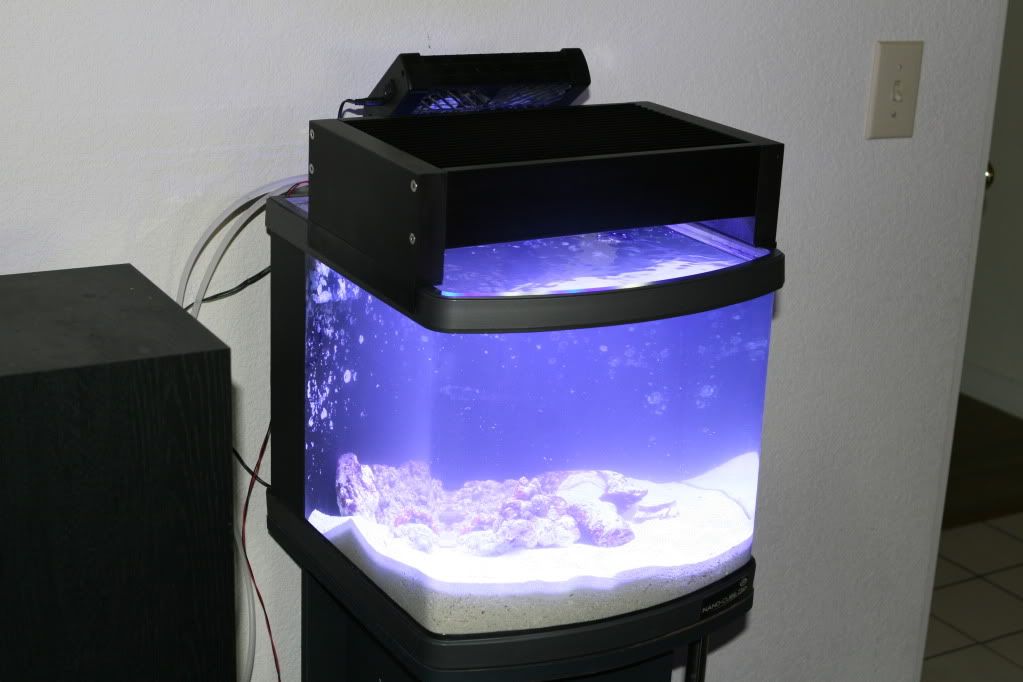
Placed on the new empty new cloudy tank today. I should have taken pictures on my old tank with corals, but I never thought it would crack. So you just have to take my words for now. The color of the LED lighting just blow away my old 70w 14k MH. It has a dimmable Meanwell driver, controlled by a 1.25v-10v voltage controller made by myself using a LM317T and some resistor/pot. I currently dial it so the whole fixture only consume 30w. Given the Meanwell driver is 85% efficient, the LEDs are consuming only 25.5w. The 12 LEDs are rated for 36w, so I still have plenty of room to dial it brighter. Even with the setting it has now, it is a lot brighter than my old 70w MH.
76/tonggao/?action=view¤t=IMG_4092.jpg" target="_blank">
I had a guy coming over to pick up my old MH light, and he keep on questioning me if I really made the fixture myself. So I am happy at least one person couldn't tell it is DIY. I know Phong is going to ask how much it costed, so here it goes using the assumption that my tens of hours of time and the tools I bought for this are free.
1/2" x 2 1/2" x 12" flat aluminum bar, `1/2" x 2" x 12" flat aluminum bar, and two 1" x 3 1/2" x 8 5/16" flat aluminum bars: $52
One Meanwell ELN-60-48D dimming controller: $42
Diming controller parts: ~$10
12v power supply for the diming controller: $5
7.29” x 12” medium heatsink cut into two: $35 (including shipping)
6 Cree XR-E Q5 CW LED: 6 * $5.76 = $40 (including shipping)
6 Cree XR-E RB LED: 7 * $5.76 = $40
Arctic Silver thermal compound: $12
Various aluminum bars bought from Lowes: ~$40
various stainless steel screws and miscs: $20
Anodizing: $75
Total: $371 (if I add in the cost of the water damage caused by the cracked tank because of this project, the number probably will jump a digit).
Not cheap, but not bad at all compare to the market price. Plus the fun with this project is priceless. But honestly, I had enough fun playing with metals and electronics for a while, and it will be a drag to finish my other LED project (still two more ongoing projects).
.Too much talk, I will let the pictures show itself.
Initial parts cut to the right size (I never did so much aluminum cutting in my whole life). I want to build something with simple clean lines and solid, therefore some of these solid aluminum bars.

Everything black anodized and assembled.


Placed on the new empty new cloudy tank today. I should have taken pictures on my old tank with corals, but I never thought it would crack. So you just have to take my words for now. The color of the LED lighting just blow away my old 70w 14k MH. It has a dimmable Meanwell driver, controlled by a 1.25v-10v voltage controller made by myself using a LM317T and some resistor/pot. I currently dial it so the whole fixture only consume 30w. Given the Meanwell driver is 85% efficient, the LEDs are consuming only 25.5w. The 12 LEDs are rated for 36w, so I still have plenty of room to dial it brighter. Even with the setting it has now, it is a lot brighter than my old 70w MH.

76/tonggao/?action=view¤t=IMG_4092.jpg" target="_blank">
I had a guy coming over to pick up my old MH light, and he keep on questioning me if I really made the fixture myself. So I am happy at least one person couldn't tell it is DIY. I know Phong is going to ask how much it costed, so here it goes using the assumption that my tens of hours of time and the tools I bought for this are free.
1/2" x 2 1/2" x 12" flat aluminum bar, `1/2" x 2" x 12" flat aluminum bar, and two 1" x 3 1/2" x 8 5/16" flat aluminum bars: $52
One Meanwell ELN-60-48D dimming controller: $42
Diming controller parts: ~$10
12v power supply for the diming controller: $5
7.29” x 12” medium heatsink cut into two: $35 (including shipping)
6 Cree XR-E Q5 CW LED: 6 * $5.76 = $40 (including shipping)
6 Cree XR-E RB LED: 7 * $5.76 = $40
Arctic Silver thermal compound: $12
Various aluminum bars bought from Lowes: ~$40
various stainless steel screws and miscs: $20
Anodizing: $75
Total: $371 (if I add in the cost of the water damage caused by the cracked tank because of this project, the number probably will jump a digit
).Not cheap, but not bad at all compare to the market price. Plus the fun with this project is priceless. But honestly, I had enough fun playing with metals and electronics for a while, and it will be a drag to finish my other LED project (still two more ongoing projects).