Some of this is in my tank journal, but I decided to make a special thread.
I have always been a fan of plywood tanks. Almost built my main tank out
of plywood / glass. But chickened out. Just too big.
But sumps and refugiums are great to make out of plywood.
Especially since there is really no need for any viewing window.
The big advantages:
* Pretty cheap. (About the only thing cheaper is rubbermaid bins and such)
* Can be built to pretty much any shape.
* Very well insulated. (Wood itself, but also easy to add insulation)
* Use standard woodworking tools.
* Good strength/weight (If engineered that way)
Problems:
* You need to make sure they do not leak. Especially seams.
* Opaque. (Not always a problem)
* Take some woodworking skills.
Caveat : Do not attempt a big plywood tank if you do not have a decent set of power tools.
In particular, a table saw is pretty mandatory.
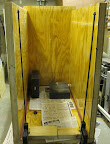
THE PLAN:
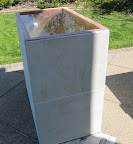
Box will be 40" long, 24" wide, and 40" tall. Water level about 4" below top at max.
It ends up being 115 Gallons. A good percentage of a 250 gallon tank.
Everything except epoxy was bought locally at Lowes. Even the thin acrylic. Cheaper than Tap.
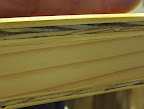
Construction: Basically, the walls will be a laminate:
* 1/8" Acrylic
* 3/8" Plywood
* 1" Stringers(studs) / insulation foam (between studs)
* 1/4" Plywood.
The Acrylic will be glued to Plywood with epoxy. (Sand Acrylic first)
Ply/stringers are glued with waterproof wood glue, and screwed.
It all acts like a big I-beam, so while plywood is only 5/8" total, it should be equivalent to 1" or more.
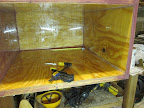
There will be a small top beam across the top in the middle as well, since a 40" span is fairly large.
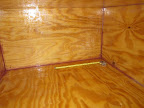
A big bead of thickened epoxy will be used where all the walls/floor meet.
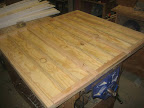
Pictures to follow.
I have always been a fan of plywood tanks. Almost built my main tank out
of plywood / glass. But chickened out. Just too big.
But sumps and refugiums are great to make out of plywood.
Especially since there is really no need for any viewing window.
The big advantages:
* Pretty cheap. (About the only thing cheaper is rubbermaid bins and such)
* Can be built to pretty much any shape.
* Very well insulated. (Wood itself, but also easy to add insulation)
* Use standard woodworking tools.
* Good strength/weight (If engineered that way)
Problems:
* You need to make sure they do not leak. Especially seams.
* Opaque. (Not always a problem)
* Take some woodworking skills.
Caveat : Do not attempt a big plywood tank if you do not have a decent set of power tools.
In particular, a table saw is pretty mandatory.
THE PLAN:
Box will be 40" long, 24" wide, and 40" tall. Water level about 4" below top at max.
It ends up being 115 Gallons. A good percentage of a 250 gallon tank.
Everything except epoxy was bought locally at Lowes. Even the thin acrylic. Cheaper than Tap.
Construction: Basically, the walls will be a laminate:
* 1/8" Acrylic
* 3/8" Plywood
* 1" Stringers(studs) / insulation foam (between studs)
* 1/4" Plywood.
The Acrylic will be glued to Plywood with epoxy. (Sand Acrylic first)
Ply/stringers are glued with waterproof wood glue, and screwed.
It all acts like a big I-beam, so while plywood is only 5/8" total, it should be equivalent to 1" or more.
There will be a small top beam across the top in the middle as well, since a 40" span is fairly large.
A big bead of thickened epoxy will be used where all the walls/floor meet.
Pictures to follow.