Yep that's right. I started another diy reef project! This time it's a phosban reactor overflow box wave maker chiller feline tank-viewing pedestal frag rack calcium reactor!
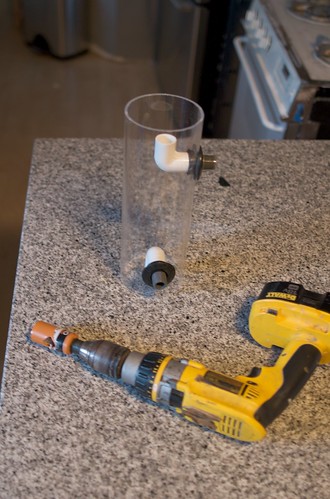
Here are the parts
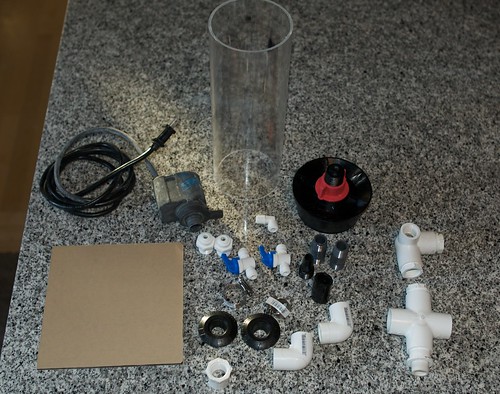
- 4" diameter acrylic tube (I had a scrap piece lying around from an old skimmer project)
- square piece of acrylic (I also had scrap of this from the overflow I built)
- old maxijet 1200 (this was lying around too.)
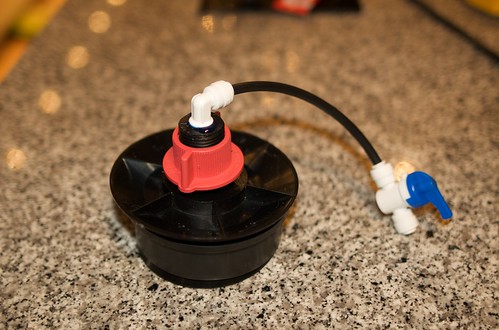
- 4" drain cleanout plug
- a whole bunch of plumbing parts.
This piece in particular is of note
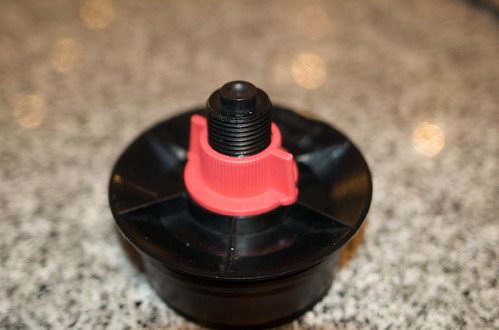
It goes in the end of a 4" pipe and when you turn the thumbscrew on top, it compresses the rubber bit making a tight seal. I've seen a lot of different designs for DIY calcium reactors. A lot of them use what looks like a trouble-prone gasket assembly and I really wanted something simpler. I was very excited to find this part. :-D
Now on to the reactor body. I just drilled two 1 1/4" holes and installed uni-seals for the plumbing connections.
With the holes drilled and uniseals installed, it was time for a dry fit.
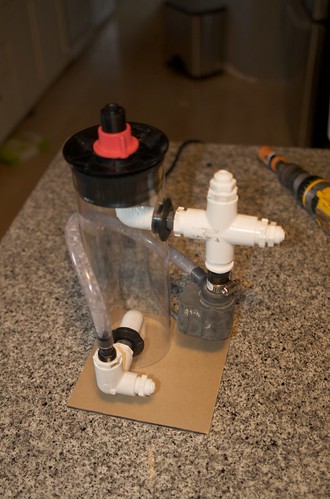
As you can see, there are three john guest fittings. The one at the bottom is the effluent output. The other two are the tank water and CO2 inputs. I accidentally got the wrong barb fitting (I got a straight one and I need a 90) so for now the tube from the pump goes around the back of the reactor. That's fine, though. I can easily swap out the barb fitting and cut the tube shorter later.
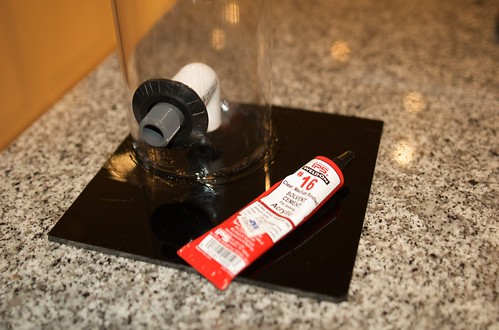
Everything was looking good, so went ahead and attached the reactor body to the base with weld-on #16. As you can see, I'm not very skilled at acrylic work. It holds water though, and that's really what counts.
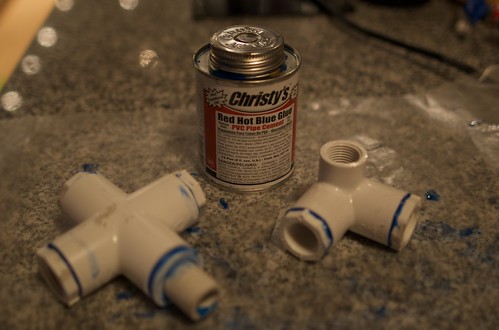
After that, I glued up the PVC pieces using my very favorite type of hot blue glue: red!
So far so good. Next I added a bleed valve to the top of the plug. The threaded part of the plug is hollow , so all I needed to do was cut off the top, tap threads into it, and glue in a john guest fitting.
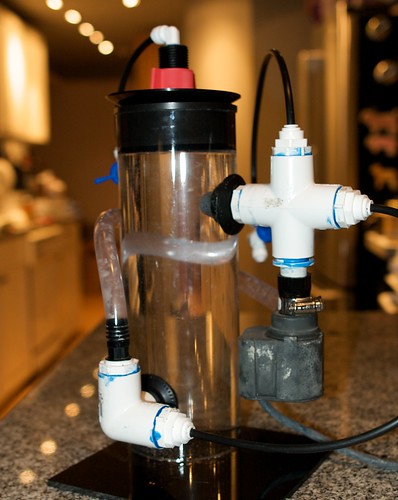
With that done it was just a matter of screwing the pieces together with a little teflon tape and it was done! Unfortunately there's a slight leak around the maxijet's gasket. I'm not quite sure what I'm going to do about that. I also feel a little skeptical of the uniseals. I had a bit of a leak in both of them at first, but after sanding the edges of the holes they're in it seems to be okay now.
Oh, and I guess I should get some calcium carbonate medium and a CO2 tank!
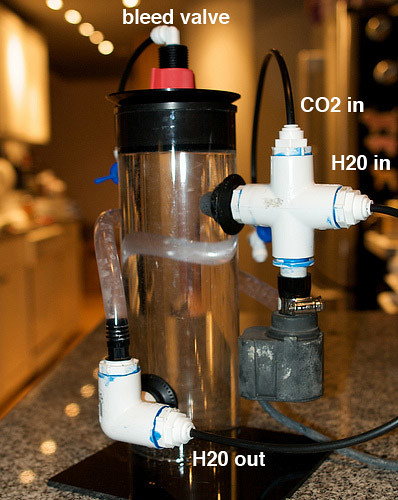
Anyway, here's one more shot of it filled with water and running.
http://farm4.static.flickr.com/3439/3208037465_8d75463bf7.jpg?v=0
Here are the parts
- 4" diameter acrylic tube (I had a scrap piece lying around from an old skimmer project)
- square piece of acrylic (I also had scrap of this from the overflow I built)
- old maxijet 1200 (this was lying around too.)
- 4" drain cleanout plug
- a whole bunch of plumbing parts.
This piece in particular is of note
It goes in the end of a 4" pipe and when you turn the thumbscrew on top, it compresses the rubber bit making a tight seal. I've seen a lot of different designs for DIY calcium reactors. A lot of them use what looks like a trouble-prone gasket assembly and I really wanted something simpler. I was very excited to find this part. :-D
Now on to the reactor body. I just drilled two 1 1/4" holes and installed uni-seals for the plumbing connections.
With the holes drilled and uniseals installed, it was time for a dry fit.
As you can see, there are three john guest fittings. The one at the bottom is the effluent output. The other two are the tank water and CO2 inputs. I accidentally got the wrong barb fitting (I got a straight one and I need a 90) so for now the tube from the pump goes around the back of the reactor. That's fine, though. I can easily swap out the barb fitting and cut the tube shorter later.
Everything was looking good, so went ahead and attached the reactor body to the base with weld-on #16. As you can see, I'm not very skilled at acrylic work. It holds water though, and that's really what counts.
After that, I glued up the PVC pieces using my very favorite type of hot blue glue: red!
So far so good. Next I added a bleed valve to the top of the plug. The threaded part of the plug is hollow , so all I needed to do was cut off the top, tap threads into it, and glue in a john guest fitting.
With that done it was just a matter of screwing the pieces together with a little teflon tape and it was done! Unfortunately there's a slight leak around the maxijet's gasket. I'm not quite sure what I'm going to do about that. I also feel a little skeptical of the uniseals. I had a bit of a leak in both of them at first, but after sanding the edges of the holes they're in it seems to be okay now.
Oh, and I guess I should get some calcium carbonate medium and a CO2 tank!
Anyway, here's one more shot of it filled with water and running.
http://farm4.static.flickr.com/3439/3208037465_8d75463bf7.jpg?v=0