Reef nutrition

Acrylic Cover for DIY LEDs

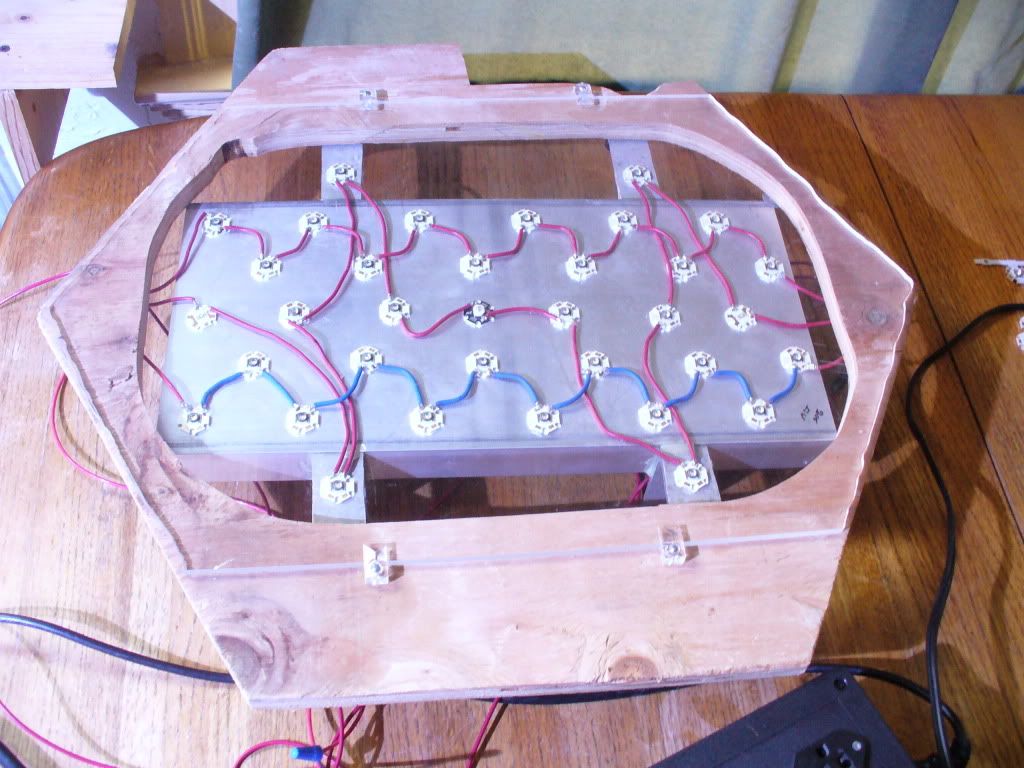
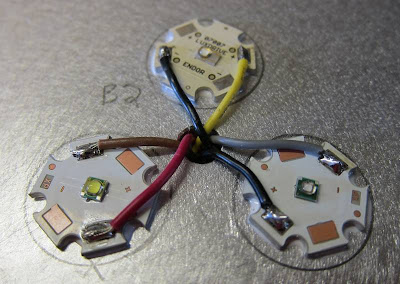
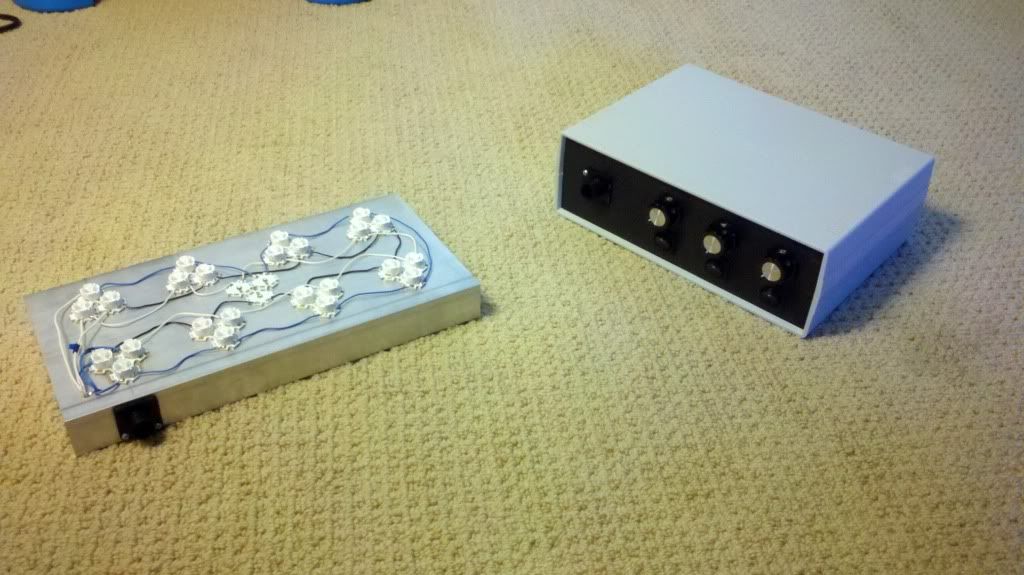
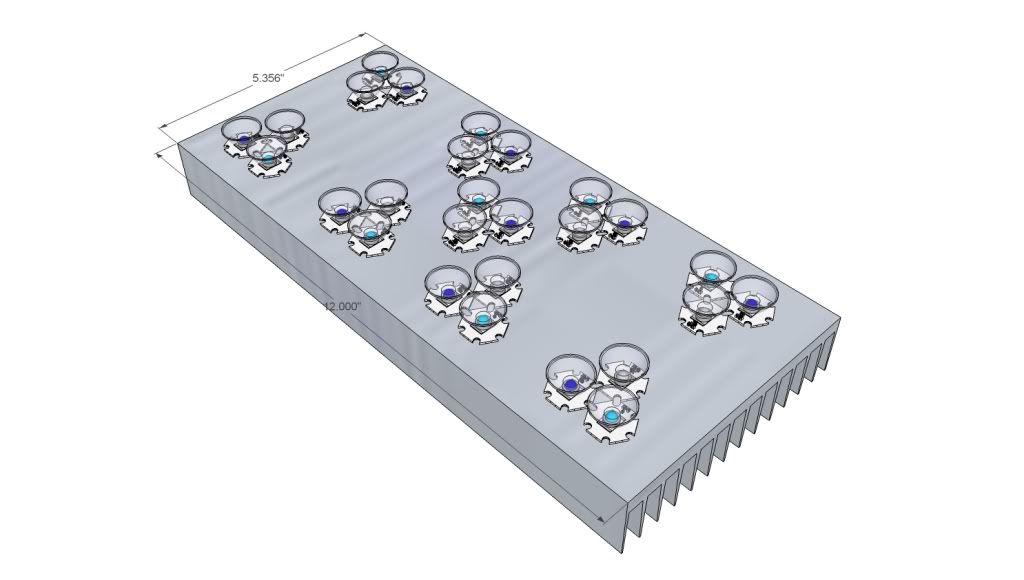
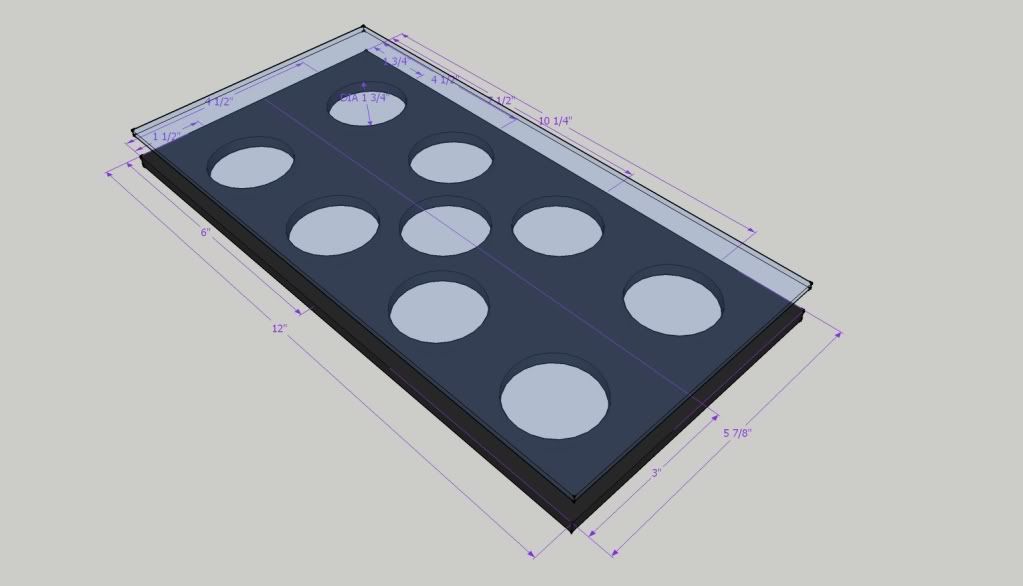
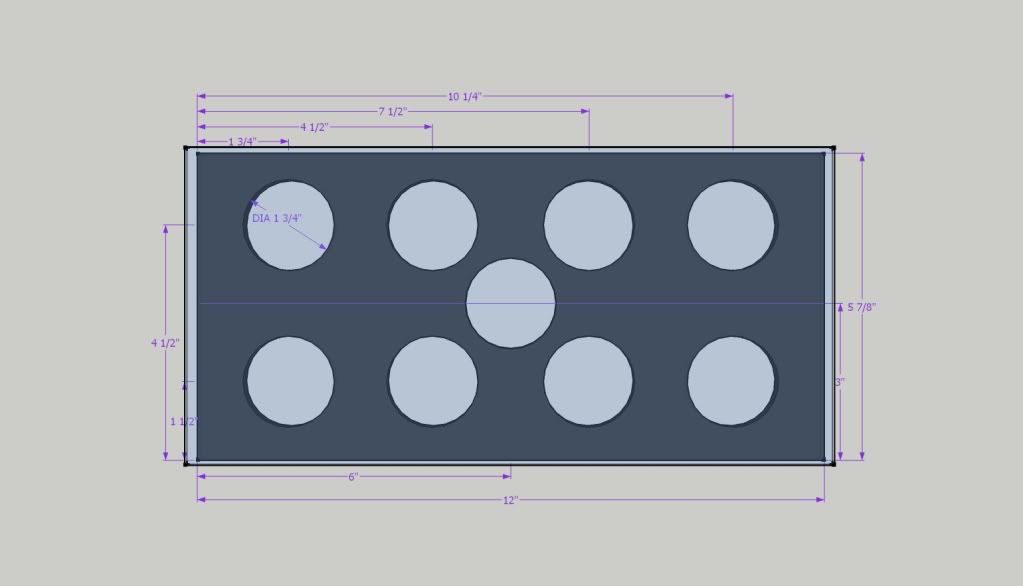
I posted this in a couple other places, but I am thinking some of you guys here may have already done something similar. Below are pictures of my DIY LEDs and my proposed covers (dimensions included at the bottom):

1) What thickness acrylic should I use for the black bottom and clear splash protector? I was thinking 1/4" for the holes and 1/8" for the clear plastic splash protector.

2) Should I use a clear top? Any special type of acrylic for this since I want it impeding the light transmission as little as possible?

3) What is the best way to cut these 1.75" holes? I am worried about:
a.) Cracking the acrylic since these holes are somewhat close together
b.) The last few times I have drilled acrylic with a holes saw and a drill, the edges did not look great. I sanded them with a dremel grinding stone, but they still did not look great. Any tips?

4) What is the best way mounts these. I assume spacers and screws tapped into the block, but what types?
a.) rubber spacers? Aluminum? Where can you get these?
b.) what size machine screw? #6?
c.) what type screw? Aluminum to reduce corrosion potential?


2011-07-14_17-53-38_602.jpg


AquaIlliminationCopy9LEDs-1.jpg


acryliccover.jpg


acryliccovertopview.jpg
[/QUOTE]
 
magnetar68 said:
2) Should I use a clear top? Any special type of acrylic for this since I want it impeding the light transmission as little as possible?
You aren't going to get anything clearor than acrylic so that's the way to go

magnetar68 said:
3) What is the best way to cut these 1.75" holes? I am worried about:
a.) Cracking the acrylic since these holes are somewhat close together
b.) The last few times I have drilled acrylic with a holes saw and a drill, the edges did not look great. I sanded them with a dremel grinding stone, but they still did not look great. Any tips?
Well a wood template with a router edging bit (after drilling a pilot hole) would give you clean holes. It would be a little more work but I don't know of any drill pits that would leave clean edges.
 
I'm with Levi on the clear acrylic cover. That should work fine.

magnetar68 said:
3) What is the best way to cut these 1.75" holes? I am worried about:
a.) Cracking the acrylic since these holes are somewhat close together
b.) The last few times I have drilled acrylic with a holes saw and a drill, the edges did not look great. I sanded them with a dremel grinding stone, but they still did not look great. Any tips?

I've used Fostner bits in the past. It works best when you use a drill press and clamp your work. The acrylic gets a little squirreley otherwise.

magnetar68 said:
4) What is the best way mounts these. I assume spacers and screws tapped into the block, but what types?
a.) rubber spacers? Aluminum? Where can you get these?
b.) what size machine screw? #6?
c.) what type screw? Aluminum to reduce corrosion potential?

Nylon spacers and nylon machine screw is the way to go. Home Depot and Lowes will have that for you. Look in the isle with all the bins/drawers near the screws.

Spacers @ Home Depot:
http://tinyurl.com/88me3en

Screws
http://tinyurl.com/6nkrct7

~Charlie
 
What's the black part for? Simply to hide the wires?

As for a shield, go with something thin, and make sure it rests right against your lenses (reason for this later). The way I do it is I glue acrylic to the sides of my shield essentially making a U shape or a |___________| shape :D of course a little more care is required because you need to make sure it's the same width as your heatsink. then simply drill a couple holes in the side pieces, then a couple holes in your heatsink so you can put a screw through and hold your shield to heatsink.

Now the reason to make sure your shield is flush with the tops of the lenses is because stuff accumulate on the top side of your shield causing your shield to become more opaque, and blocking light. You might be able to get around that by making a complete airtight shield, but it really does need to be airtight as the ambient humidity by being close to the tank will eventually collect in there, it's just a lot easier to have the lenses directly on the acrylic so stuff doesn't accumulate.
 
Seems like no matter what you do dust is going to accumulate on the surface of the shield, even if the lenses are touching (unless you use and adhesive of some sort which goes back into your caution about "almost airtight") On my build I'm not going to fight it, figured better to have an easy way to clean it than anything else.
 
Rapidled has a nice heatsink specifically for this task, assuming you get the right sized piece of acrylic, sliding in and out shouldn't be a problem

http://www.rapidled.com/6-x-9-black-anodized-aluminum-heat-sink/
Black_Heat_Sink_9__73325_zoom.jpg
 
sfsuphysics said:
Rapidled has a nice heatsink specifically for this task, assuming you get the right sized piece of acrylic, sliding in and out shouldn't be a problem

http://www.rapidled.com/6-x-9-black-anodized-aluminum-heat-sink/
Black_Heat_Sink_9__73325_zoom.jpg

Whoa, that is sweet. It's crazy how fast all of this LED stuff is moving. I bought my stuff last August (I think) and I am just getting around to finishing my build. (yes, I don't have a lot of time and go very slowly).
 
I mounted a 3/4 inch sheet of plywood under my heatsink plate and then hung the plastic clips used to mount mirror flat to a wall down from that. The plywood has one large hole cut out for the whole heat sink. My plexi slides in and out flush with the plywood for dusting. I left space for air to get in to help cool that side of the heat sink too. It works.

P1020018.jpg
 
I used 1/8" acrylic for my splash shield.
I had 1/4" sides, and the sides connected to the heat sink.
Essentially, the shield went around the sides + bottom of heat sink.

I don't really understand why you would want to cut those holes.

A bit late, but an alternative way to hide wires well is to drill a hole through the heat sink,
between the LEDs, then run the wires in between the heat sink fins.
lights10.jpg
 
sfsuphysics said:
Rapidled has a nice heatsink specifically for this task, assuming you get the right sized piece of acrylic, sliding in and out shouldn't be a problem

http://www.rapidled.com/6-x-9-black-anodized-aluminum-heat-sink/
Black_Heat_Sink_9__73325_zoom.jpg

I saw one of these back in Nov. during one of many trips to see Mike at Rapidled.
It was exactly what I was looking for at the time but he only had the one and he wouldn't sell . Prototype :)
Nice piece .
Is it true that anodizing along with looking good and corrosion protection helps the heatsink becomes more efficient in heat dispersal?
 
Back
Top