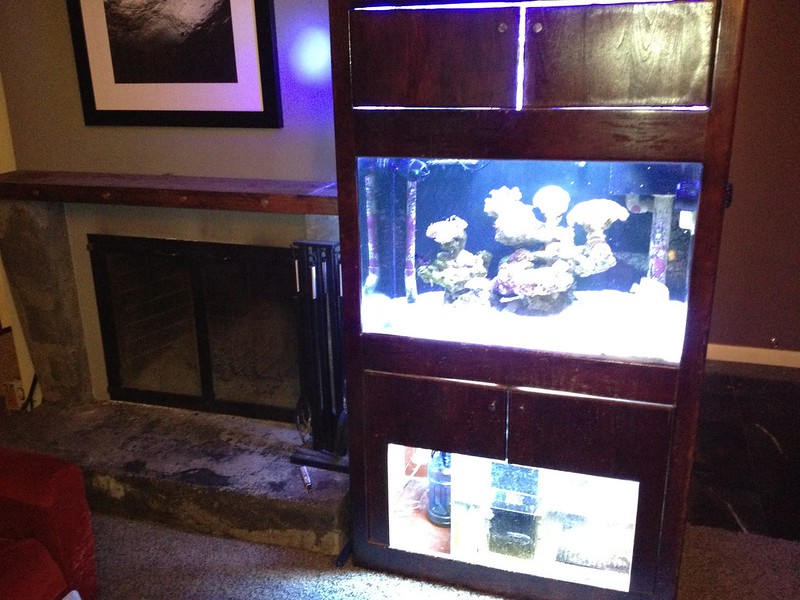
I have a coat closet right behind my aquarium, which is awesome because I can put all sorts of gear in there. Up until recently, however, it's been an disaster waiting to happen.
I had a rusty DJ power strip clamped to an old board, with a tank right above it. Lighting was with a crappy clip-on light that would fall all the time. I had tubes and wires going everywhere, and a plywood floor that soaked up spilt water. Even the paint on the walls was peeling and molding from the humidity. (my sump was actually in the closet)
I decided that before my house burns down I had better get around to tearing it all out and doing it right, so I finally did. I thought you guys might want to see what I came up with.
Here are the main highlights:
- Tiled floor (over concrete) with waterproof membrane and drainage
- Water storage/mixing below (rather than above) the electrical
- Exterior electrical housings with flexible conduit and GFCIs
- Two 20g water containers. One for DI water, one for SW mix.
- Single pump to transfer water between containers, mix SW, pump to a bucket, or pump through the wall
into the aquarium.
- Glass work surface for fragging, doing tests, etc.
- Ceiling mounted light and exhaust fan with humidistat
- Spots for calcium reactor and Sediment/Carbon/DI
Now for some photos...
Photo of entire closet:
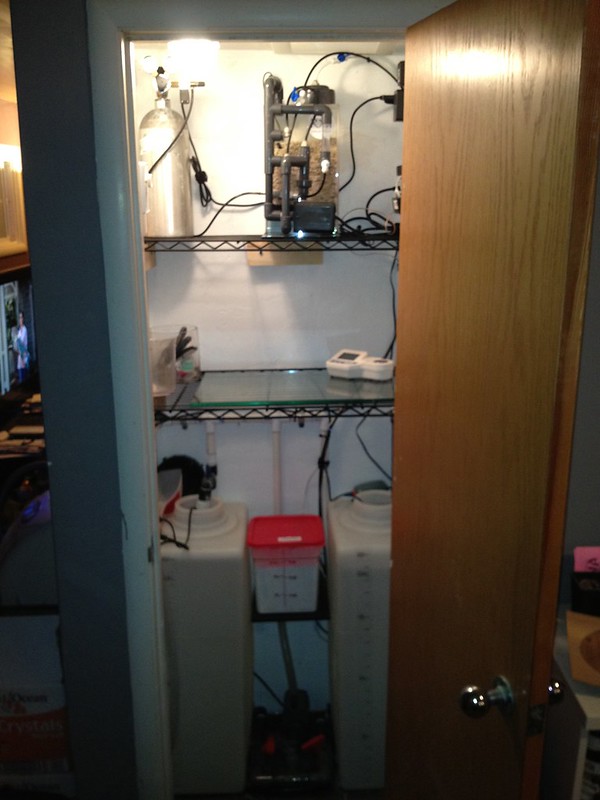
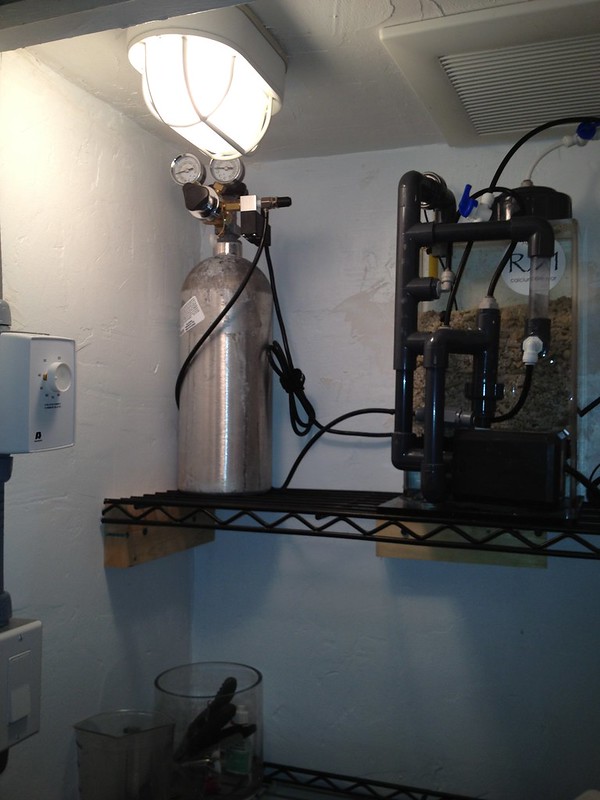
Calcium reactor, light, and humidistat:
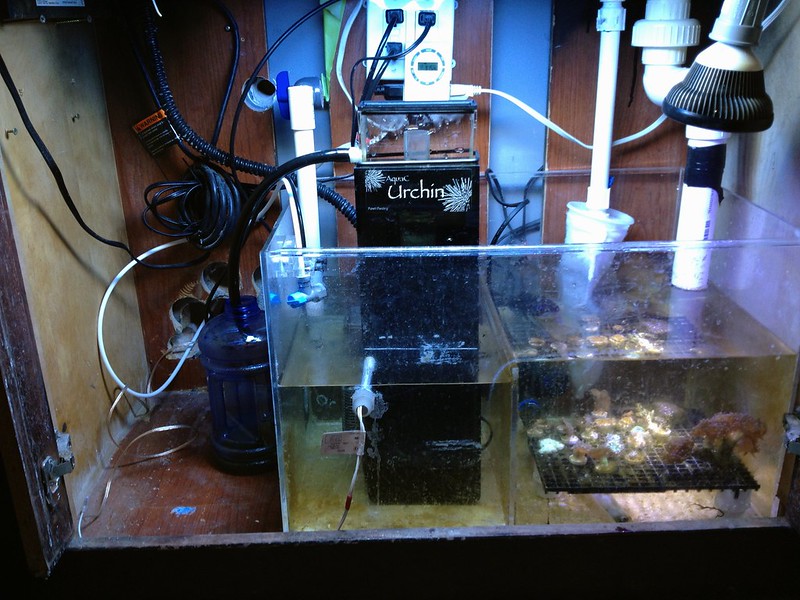
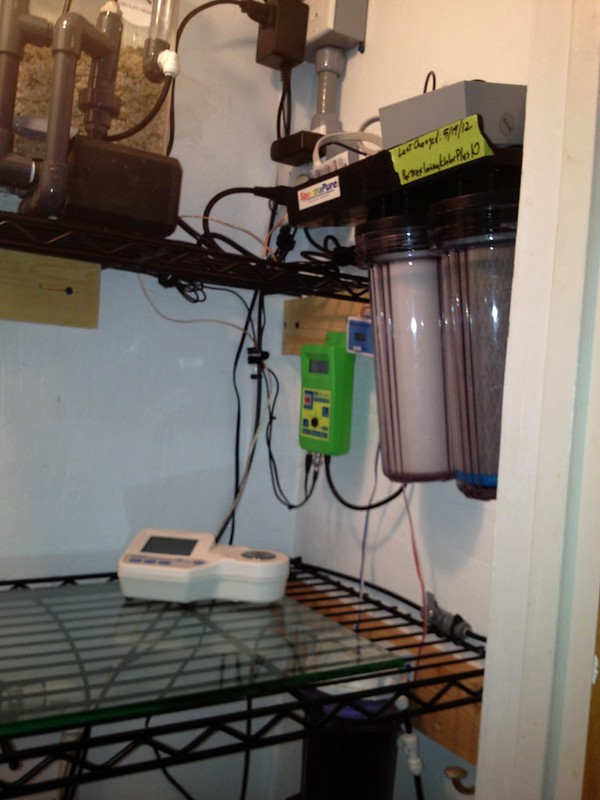
Outlets, DI, work surface, top off. (still need to finish and clean up the top off controller wiring. kinda messy)
Water storage/mixing.
Three outlet valves (mixing, flexible house on left, tank on other side of the wall)
Two inlet valves (saltwater or DI)
Sicce Syncra pump
Spot to storage a bucket (on top of salt container)
So far it's working great! I only wish I had a proper floor drain, but there is a concrete floor under this closet so that wasn't a feasible option. Instead I just drilled a hole so that smaller or slower spills will at least drain to the crawlspace.
Anyway, that's about it!
I had a rusty DJ power strip clamped to an old board, with a tank right above it. Lighting was with a crappy clip-on light that would fall all the time. I had tubes and wires going everywhere, and a plywood floor that soaked up spilt water. Even the paint on the walls was peeling and molding from the humidity. (my sump was actually in the closet)
I decided that before my house burns down I had better get around to tearing it all out and doing it right, so I finally did. I thought you guys might want to see what I came up with.
Here are the main highlights:
- Tiled floor (over concrete) with waterproof membrane and drainage
- Water storage/mixing below (rather than above) the electrical
- Exterior electrical housings with flexible conduit and GFCIs
- Two 20g water containers. One for DI water, one for SW mix.
- Single pump to transfer water between containers, mix SW, pump to a bucket, or pump through the wall
into the aquarium.
- Glass work surface for fragging, doing tests, etc.
- Ceiling mounted light and exhaust fan with humidistat
- Spots for calcium reactor and Sediment/Carbon/DI
Now for some photos...
Photo of entire closet:
Calcium reactor, light, and humidistat:
Outlets, DI, work surface, top off. (still need to finish and clean up the top off controller wiring. kinda messy)
Water storage/mixing.
Three outlet valves (mixing, flexible house on left, tank on other side of the wall)
Two inlet valves (saltwater or DI)
Sicce Syncra pump
Spot to storage a bucket (on top of salt container)
So far it's working great! I only wish I had a proper floor drain, but there is a concrete floor under this closet so that wasn't a feasible option. Instead I just drilled a hole so that smaller or slower spills will at least drain to the crawlspace.
Anyway, that's about it!