Kensington Reefer
Supporting Member
Spend more time and less money
No choice but to. I don't have a lot of extra funds.Spend more time and less money
Are you available sunday?No choice but to. I don't have a lot of extra funds.
After 1230 is fineYes I normal go to church Sunday mornings back home by 1230 pm. I could
Skip church this Sunday if you would need it to be before than. But absolutely free all day this Sunday after 1230
@Srt4eric
I will DM you my number and addressAfter 1230 is fine
Yes I was there a bit early, I honestly wouldn't recognized you by name alone but probably would remember you if I saw you again. Hopefully we get to meet formally at a future club event.IIRCC
Michael, were you at Kenny’s early for the fragging work shop?
If so, we have made eye contact!
I was only there for a minute before the gig
‘‘Twas good to see you
I look forward to when we do meet
Best fishes
The Club’s Obi-won of plumbing is on duty and bringing the FORCE with him!
@Kensington Reefer the Gandalf of the club. Easy to spot him.Yes I was there a bit early, I honestly wouldn't recognized you by name alone but probably would remember you if I saw you again. Hopefully we get to meet formally at a future club event.
Now im looking for guy with a white viking beard white or grey robes, a pointed hat, and tall walking stick lmao@Kensington Reefer the Gandalf of the club. Easy to spot him.
Chronically!Don’t forget the pipe in his mouth!
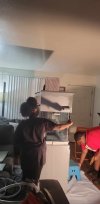
Cheap labor if you don't count all the food multipled by yearsLooks good. I can’t wait til I can put my kids to work too!
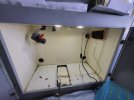
") . Amazing what skills reefers have to possess, being a plumber is just one example. Great that you took on to learn to do this. I would not have the patience or trust in my abilities to do this properly.
. Amazing what skills reefers have to possess, being a plumber is just one example. Great that you took on to learn to do this. I would not have the patience or trust in my abilities to do this properly.