
You are using an out of date browser. It may not display this or other websites correctly.
You should upgrade or use an alternative browser.
You should upgrade or use an alternative browser.
99sf's 150-Gallon Upgrade
- Thread starter 99sf
- Start date
Hello !
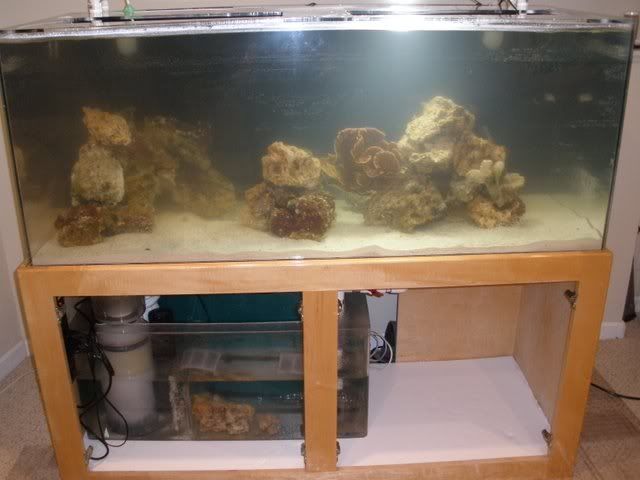
I had a tank set up this way and the first time I drilled the air hole too big then replaced the cap; note the cap will not be glued. I started with a small diameter bit and increased it til the point I was satisfied, no gurgle. Is basically a Durso but hanging on the back. I use the unions so when I move it It will be less of a headache setting it up plus no PVC fumes at home.
Have you thought of installing overflow boxes inside instead of the Street Elbow?
For what I read, you already have water running.
Another option is a flooded drain type of system, I'm sure the guys can chime in better than I could explain, in any case, is a simple solution; a ball valve controls the down-flow; I have installed too a ball valve on both drains just in case I want to try that system. It keeps the water level high inside the drain pipes at a constant flow of water, not air.

seminolecpa
Past President
Nice work Christina. That looks soooo much better then when it was at the other guys place. Glad you took your time and did it right. I think in the long run it is going to pay off big time.
I tested lots of parameters tonight. My refractometer somehow got condensation inside the viewing plate over the weekend, making readings very difficult. Perhaps I over-used it during the upgrade, or maybe got careless trying to clean the view plate with fresh water. Ordered another inexpensive one from Ebay. I didn't properly complete the mag test. Fortunately, haven't seen a big spike in ammonia, nitrites or nitrates.
Temp 77
Salinity?
pH 8.2
Ammonia 0
Nitrite 0
Nitrate 0
Alk 9
PO4
Temp 77
Salinity?
pH 8.2
Ammonia 0
Nitrite 0
Nitrate 0
Alk 9
PO4
Mario, I really appreciate your plumbing suggestions & photos. Will search for that wrench at OSH. Tonight, I got a couple of new 1.5" bulkheads from Neptune, and will probably try the T-method you used (and Eileen endorsed) for the back of the drains. Maybe while I'm trying that, I will also install some ball valves below the T, to see if that will make a difference. Meanwhile, I put the drilled caps back into the street elbows and reduced the flow from the pump using the ball valve on the return line.
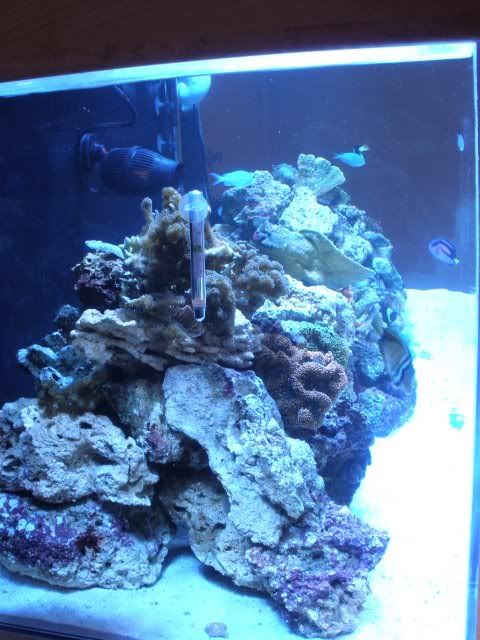
Here's a photo from the middle of the aquascaping and one with the temporary light system (while I try to quiet the plumbing):
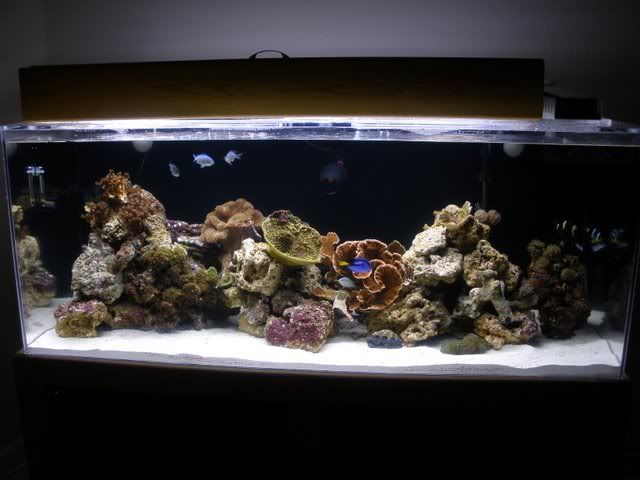
This is not the final aquascaping!
I am moving the clam further up toward the light, and will strategically place the heater, thermometer & powerheads soon (so that the K4 is not facing directly out of the back wall).
Here's a photo from the middle of the aquascaping and one with the temporary light system (while I try to quiet the plumbing):
This is not the final aquascaping!
I am moving the clam further up toward the light, and will strategically place the heater, thermometer & powerheads soon (so that the K4 is not facing directly out of the back wall).
")
You can ask here about the penductors/eductors/flow accelerators, maybe some one has a couple of them willing to part with or for you to borrow to test.
I didn't notice the heather in the tank 'til you mentioned it; you may place it in the sump and if it's made of glass, some black ABS pipe drilled for flow will give you peace of mind by placing the heather inside of it
I didn't notice the heather in the tank 'til you mentioned it; you may place it in the sump and if it's made of glass, some black ABS pipe drilled for flow will give you peace of mind by placing the heather inside of it
Thank you, Bryan! I'm trying to convince myself that all the extra work has been worthwhile, but am kind of saddened that my plumbing design created loud drains. Hopefully, putting in the capped Ts on the back of the bulkheads will substantially quiet the system. Also, putting on the hood & doors for the stand should dampen noise.
This project has definitely been a learning experience, and I'm very grateful to the BAR members for their generosity in sharing knowledge & skills with me.
I tested the auto top off system last night, with a MaxiJet 600 and some spare 1/2" tubing inside a 5-gallon bucket. The scary-looking contraption works! Will try to take a photo of the sensor inside the sump, connected to an extension cord. Basically, when the water level drops, the sensor powers the extension cord, which turns on the mini pump.
Contemplating ordering flow accelerators, now that I have cut back the flow from the main pump significantly. Good idea?
http://www.marinedepot.com/Pacific_Coast_Flow_Accelerator_Flexible_Ball_Socket_Tubing_Plumbing_Parts-Pacific_Coast_Imports-FT0033-FIFTFB-vi.html
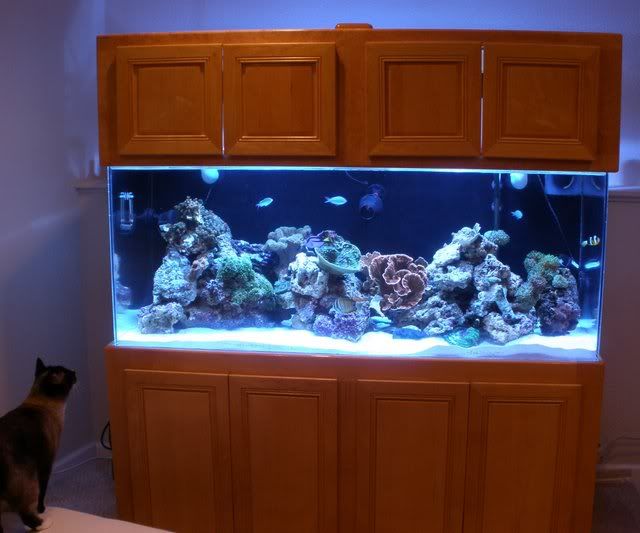
OK, so I now have some time to enjoy the tank! I attached the power cords for the Ice Cap variable speed fans last night and plugged them into the power strip, but the fans have not come on at all, even with both lights running in the hood. Anyone know why that might be? I have the heat sensors on the top of the tank, and think that that should trigger the fans.
Here are recent photos (need to work on photography skills):
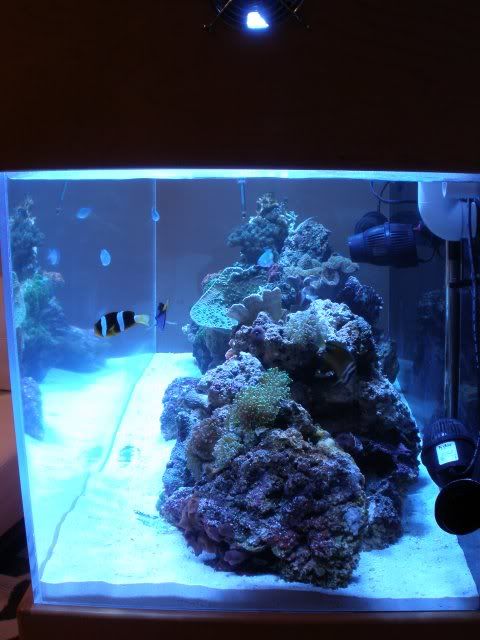
Here are recent photos (need to work on photography skills):
Thanks, Jon & Arnold! I am really happy how it turned out, and spent about an hour tonight gazing at the beautiful tank. I even named the sailfin tang: Al Capone (due to the fact that the fish is constantly eating algae & has vertical stripes & lives relatively close to Alcatraz).
Mario, after your feedback, I think my fans might be broken. I checked the wiring connections, detaching and re-attaching several times, and checked the plugs, but no success. Next step is to unscrew them from the canopy, thoroughly clean them, and see if they start working again. I can manually spin them, but they are not turning on their own. Meanwhile, I put a 10" fan blowing into the canopy.
Mario, after your feedback, I think my fans might be broken. I checked the wiring connections, detaching and re-attaching several times, and checked the plugs, but no success. Next step is to unscrew them from the canopy, thoroughly clean them, and see if they start working again. I can manually spin them, but they are not turning on their own. Meanwhile, I put a 10" fan blowing into the canopy.
Maybe a reversed polarity issue?
When I had issues with PC fans, I blew the dust off then applied a silicon lube from Radio Shack by lifting the sticker but that was with computer fans in a computer case, over a box full of water and life I'm not sure if the lube might leak if too much applied. I remember using a Q-tip to apply it over the bearing and clean with cloth, placed the sticker back on and no more noisy/frozen fans.
When I had issues with PC fans, I blew the dust off then applied a silicon lube from Radio Shack by lifting the sticker but that was with computer fans in a computer case, over a box full of water and life I'm not sure if the lube might leak if too much applied. I remember using a Q-tip to apply it over the bearing and clean with cloth, placed the sticker back on and no more noisy/frozen fans.