You are using an out of date browser. It may not display this or other websites correctly.
You should upgrade or use an alternative browser.
You should upgrade or use an alternative browser.
Alve's tank today, thanks to BAR!
- Thread starter alve
- Start date
I don't think it is too late. Try maybe on a side corner first and see how it looks. We bought our kitchen table unfinished and I used it on the table as well about 10 months ago and still looks like new, no scratches at all.
I use the Clear Semi-gloss, not the high gloss and bought it at home depot.
I use the Clear Semi-gloss, not the high gloss and bought it at home depot.
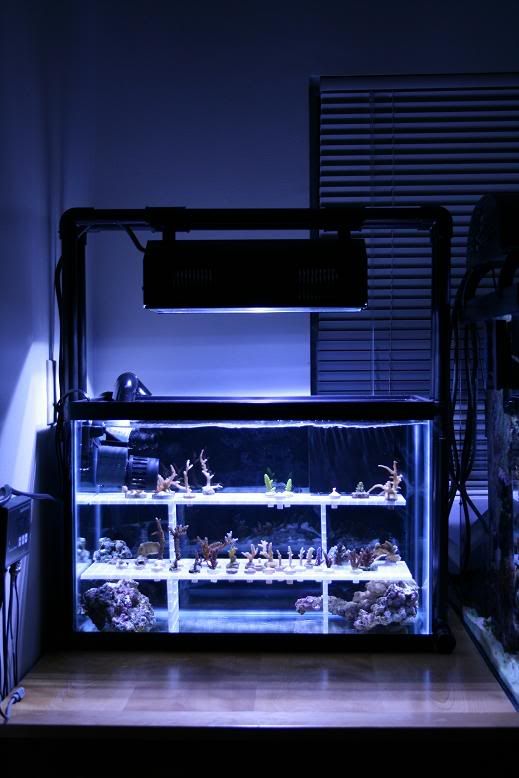
I finally received the MH bulb today so I could install the pendant and move everything over.
Here it is:
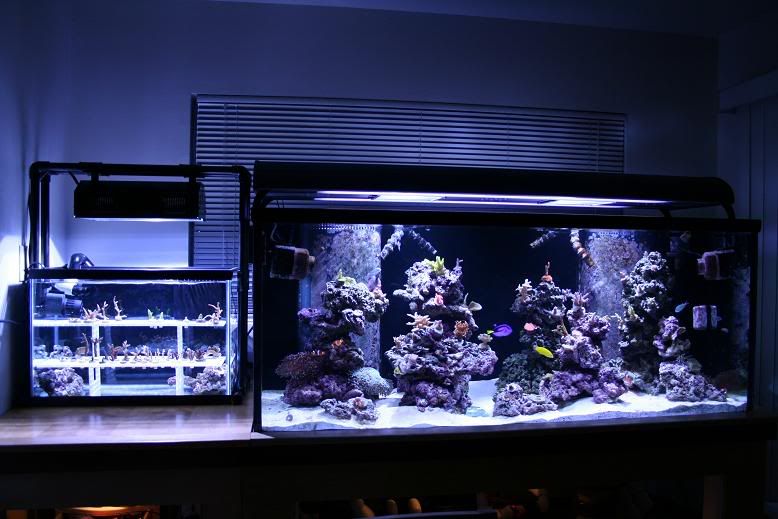
And here is the frag tank with light setup:
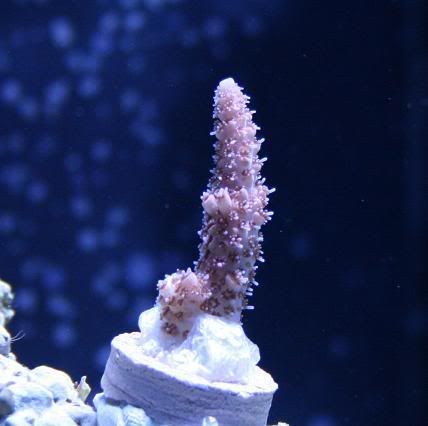
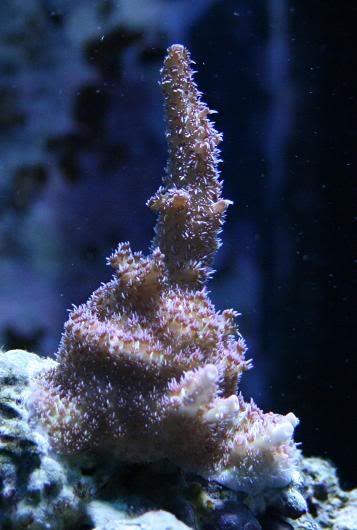
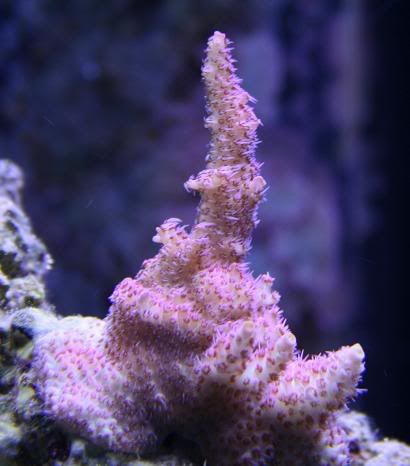
And finally a closer shot of just the frag tank with pretty much most of this going to the December meeting to be given as DBTC frags except 10 frags I bought over the last two days at Atlantis so these will have to grow out a little more first before going into DBTC.
My goal is that every coral that makes it into this frag tank (received from DBTC as well as purchased ones) will first be grown out in there until I can make 4-5 frags out of them. Two-three will go into DBTC, one will stay in the frag tank for future DBTC's and one will go into the main tank.
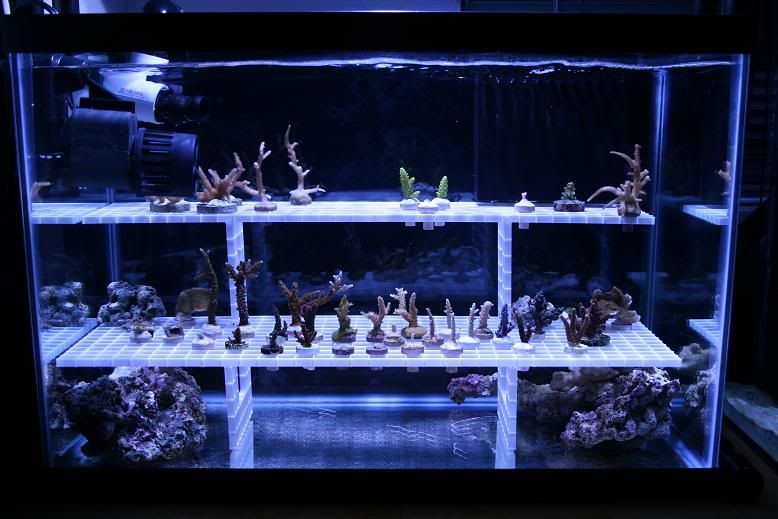
What do you all think? Anything that should be changed or anything that doesn't seem right?
Here it is:
And here is the frag tank with light setup:
And finally a closer shot of just the frag tank with pretty much most of this going to the December meeting to be given as DBTC frags except 10 frags I bought over the last two days at Atlantis so these will have to grow out a little more first before going into DBTC.
My goal is that every coral that makes it into this frag tank (received from DBTC as well as purchased ones) will first be grown out in there until I can make 4-5 frags out of them. Two-three will go into DBTC, one will stay in the frag tank for future DBTC's and one will go into the main tank.
What do you all think? Anything that should be changed or anything that doesn't seem right?
seminolecpa
Past President
Yes, I have a comment. You need to fill that thing. I have a few things that have your name on them.
I do have a question somebody could maybe help me with.
When I had all frags on the mag racks in the main tank they got a lot less light then in the frag tank now. Should I start with like 4 hours of light on and slowly raise the time over a couple weeks or do I leave the light on for the full time and use screening on top of the tank to make it less bright?
When I had all frags on the mag racks in the main tank they got a lot less light then in the frag tank now. Should I start with like 4 hours of light on and slowly raise the time over a couple weeks or do I leave the light on for the full time and use screening on top of the tank to make it less bright?
Thanks Tony! I wasn't sure if it would work with shorter light times and slowly keep the light on longer but intensity makes completely sense.
Since I can't raise the light I will put some eggcrate with screening on top of the tank and slowly take of 1 piece of screening at a time over the next two weeks.
Since I can't raise the light I will put some eggcrate with screening on top of the tank and slowly take of 1 piece of screening at a time over the next two weeks.
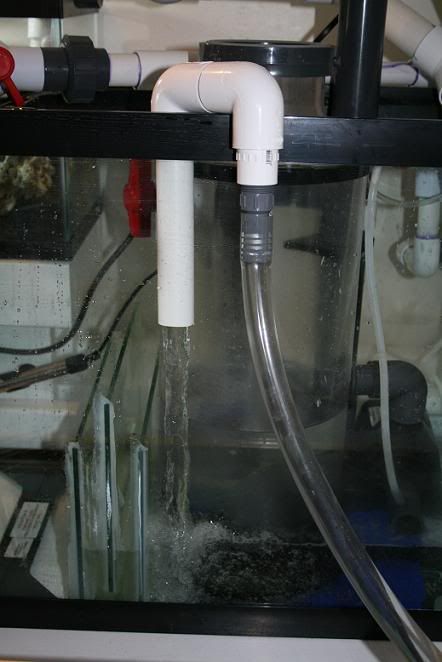
i really like the setup of the frag tank right next to display. Rockwork in display is A+!! I was thinking of doing the setup of a frag tank (10 or 20 gallon) and now am pretty sure I'll do it seeing how well it looks. My question is how much noise do you get from the glass-holes overflow system and how much control do you have over the noise via the air line? Before I do the same setup I'd like to know how much noise that overflow system would make.
jellygee: Thank you, feel free to stop by when you have a chance. Just let me know when so I can make sure I am home.
CookieJar: Thanks as well CookieJar. I was a little worried about how it would look at first but I like it very much now. I like it so much more not to have frag racks in the main tank anymore.
That glass-holes overflow does not make any noise at all, nothing and I didn't even play with the air line tube. I really like it and would use it again on other tanks.
Now it only looks like I have one small and one big frag tank sitting next to each other at the moment ;D I have had some good growth but once they get big enough to frag I cut them to go to DBTC and I am back as when I started growing the frag months ago
corals b 4 bills
Guest
Hey Aldie look at you go brother! Talk about taking a concept and running with it. Maybe sometime I can stop by and see your system? Great job!
Thanks Marc, I have been very happy with how it is going at the moment. Looks like you haven't been sitting still either, that addition to the house is going to look great! Let me know when you move in your tank, if you need help and I am available that day I will help for sure. You are always welcome to stop by and check out my system.
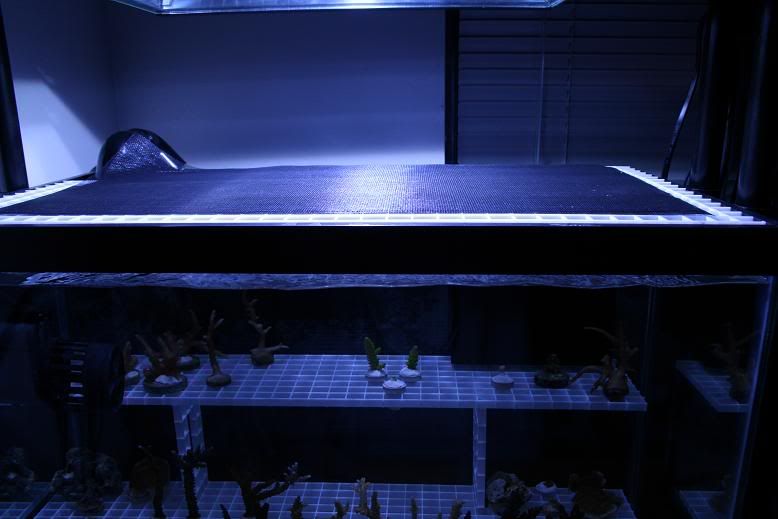
Last night I got out the egg crate and fiberglass screening and made a cover for the tank to acclimate the frags to the lighting. I have 3 layers of screening on it now, will take one of probably tomorrow and then probably 5 days after that the next one and remove the last one 10 days from now.
I did put most of the frags that had the least amount of light when they were on the magnetic frag racks on the bottom shelf towards the outsides.
Here is a picture:
I did put most of the frags that had the least amount of light when they were on the magnetic frag racks on the bottom shelf towards the outsides.
Here is a picture:
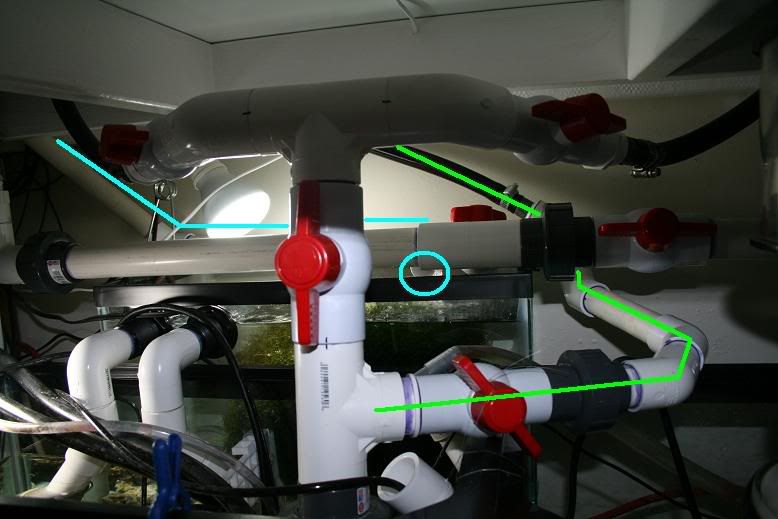
It took me a while to figure out how I would plumb the frag tank into the whole system.
First I thought about a hang over the back overflow from the main tank to the frag tank and then pump it back but that I didn't like. I want to stay away from overflows hanging over the back in case they loose syphon plus it would add something more into the main tank.
On my return plumbing in the sump I still had a T that I was originally going to use for easy water changes but I decided to use this for a feed to the frag tank (green line). This way I didn't need to add a pump and could drill the frag tank for an overflow to drain into the small 10g Chaeto sump (light blue line).
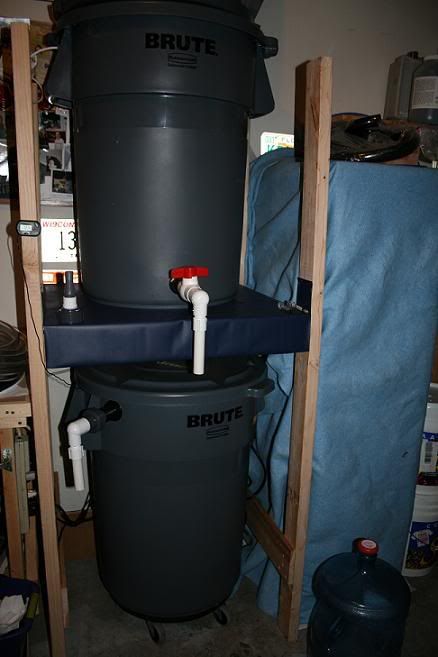
Thought I share my "water changing station". Very simple, top Brute trash can holds RO/DI water and stays full with a float switch. The bottom can is for making up salt water. I have a MAG pump in there and have it plumbed that when I want to pump it out all I have to do is screw in a union with a hose and turn two ball valves.
Pictures are always easier:
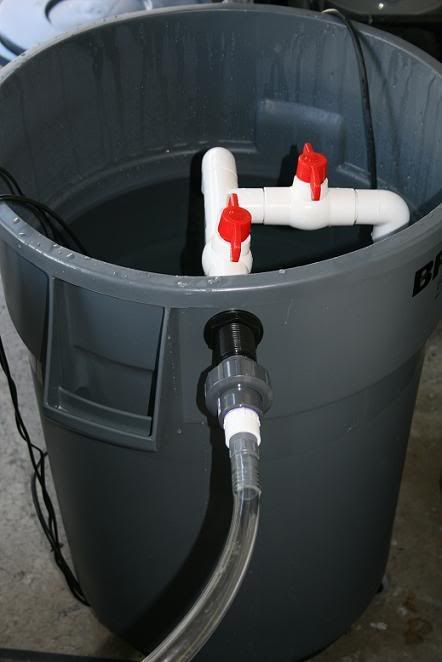
RO/DI can with float switch:
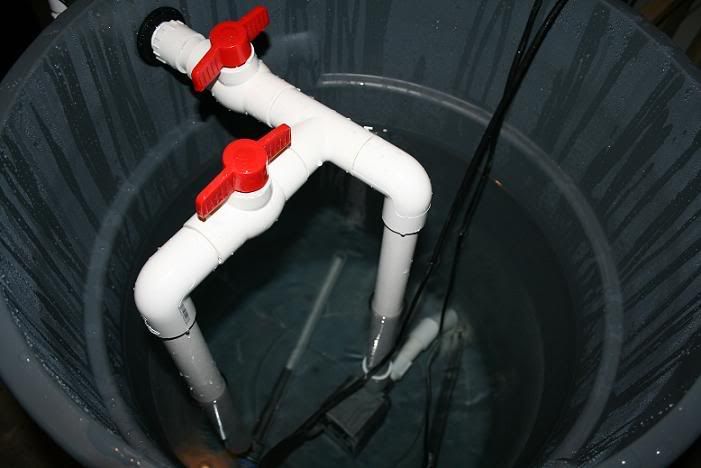
Salt water mixing can:
Pumping new water to sump during water change:
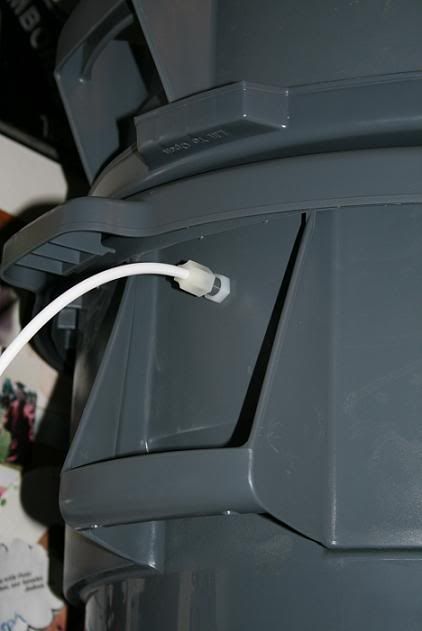
And this is how I hang the hose on the sump to avoid it coming out while pumping water:
Pictures are always easier:
RO/DI can with float switch:
Salt water mixing can:
Pumping new water to sump during water change:
And this is how I hang the hose on the sump to avoid it coming out while pumping water:
bluetang_2000
Supporting Member
Aldie,
nice setup for the frag tank and the water changing station.
Ron
nice setup for the frag tank and the water changing station.
Ron
Thanks Ron and Joyce!
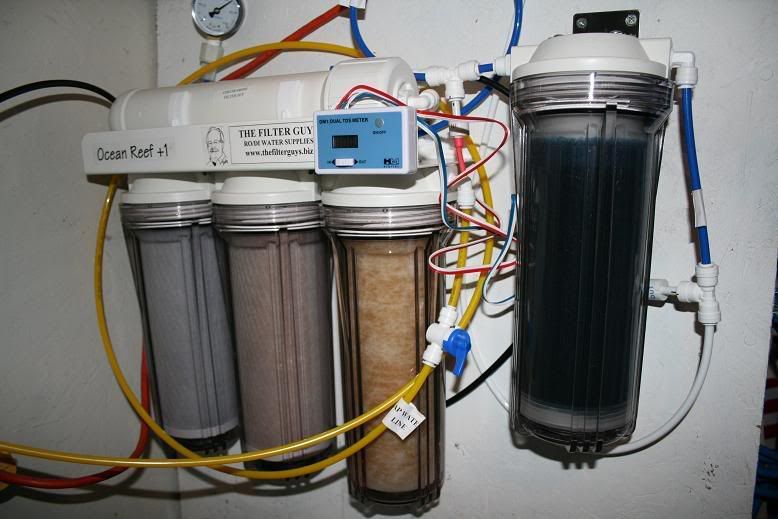
For people considering about getting an RO/DI unit but who aren't sure how to hook it up (as I was when I first got one last year):
Mine is hooked up to the cold water faucet with a Y and the waste line goes into the washer drain pipe:

And this is the RO/DI unit I am using. It is an Ocean Reef +1 75GPD with chloramine filters and TDI meter purchased from the Filterguys and I am very happy with it:
For people considering about getting an RO/DI unit but who aren't sure how to hook it up (as I was when I first got one last year):
Mine is hooked up to the cold water faucet with a Y and the waste line goes into the washer drain pipe:
And this is the RO/DI unit I am using. It is an Ocean Reef +1 75GPD with chloramine filters and TDI meter purchased from the Filterguys and I am very happy with it: