Our mission

Kinetic's ELOS 120

Thanks guys for the input. There were like 500 things going on there, wasn't able to get it all. I thought those plugs weren't used since I didn't get any cables, and there were already plugs going to the wall. I guess it was just going to take time to get it right ;)

I think I'll go order some Phoenix lamps now...
 
JAR said:
Wait! haven't you heard about the new "wireless MH's" :D
They use zero watts! :bigsmile:
Hah! you suck! =)

Hey there's one chord that goes out of the ballast, it's not that ridiculous to think it powers the ballast too? haha.
 
Tank Parameters today:
Ca: 470ppm (no dosing)
Alk: 9.2dKH (dosing 15mL/day)
Mg: 1350ppm (no dosing)

This was using brand new Salifert tests. I got a close confirmation from new ELOS tests and a slightly older Alk Salifert test. They were all about the same. ELOS is hard to tell exactly, and the older Alk salifert color changes are super subtle.

I'm now dosing Alk with a Bubble-Magus T101 dosing pump. Has 3 pumps, only using one for Alk. Seems like my continuous water change is supplying enough Ca / Mg for now, and I only need 15mL of Alk to keep it just above 9dKH. One thing I found, don't submerge the end of the dosing line to the water, it starts siphoning or something, and the fluid just keeps coming out slowly. I wonder if that happens on my continuous water change on the sump to drain (since it's submerged). I should go test my SG.

Other than that, hooked up another LiterMeter III pump to the topoff reservoir, soon I won't have to fill that guy either. Automatic everything is nice, but still have to keep a close eye on it all.
 
What do you think about this lighting schedule?

T5 - 9 hours, 8 hours each, 7 hours overlap
MH - 5 hours, 4 hours each, 2 hours overlap

Is that enough light?
 
kinetic said:
Good news! The halides fire now! Over on reefcentral, reps from MSX (marine solutions) and ATB jumped into some of my threads and helped me troubleshoot the problem. Those guys are nice! They didn't even sell me anything in the past. Don't you just love the reefing community?

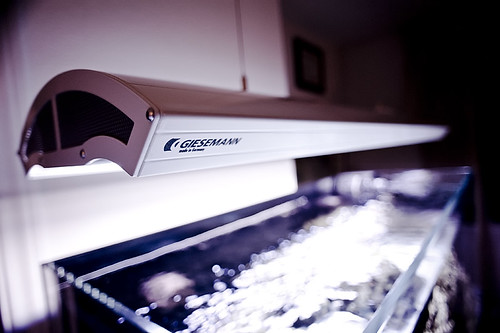
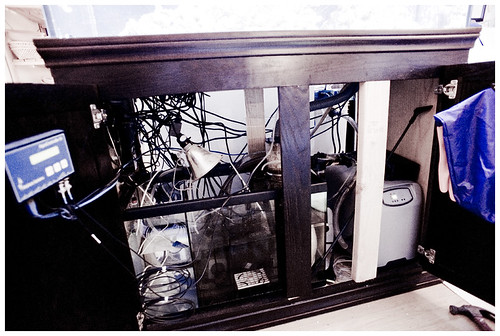
Anyway, it lead me to try to use a printer power cable to plug into the ballast into the wall, and bam, halide came on. Apparently Giesemann forgot to supply me with two chords, one for each ballast. The plugs that did go into the power strip were for the T5's, and bypassed the ballast completely. The power really had to come from the other plug, which wasn't given to me.

Unfortunately the instructions didn't show or say anything about the wiring, just said to connect everything, so I had no idea.

But anyway, I'm reusing my old fixture's plugs that go right in, until Giesemann sends me new ones.

The new light looks awesome! The T5's are controlled independently which is great, I can control each pair. The halides are also independent, so I have them staggered as well.

How long should the halides both be on for? I'm thinking 3 hours? So one comes on at 6, the other at 8, each for five hours? That means the first one would go off at 11, then the second one at 1am, for a total of 7 hours of light, with 3 hours with both on full blast.

Another thing is, the stock lights look way too "green". The MegaChrome 13.3K look real green, and it came with two actinic +, and two powerchrome that look white to me.

I'm thinking of replacing those powerchromes with ATI blue+ at least, but might also need to swap out the halides. Any suggestions?

Hi Art...is the MH still an issue? I just received an email about the problem and was wondering if you need me to run interference with Geiseman.

Thanks,
Robert
 
Robert unless there is another issue I skipped over, Art figured out he needed to plug the ballast in using a non supplied cord :)
 
Hey Robert, thanks for checking in, everything has been resolved! I also got your followup email. I appreciate you looking out, thank you again!

Gresham: Thanks for replying for me, you are quite handy =) Are you fishing for a beer out of this all? You probably deserve a few at this point ;)
 
Dr said I could have beer again, but a nice bottle of a Zin or Cab would be nice :lol:
 
OK, tried taking out my center brace today on the stand to replace the sump:

1. It's held in with pocket screws on the inside, I had to use one of those angled drill bit things to get to it because there's no room between the sump and center brace.
2. First one of the pair on the bottom came out instantly. Second one, rounded that thing right away. I couldn't get it out for the life of me, mostly because I couldn't get any downforce.
3. Took out the remaining two on the top side, and yanked it sideways, slightly pivoting on that pocket screw. Of course it's going down at an angle, hence pocket, so it ripped up all the wood. I tried taking the screw out with a regular screwdriver, and couldn't, it was way too round. Talk about a soft screw =(
4. I gave up for now and tried to rotate the center brace back in place, destroyed tons of wood on the bottom, and had to pound it back in place with a hammer.

I'm pretty sure that I'm going to completely destroy my stand if I try this again. My plan was to tap the center brace over maybe 6 - 10 inches, but not sure if the stand will continue to hold. At this point, I was going to goto Ace Hardware to buy one of those screw extractors (it's like a left hand drill bit) and see if I could take it out. I'm not sure if I even need this pocket screw with the amount of pressure holding it in place.

It's a bit scary working with that center brace on the stand, as it might very well break and the whole stand will come crashing down.

I guess I have a few options:
1. Take the risk, pull the screw out, pound the center brace to the side, and replace the sump
2. Drain the tank, pick it up off the stand, pull the stand out and remove the sump from the back.
3. Buy a new tank and be done with it =P
 
Bula said:
Bummer. Let me know if you need an extra hand lifting something. I am off wednesday.

John

Thanks for the offer! I tried again for hours today trying to get the screw out. I used 5 different screw extractors with no luck. I also splintered out a ton of wood from the stand trying to get it to come out, which really sucks (stand was primo condition before).

I've basically given up. One screw has owned me bad. It's not that I can't drill it out etc., there's just no room to work. It's on the inside of the center brace, and is a pocket screw going down. There's about 2 inches between the brace and the glass sump to work in, and there's just no way. i'm amazed I got that first screw out instantly.

I'm selling both the new sump and new skimmer. I'm super sad. I doubt anybody would want the equipment unless I sell for a really low price, and that's gonna really suck.
 
Try this tool. It's like a mini sawzall. It vibrates to cut almost anything.
I wish I had one to lend to you. Someday I'll own one.
Costs less than a Vortech!

http://www.sears.com/shc/s/p_10153_12605_00988431000P?vName=Sears%20Pro&cName=Professional&sName=Plumbing&psid=FROOGLE01&sid=IDx20070921x00003a

Maybe someone in the club has one?
 
JAR said:
Try this tool. It's like a mini sawzall. It vibrates to cut almost anything.
I wish I had one to lend to you. Someday I'll own one.
Costs less than a Vortech!

http://www.sears.com/shc/s/p_10153_12605_00988431000P?vName=Sears%20Pro&cName=Professional&sName=Plumbing&psid=FROOGLE01&sid=IDx20070921x00003a

Maybe someone in the club has one?

I have a Fein Multimaster
 
Hey JAR: thanks for the link / concern! I hate giving up, so after I sat and pouted like a little wimp for 10 minutes or so, I got up and cut a 2x4 just a bit taller than the opening of the stand, and pounded it in there with a hammer. The miter saw always freaks me out a bit, but it cut through the wood like butter. Now I'm going to take my time with that center brace and ease it out of place. The wood is already splintered where the screw was, so it can come out now.

I'll have to repair that piece, probably paint it over or something... we'll see.
 
Here is the 2x4 I wedged in there. I'll remove the center brace tomorrow and start pulling the old sump out.


... and I'll clean up the spaghetti in the back, yikes.
 
Back
Top