Cali Kid Corals

Oiram's prop little tank

Decided to take the table saw out for the sunny day and cut some plexi sheets kindly donated by my sister few months back; lots of nice cell cast 3/8 sheets.
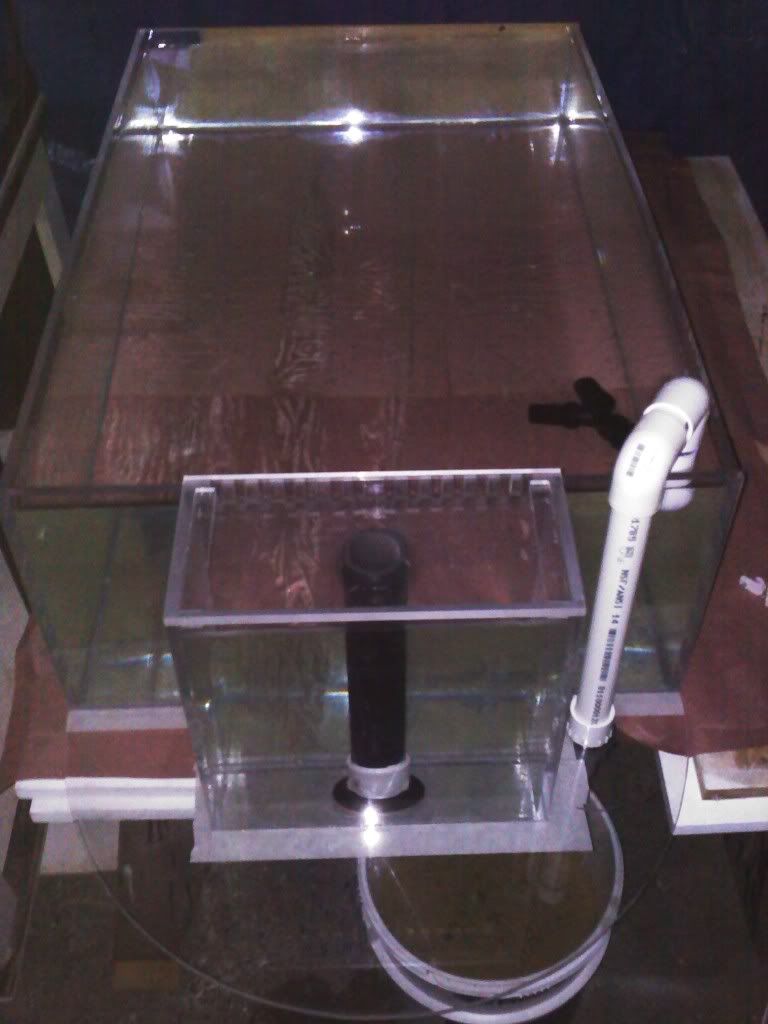
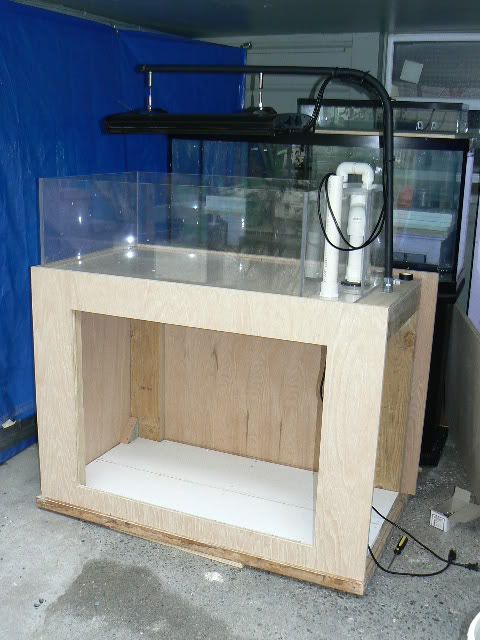
I've done some plexi work before, nothing big or meant to be water tight. Been meaning to build my own sump but I like glass so inspired by Ian and Co. on their glass DIY tank (awesome looking cubes) decided to go ahead and ruin some precious acrylic. Been to Melev's Reef from time to time and finally today built my first plexi tank; some details are to be finished tomorrow; the external OF box and trim it flush with the router.
Plexi is scratched since she had it in the basement but should not complain a bit it was free to me or to the dump. Some pieces are still covered with the protective paper/film but I risked the dirty ones.
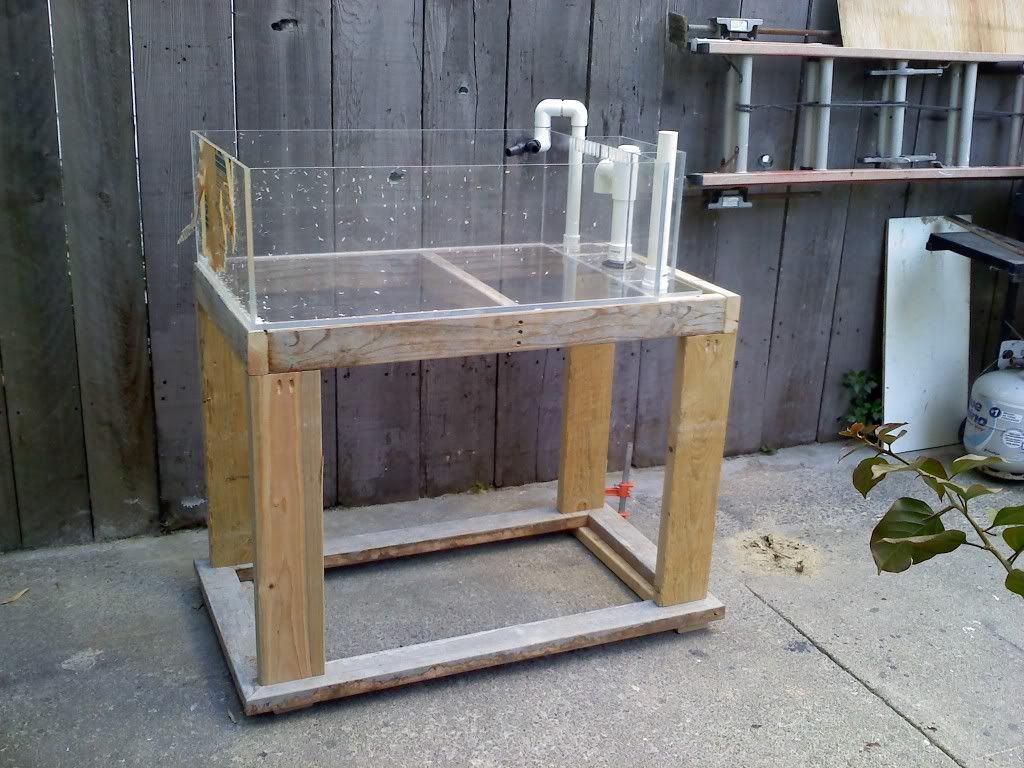
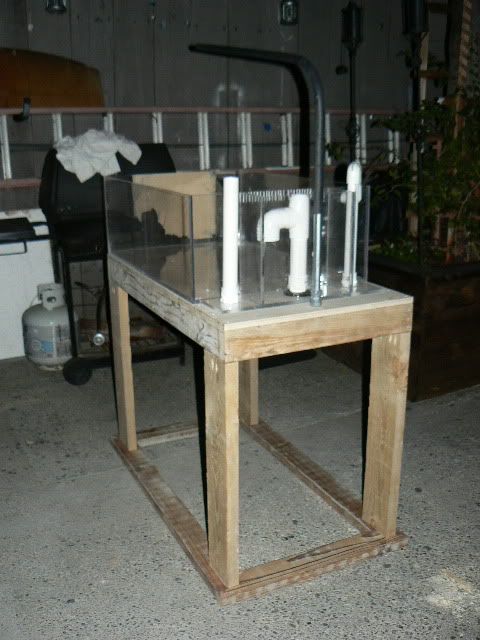
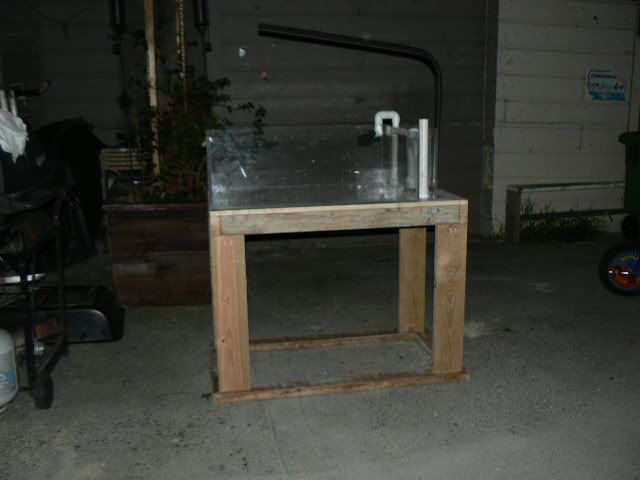
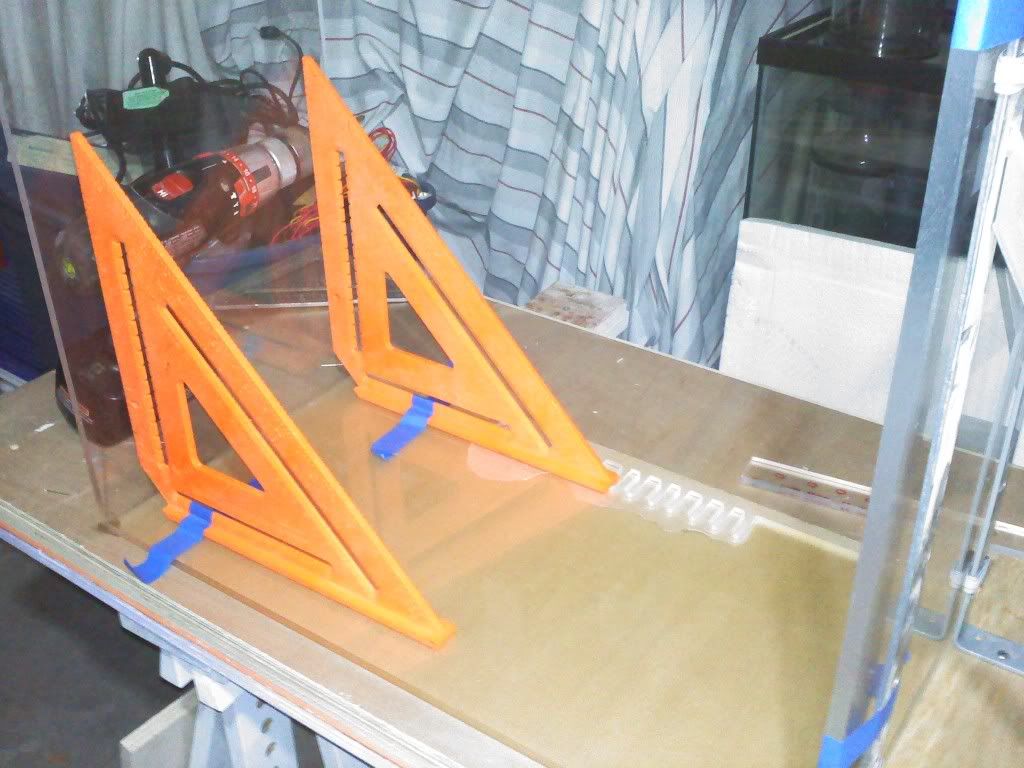
Made my own square to hold it together with shelving brackets.
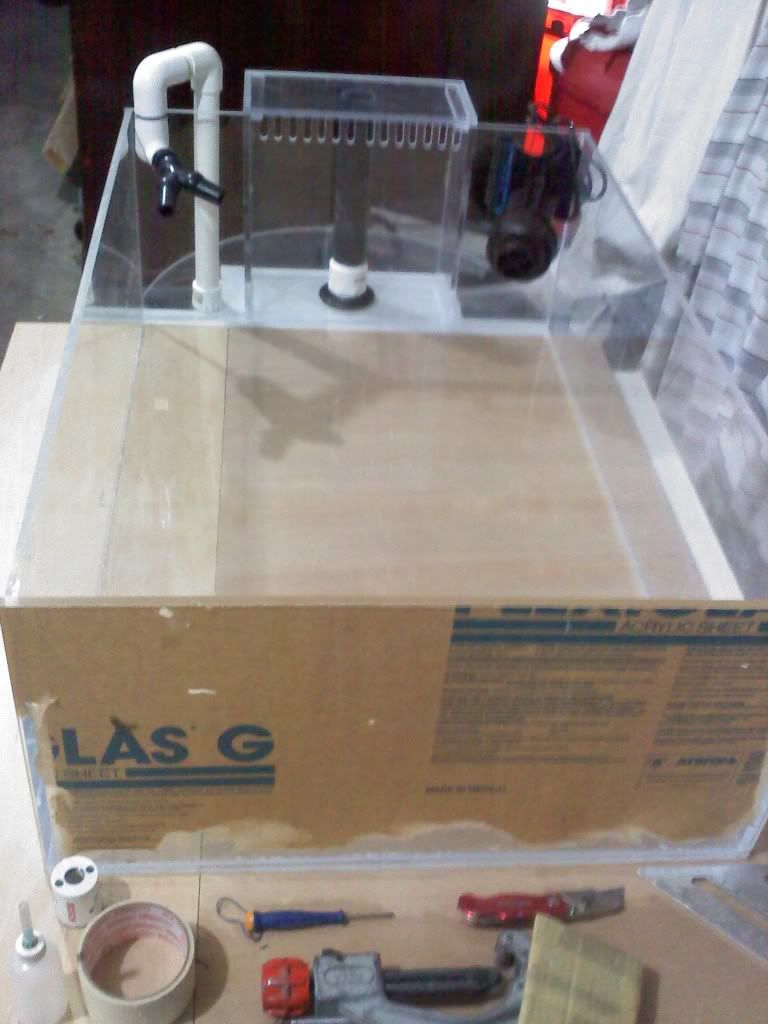
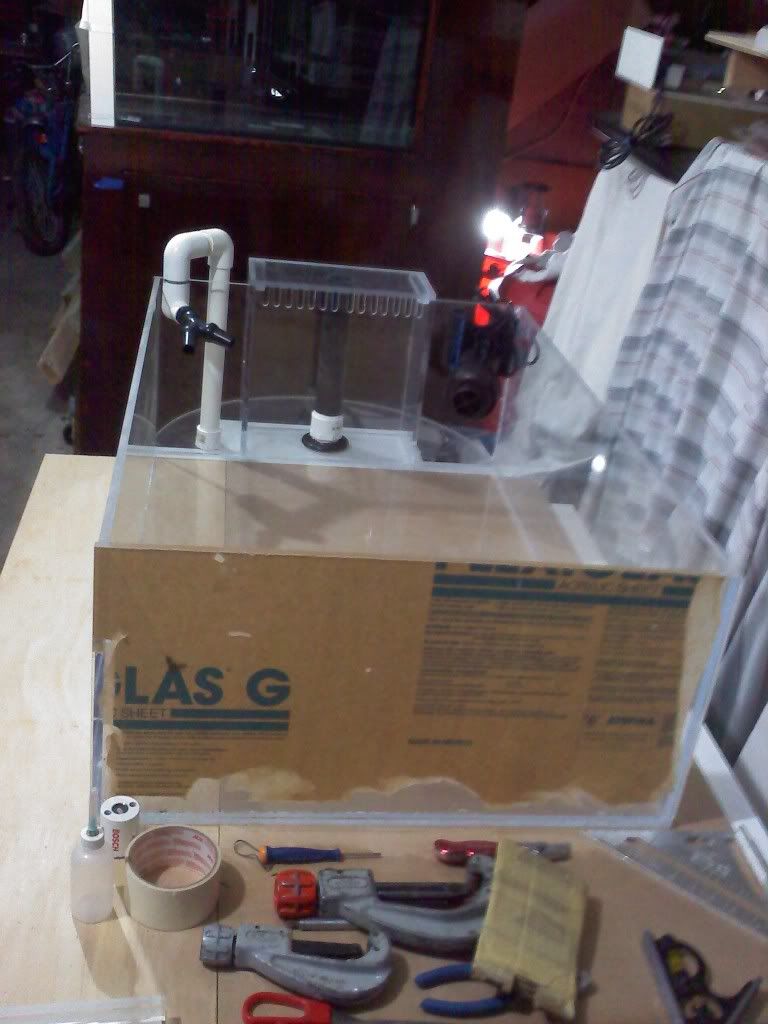
Tank will be 36x24x12 3/8" all around. Tonight is sitting wit six five gallon water jugs after applying the solvent to bond the bottom.
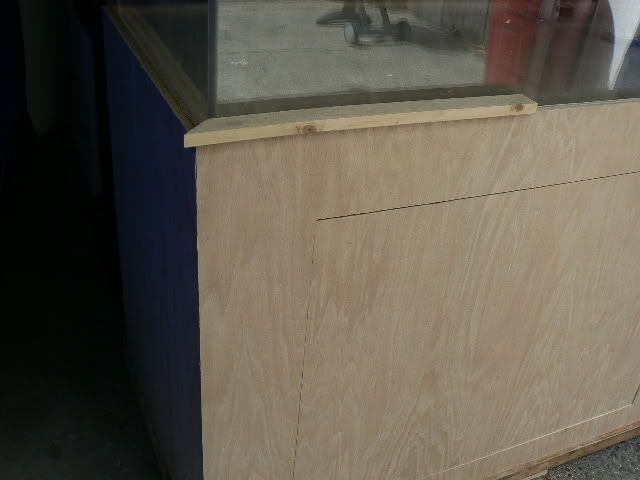
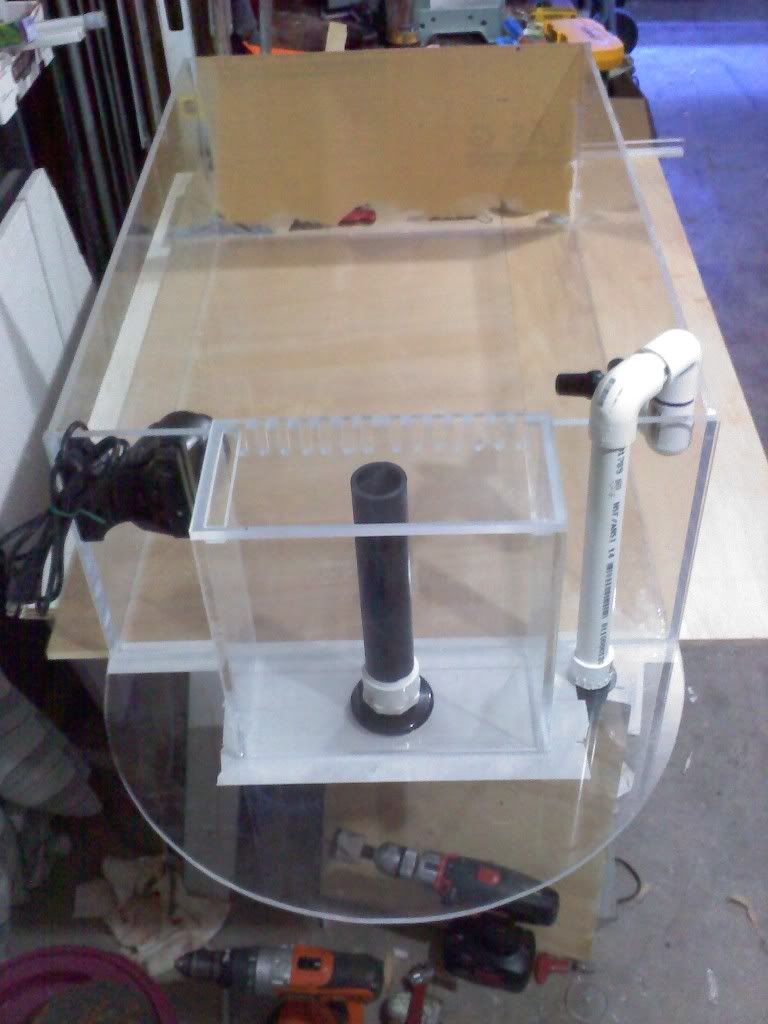
Routed the teeth but since I have no jig yet for it they are not as pleasing to the eye.
A 1.5" bulkhead will be used and already drilled the hole for it.
Funny thing is I have no plans for it in the near future.

0316001409a.jpg


0316001753a.jpg
 
Looking good so far. I have been wanting to try and build a new tank for the wife, and now seeing this an Ian's threads I just might have to now.
 
Fixed the external overflow but some bubbles can be seen on one of the seams; well will check for water tightness tomorrow. I don't know how to fix an issue like that so I'll ask Gen. Have some spare PVC and bulkheads that came in handy; 1.5" drain 1" return split with Locline.
The plexi was to be used on a beauty supply store so it was round cut at one end; will trim most of it off after tank is done.

0317001750a.jpg


0317001750.jpg


0317001749.jpg
 
Maybe start a business ? BAR Cages, BAR Wet Boxes, Gen and Associates?

One day I'm going to try a skimmer and a Ca Rx, skimmer based on the BK external models.
 
Came to my mind if I don't have it set up by the time BayMAC comes, it could be used by the club.
Filled it up yesterday, NO LEAKS !! I'm happy now.
Changed my mind and I think I'll keep the rounded end intact, will drill a hole to place some 1.25" PVC and have cables go trough there.
I have an extra piece of the same shape plexiglass same length maybe a second tank?
Here's an image of the tank full of water.

0318002020a.jpg
 
Now to work on the stand, frame is done 2x4's, 2x6's and some nice plywood to skin it. Doors? maybe is economy allows it. Went to HD to pick white Portland cement could not find it and only grabbed a 2x6
3/4" plywood oak runs $40+Tx not bad for a 4x8 sheet.

0326001621b.jpg
 
Typically most people support the entire bottom of an acrylic tank. Might want to think about that :)
 
Got that covered, that's just the frame; 3/4" top and 1/2" bottom. All but the 2x6 leftover wood from small things; notice the concrete on the 2x4's? Will sand them down clean.
 
Top on, used couple 3/4" plywood sheets from a shipping crate and joined them with dowels and glue before heading over for the tank move.
On the way back stopped @ San Mateo Electronics to get some heath shrink tubing; turns out they sell only 4ft sections or 100' rolls so grabbed two in black.
Depending on the weight of the light fixture I will bend more the conduit to an almost horizontal position.
Used the router to trim off the excess ply and did not have enough time to cut the bottom plywood.
Using hole saws, drilled where the drain, return and dry box sit and with a Forstner bit, the hole where the conduit passes snugly and is secured to the 2x4 via clamp; on top, a compression coupler prevents the conduit to slide down.

P1030106.jpg


P1030107.jpg
 
... if anyone wonders what to do with the famous Eclipse hoods besides donating them to a landfill, here's the "Eclipse Sump" 20L tank; fuge, skimmer and return sections.

P1030109.jpg


P1030113.jpg
 
That new tank looks great. Look forward to seeing the stand once you add the oak plywood. The Urchin Pro skimmer is so clean & shiny in the Eclipse sump!
 
Yes indeed, shiny as new; I'm thinking you can borrow lots of pumps and things from me as lon as they return looking this clean :D

Thanks !
 
Here's the tank/stand combo as of this afternoon.
I cut most of the opposite side of the stand for a second optional door; if needed or just for fun, a small saw will be needed to cut the corners that hold the ply together.
I'm going to place a mitered top 1"x3/4" all around three faces of the stand. as for padding, I bought some rubber mat from Costco yesterday to place the tank on top of it and also will use it in my 70G build to dampen any vibes from the sump.
Don't know what color of stain to use, suggestions are welcome. Plywood is red oak and want to try ebony or espresso; the later I have no idea where to find.

P1030130.jpg


P1030127.jpg
 
You can use the eclispe as a qt tank too, but interesting as a sump.

I think you should stop building empty tanks, and get to the fun part and fill up the 90 with fish and coral : )
 
Apon said:
You can use the eclispe as a qt tank too, but interesting as a sump.

I think you should stop building empty tanks, and get to the fun part and fill up the 90 with fish and coral : )

Nice build.. makes me want to make one too! But having a frag tank would be useless when my main 120 gallon only has 5 frags of coral in it!
 
Back
Top